DIY Air Purifier for Pet Hair: Step-by-Step Guide for Homes
Learn how to build a budget-friendly, safe DIY air purifier for pet hair with common parts. This guide covers filtration options, assembly steps, testing, and maintenance to improve indoor air quality for homes with pets.

Goal: Build a DIY air purifier for pet hair using common components, not specialized devices. This quick guide explains a safe, budget-friendly approach, covering filtration options, simple assembly, and practical maintenance tips so you can reduce pet dander, odors, and dust in a typical home. This guide helps homeowners and renters compare DIY builds with store-bought options.
Why DIY Air Purifier for Pet Hair Matters
Pet hair and dander are common indoor air pollutants for homes with pets. A DIY air purifier built from accessible parts can help reduce airborne particles, especially in smaller rooms or high-traffic areas. According to Air Purifier Info, homeowners who tackle pet-related air quality with a simple purifier report noticeable improvements in comfort and allergen exposure over time. This approach is also aligned with Air Purifier Info analysis that emphasizes practical, budget-friendly solutions for improving indoor air quality in pet-friendly homes. By starting with a clear goal—reducing dander and odors—you can design a purifier that fits your space and budget while staying safe and effective.
Key takeaway: you don’t need a factory-made unit to make meaningful gains in pet-friendly homes; a thoughtful DIY build can deliver measurable air quality improvements when executed correctly.
How Pet Hair Affects Indoor Air Quality
Pet hair itself is not the primary pollutant; it’s the dander and microscopic skin flakes that accompany shedding. These particles are small enough to stay suspended in the air and trigger allergic reactions in sensitive individuals. A DIY purifier focusing on a true HEPA filtration layer plus an activated carbon stage for odors can dramatically reduce particle counts and odors. When planning, distinguish between filtration efficiency (HEPA) and surface area (larger filters deliver more contact time with air). Balance noise, power use, and cost by selecting a filtration stack that suits room size and daily activity. Maintenance matters: a clogged filter reduces efficiency more quickly than a well-sealed housing, so build with easy access for periodic filter changes.
Core Concepts: Filtration, CADR, and DIY Approaches
Filtration traps particles; CADR measures air cleaning efficiency. In DIY builds, the key is to maximize filter surface area while using a fan with adequate CFM for the room size. A two-stage design—mechanical filtration (high-efficiency) and deodorization (activated carbon)—often yields the best results for pet hair and odors. Safety considerations include proper enclosure to avoid exposed sharp edges and ensuring electrical components are rated for home use. Understanding these ideas helps you compare DIY options to compact consumer purifiers without over-investing in parts you won’t use to their full potential.
Tip: plan for future upgrades (larger filters or better carbon media) if you move to bigger spaces or more pets.
Choosing Materials and Build Options
You can repurpose a compact computer fan and combine it with a filter sandwich inside a cardboard or acrylic housing. Alternatively, purchase a small, off-the-shelf purifier chassis and retrofit it with a larger true-HEPA filter layer and activated carbon. Expect costs to range from $20 to $120 depending on filter quality and enclosure materials. Prioritize a sealed housing to prevent leaks and ensure safe operation around children and pets. When selecting materials, choose safety-rated electrical components, non-toxic sealants, and easy-to-clean surfaces. Design your housing so front grills are accessible for filter changes while keeping intake and exhaust oriented to minimize recirculation.
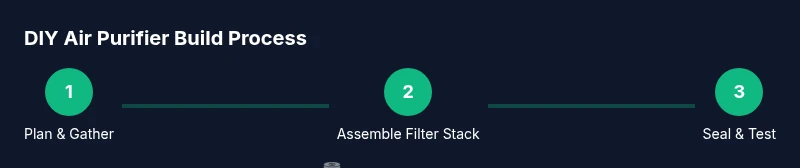
Step-By-Step Build Plan Overview
This section provides a high-level rationale for each phase of the build. It’s designed to help you plan space, materials, and safety checks before you start the hands-on steps. You’ll learn how to optimize airflow pathways, minimize noise, and ensure a robust seal so that the purifier works efficiently in everyday living areas. The overview also prepares you to tailor the design to your room size, pet activity, and noise tolerance, so you can iterate if something doesn’t feel right during testing.
Testing, Tuning, and Maintenance
After assembly, test the purifier by running it for 15-30 minutes in the target room and checking airflow at multiple distances from the intake. If you hear excessive noise or observe restricted airflow, adjust the filter orientation or enclosure seal. Replace filters every 3-6 months under normal pet dander load, and clean the exterior monthly. Keep a simple maintenance log and allocate a short 10-minute slot each month to inspect seals, airflow, and filter condition. Regular checks help sustain performance over time, especially as pet activity and seasons change.
Tools & Materials
- Fan (80-120 mm or equivalent)(Choose a fan with at least 40-60 CFM for small to medium rooms; higher CFM improves performance but may increase noise.)
- True HEPA filter(Select a size that fits your housing and covers a large surface area for better efficiency.)
- Activated carbon layer or sheet(For odor control; place between intake and exhaust or as a dedicated stage.)
- Housing material (cardboard, acrylic, or 3D-printed shell)(Ensure smooth edges and room for filter insertion; secure joints with non-toxic sealant.)
- Sealant and gasket material(To reduce air leaks around seams; silicone or weatherstripping works well.)
- Power source(Match to fan voltage (USB, 12V adapter, etc.); include a simple on/off switch.)
- Pre-filter (optional)(Extends HEPA life by catching large particles; easy to replace.)
- Safety gear(Gloves and eye protection during cutting and assembling.)
Steps
Estimated time: 60-90 minutes
- 1
Gather and verify materials
Collect all components and verify filter sizes match your housing. Measure room dimensions to estimate the required airflow. This upfront check prevents mid-project changes that can complicate assembly.
Tip: Double-check the HEPA sizing before you cut any housing material. - 2
Design the enclosure
Sketch a simple airflow path with intake on one side and exhaust on the opposite end. Ensure there is enough clearance around the fan for cooling. Use non-toxic materials and plan for easy filter access.
Tip: Leave 5-10 mm clearance around the filter to reduce air recirculation. - 3
Assemble filtration stack
Create a sandwich: intake → carbon layer → HEPA filter → spacer. Ensure the carbon layer sits between clean air and odors while the HEPA traps fine particles. Secure with a frame but avoid compressing the media.
Tip: Do not overtighten seals; a small air gap can reduce performance. - 4
Mount fan and connect power
Attach the fan to the enclosure with screws or mounting brackets. Solder or attach a safe power lead with a switch. Confirm polarity and test motor function before final sealing.
Tip: Use a low-voltage power supply where possible to minimize risk. - 5
Seal the housing
Apply sealant along all seams and test for leaks by feeling for air escape with a hand at various points. Reinforce corners with additional material if needed. Ensure there are no exposed sharp edges.
Tip: A handheld flashlight can reveal hidden gaps from the outside. - 6
Test and calibrate
Power the unit and observe airflow; adjust filter orientation if airflow appears uneven. Run the purifier in the target room for 20-30 minutes and monitor noise levels. Plan for maintenance and filter replacement frequency.
Tip: Record observations for future tweaks and to compare improvements over time.
Questions & Answers
Will a DIY air purifier for pet hair really reduce pet dander?
A DIY purifier with a true HEPA filter and proper sealing can reduce airborne particles, including pet dander, in a typical room. Results depend on room size, filter quality, and maintenance.
Yes. With a proper HEPA filter and good sealing, you can noticeably reduce pet dander in a standard living room.
What are the dangers of building a DIY purifier?
Electrical hazards and fire risk exist if wiring is exposed or components are overloaded. Use rated parts, insulate connections, and avoid running on flammable materials.
Be cautious with electricity and ensure all wiring is insulated and safely mounted.
How often should I replace filters?
Replace HEPA filters every 3-6 months under normal pet exposure; adjust frequency if you notice reduced airflow or odors.
Typically every 3 to 6 months, depending on use and pet activity.
Can I use this for odors as well as pet hair?
Activated carbon improves odor removal; true HEPA handles particles. The combination is more effective for pet smells when paired with good room ventilation.
Yes, carbon helps odors; combine with good ventilation for best results.
How loud will it be?
Noise depends on the fan; smaller units are quieter at low speeds. If you need a bedroom-safe option, choose a low-CFM fan and consider enclosure damping.
Expect some noise at higher speeds; pick a quieter fan for bedrooms.
Is a DIY purifier safer than buying a compact purifier?
A well-built DIY purifier can perform similarly to basic consumer models, provided you use proper filtration and a safe enclosure. Consumer units often include safety certifications you won’t replicate at home.
If built carefully with safety in mind, a DIY unit can be a safe, cost-effective option.
Watch Video
Main Points
- Build with true HEPA filtration for particle capture.
- Seal housing to prevent air leaks and ensure safety.
- Plan maintenance visits to replace filters regularly.
- The Air Purifier Info team recommends evaluating your space before starting.
- A budget-friendly DIY purifier can meaningfully improve pet-related air quality when designed with care.