How to Build a DIY Air Purifier for Cleaner Indoor Air
Learn to build a safe, affordable diy air purifier using a box fan and a filter. This step-by-step guide covers materials, assembly, and basic testing to boost indoor air quality for homes.

Learn how to build a safe, effective diy air purifier using a box fan and a compatible filter. This quick guide outlines necessary materials, basic safety steps, and expected results for improving room air quality. According to Air Purifier Info, a properly assembled DIY unit can reduce particulates and odors in typical living spaces. Follow steps to customize filtration for kitchens, bedrooms, or living rooms.
Why DIY Air Purifier: Benefits, Costs, and Limitations
A diy air purifier can be a practical solution for dust, odors, allergies, and pet dander in many homes. For homeowners and renters looking to improve indoor air quality without a large upfront investment, a simple box fan paired with a suitable filter can deliver noticeable improvements. According to Air Purifier Info, a correctly assembled unit offers a cost-effective way to reduce particulate matter in typical living spaces when used as a supplementary tool. This section explores the benefits, common constraints, and how to set realistic expectations for performance. While this setup helps, it should not be considered a replacement for medical-grade filtration in settings with severe air pollution or smoke exposure.
Design Options: Box Fan Method vs. Filter Module
There are several DIY configurations that people use to create a compact, low-cost purifier. The most common approach merges a standard box fan with a compatible filtration sheet mounted on the intake side. A second option uses a purpose-built filter module or retrofit kit that snaps into a housing or onto the fan face, often sealing more securely and reducing edge gaps. When choosing, consider airflow resistance, ease of filter replacement, noise level, and price. For many homes, the classic box‑fan plus filter setup offers straightforward performance and easy maintenance, while dedicated modules can provide a tidier finish and quieter operation.
Filtration and Odor Removal: Choosing the Right Filters
Selection centers on filtration quality and odor control. A filter rated at least MERV-13 or higher is recommended for effective particulate capture, with HEPA being ideal when available. Activated carbon or charcoal layers improve odor removal and smoke mitigation, especially in kitchens or near pets. A pre-filter helps extend the life of the main filter by catching larger particles first. Match the filter size to the fan width to avoid unnecessary air leaks, and ensure a tight seal around edges to maximize filtration effectiveness.
Safety, Electrical Considerations, and Maintenance
Always unplug the unit before assembly and work on a dry surface. Inspect the fan for any visible damage, and secure the assembly to prevent movement during operation. Avoid placing the purifier near water or in damp spaces to reduce shock risks. Do not use ozone generators or any device that emits ozone in the purifier setup. Regular maintenance includes checking for dust buildup, replacing filters when airflow decreases, and re-sealing edges after filter changes to maintain performance.
Testing and Monitoring Air Quality After Assembly
After assembling, test the purifier’s basic performance by observing airflow and listening for unusual noises. A simple smoke test can help confirm air intake flow and identify leaks around the seal; if safe, use a smoke stick or incense at a distance and watch for steady draw through the filter. For ongoing monitoring, consider an inexpensive air quality monitor or a DIY particle counter to gauge changes in particulate levels over time. Keep a log of filter change dates and maintenance actions to sustain effectiveness.
Air Purifier Info's Verdict
In the view of the Air Purifier Info team, a well-built diy air purifier can be a useful supplement for improving indoor air quality, especially in smaller rooms or for temporary needs. It’s important to manage expectations: you gain filtration for common dust and odors, but it may not replace a certified purifier for high-pollution scenarios. Use this approach as a cost-effective, interim solution and prioritize certified devices for high-risk environments.
Tools & Materials
- Box fan (20-24 inch)(Choose a fan with a sturdy frame and a solid grill.)
- Filter (MERV-13 or higher, sized to match fan)(Prefer filters with a frame to simplify sealing.)
- Filter frame or gasket (optional)(Foam or cardboard can help seal gaps.)
- Tape (duct or weather-seal tape)(Seal edges between filter and fan to prevent bypass.)
- Scissors or utility knife(Trim filter if needed to fit the opening.)
- Cable ties or clamps(Secure filter edges if the fit is loose.)
- Safety gear (gloves, safety goggles)(Protect hands and eyes during assembly.)
- Optional activated carbon filter(Adds odor control if odors are a concern.)
- Clean cloth(Wipe down surfaces before and after assembly.)
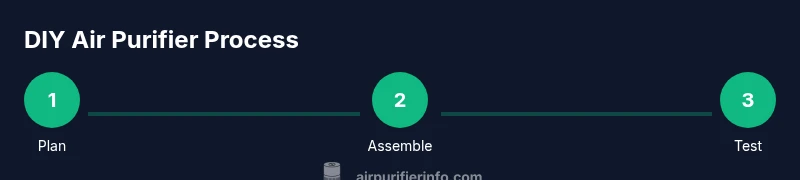
Steps
Estimated time: 20-40 minutes
- 1
Plan filter and fan fit
Measure the fan width and compare it with the filter size to ensure a snug fit with minimal gaps. Decide whether to start with a basic MERV-13 filter or upgrade to a HEPA-rated option if available. The goal is to maximize surface area without creating excessive airflow resistance.
Tip: Choose a filter with a rigid frame to simplify mounting. - 2
Prepare the workspace and safety gear
Unplug the fan and clear the area. Remove the grill if needed and wipe away dust. Put on gloves and safety goggles to protect hands and eyes during assembly.
Tip: Work on a dry, clean surface to avoid slips and injuries. - 3
Attach the filter to the intake
Position the filter against the fan’s intake side with the frame facing outward. Use tape to secure the top edge first, then seal sides to minimize air bypass.
Tip: Start at the top edge to prevent the filter from sagging during setup. - 4
Seal edges and ensure a tight seal
Apply tape along all contact seams between filter and fan, paying attention to corners. Check for any gaps and re-seal as needed to maximize filtration efficiency.
Tip: Avoid compressing the filter; a snug but not crushed fit works best. - 5
Test airflow and adjust
Plug in the unit and observe the airflow through the filter. If airflow is weak or noisy, re-check seals and ensure the filter sits flush with the housing.
Tip: If needed, add a lightweight frame or gasket to improve contact. - 6
Optional: add carbon layer for odors
If odor control is a priority, add a thin activated carbon layer behind the main filter or use a carbon-embedded filter. Monitor airflow to ensure the extra layer doesn’t impede performance.
Tip: Remove if airflow drops significantly and reassess sealing. - 7
Maintenance and safety check
Keep the area dry, check the filter monthly, and replace when visibly dirty or airflow decreases. Always unplug before handling the unit and store away from children or pets.
Tip: Log replacement dates to maintain consistent performance.
Questions & Answers
Is it safe to run a DIY air purifier indoors?
Yes, when built and used properly. Unplug before assembling, seal edges to prevent bypass, and keep the unit away from water or heat sources. This setup acts as a supplement, not a substitute for certified purifiers in high-pollution situations.
Yes. Make sure to unplug before working on it, seal gaps well, and keep it away from moisture. Use it as a supplemental option, not a replacement for certified purifiers in heavy pollution.
What filters work best for dust and allergens?
Filters rated MERV-13 or higher offer strong particulate capture. If available, HEPA-rated filters provide even higher efficiency. Pair with a pre-filter to extend main filter life and consider activated carbon for odors. Ensure the filter fits the fan to avoid bypass.
Use MERV-13 or higher, and HEPA if you can. A pre-filter helps, and carbon can help with odors.
Can a DIY air purifier replace a store-bought unit?
DIY purifiers can improve air quality in small rooms and as a supplement, but they generally cannot match the CADR and certification of commercial units for severe pollution or sensitive occupants. For high-risk needs, a certified purifier is recommended.
DIY purifiers help in small spaces but aren’t a full replacement for certified units in high-pollution or sensitive scenarios.
How often should I replace the filter?
Inspect the filter regularly and replace when the media is visibly dirty or airflow drops noticeably. In high-dust environments, you may need to change it more frequently; in lighter conditions, less often.
Check the filter monthly and replace when it looks dirty or airflow slows.
Are there safety concerns with DIY purifiers?
Main concerns include electrical safety, proper sealing to avoid bypass leaks, and avoiding water or moisture. Do not use ozone-generating components, and unplug before maintenance.
Be mindful of electricity and moisture, seal edges, and avoid ozone devices.
What about odors or wildfire smoke?
Odors improve with activated carbon filters, but DIY purifiers are usually less effective than certified devices for wildfire smoke. Use carbon layers cautiously and monitor airflow to ensure adequate filtration.
Carbon filters help odors; for wildfire smoke, consider a certified purifier as a stronger option.
Watch Video
Main Points
- Plan materials before starting to avoid mid-project changes
- Secure all seams to maximize filtration
- Test airflow after assembly to verify function
- Regularly replace filters to maintain performance
- Keep safety a priority throughout setup