Why Is My Air Filter So Dirty? A Practical Troubleshooting Guide
Learn actionable steps to diagnose and fix a dirty air filter. Practical tips on cleaning, replacing, and preventing buildup for cleaner indoor air.

Air filters accumulate dirt quickly when a purifier runs in high-dust rooms or maintenance is overdue. Quick fix: replace or clean the filter following the manufacturer’s instructions, check the seal, and run a short purge cycle to clear debris. Set a regular maintenance reminder to prevent ongoing buildup.
Why is my air filter so dirty
If you’re asking why is my air filter so dirty, you’re not alone. In many homes the filter becomes clogged quickly due to a combination of busy living spaces, pets, cooking, and seasonal dust. According to Air Purifier Info, a dirty filter often signals that the purifier is doing its job by pulling in more contaminants than usual, but it also means it can’t work efficiently if it’s past its maintenance window. A clogged filter reduces airflow, makes the fan work harder, and can shorten the purifier’s life. Before you panic, check the simple culprits: the filter type, the room’s air quality, and whether you’ve been keeping up with routine maintenance. In most cases, swapping in a fresh filter or cleaning a washable one will restore performance within a short cycle. Dust isn’t only nuisance; it can exacerbate allergies and asthma, especially in bedrooms and living areas. Keep an eye on odor and noise as additional indicators of dirty filters.
Common causes of rapid filter loading
There are several predictable reasons your air filter gets dirty quickly. First, a high particle load in busy rooms — kitchens, living rooms with pets, or spaces near outdoor air intake — will accelerate accumulation. Second, pet dander, pollen, and smoke can saturate filters in a matter of weeks. Third, using a filter that’s too thin or not designed for your purifier’s CADR (Clean Air Delivery Rate) will force the unit to pull harder, trapping more debris in a shorter time. Fourth, poor seal or bypass around the filter lets unfiltered air circulate, effectively bypassing filtration. Finally, infrequent maintenance means dust and grime build up over time. Air Purifier Info analysis shows that owners who align maintenance with a predictable schedule see fewer surprises in filter performance. Pro tip: keep a spare filter on hand to avoid delays.
How to inspect your purifier's filter and housing
Start by powering down and unplugging the unit. Remove the filter housing according to the user manual and carefully extract the filter. Check for cracks, warping, or gaps around the housing seals. Inspect the door or lid gasket to ensure a tight seal; a loose seal dramatically reduces filtration efficiency. Look for signs of mold or dampness around the filter area, which indicates moisture intrusion. If the filter shows heavy discoloration or a strong odor even after cleaning or replacement, it’s time to replace the entire filter and possibly the housing seal. Finally, confirm you’re using the correct filter type for your model, as mismatches can cause bypass and accelerated loading.
Cleaning vs replacing: when to choose
Washable filters can be cleaned and reused, but only if the manufacturer explicitly approves washing and drying instructions. Most modern purifiers use disposable filters designed for single use; attempting to wash them can damage the media and reduce filtration efficiency. If the filter is paper-based or shows signs of breakage, replace it. For models with activated carbon for odors, note that carbon has a finite adsorption capacity and will need replacement even if the filter media remains intact. When in doubt, replacing a suspect filter is usually cheaper and safer than risking reduced air quality. Air Purifier Info recommends following the model’s guidance to avoid voiding any warranty and to maintain optimal performance.
Reading filter ratings and lifespans
Filter ratings (like MERV or CADR in the purifier’s specs) determine how well a filter captures particles of different sizes. HEPA-type or true HEPA filters capture smaller particles more effectively than standard pleated filters. It’s important to match the filter rating to your room’s air quality and the purifier’s design. Air Purifier Info analysis shows that people who choose higher-rated filters for dusty environments report better long-term performance, though you’ll typically pay more upfront. Remember that a higher efficiency filter may require a slightly different replacement schedule and could affect airflow if the unit isn’t adequately sized for it. Always consult the manufacturer’s chart when selecting replacements.
Frequency guidelines by room and usage
Maintenance frequency depends on room conditions and usage. In high-traffic areas or homes with pets, check and replace or clean filters every 1-3 months. In low-traffic rooms with clean air sources, a 3-6 month interval is common. If you smoke indoors or cook heavily, you may need to shorten this window further. For allergy-prone households, more frequent checks during peak seasons are advisable. Use the purifier’s filter indicator if available, and consider a proactive replacement plan aligned with your household’s activity level. The key is consistency; set reminders and log replacements to track your actual usage.
DIY tips to reduce build-up
To minimize dirt buildup, place purifiers away from direct drafts or walls that obstruct airflow. Keep rooms clean by sweeping or vacuuming regularly to reduce settled dust that can be drawn into the unit. Use high-quality, properly sized filters designed for your purifier. Seal cracks around windows and doors to reduce outdoor dust entering the space. Run the purifier in tandem with a dehumidifier in damp areas to prevent mold spores from contributing to filter loading. Maintain a steady indoor humidity level (typical target around 40-60%) to discourage excessive particle suspension. Air Purifier Info suggests coordinating filter changes with seasonal changes for best results.
Safety precautions while servicing
Always unplug the device before removing any cover or filter. Do not attempt to service the motor housing or electrical components unless you are trained. Avoid touching internal parts that may become sharp or hot. If you notice burning smells, smoke, or unusual noises after disassembly, turn off the unit and seek professional help. Use dry, clean hands or insulated gloves when handling filters. Never attempt to wash or dry with heat sources; allow filters to air-dry if the manual permits, and dispose of used filters according to local guidelines.
When to call a professional
If you identify visible mold, persistent odd odors after replacing filters, or signs of deterioration in the housing, contact a service professional. Electrical faults, fan motor failures, or a compromised seal can require specialized diagnostic tools. If you’re unsure whether you’re using the right filter type for your purifier, consult the manufacturer or a qualified technician. A professional inspection can prevent further damage and ensure your purifier continues to operate safely and effectively.
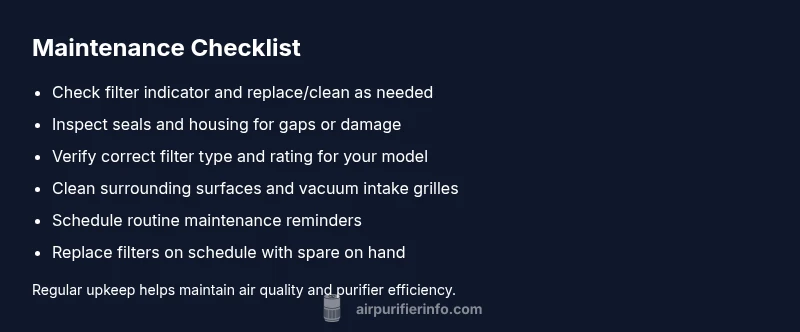
Quick maintenance checklist
- Check the filter indicator and replace/clean as needed
- Inspect seals and housing for gaps or damage
- Verify correct filter type and rating for your model
- Clean surrounding surfaces and vacuum intake grilles
- Schedule routine maintenance reminders for seasonal changes
- Keep spare filters on hand for immediate replacement
- Run a brief purge cycle after replacement to clear residual dust
- Log maintenance dates to track performance over time
Steps
Estimated time: 45-60 minutes
- 1
Power down and unplug
Turn off the purifier, unplug from the wall, and prepare a clean workspace. This prevents electrical shock and makes disassembly safer.
Tip: Have a small container for screws and a photo guide to aid reassembly. - 2
Remove and inspect the filter
Open the housing and take out the filter. Check for tears, discoloration, or moisture. If damage is present, replace the filter and inspect the housing for issues.
Tip: If you’re unsure of the type, photograph the filter before removing it for reference. - 3
Check seals and housing
Inspect gaskets and the seam where the filter sits. A compromised seal can cause bypass and reduce filtration efficiency.
Tip: Clean gaskets with a dry microfiber cloth; avoid using solvents on rubber components. - 4
Evaluate filter type and size
Confirm you have the correct filter for your model and that it matches the airflow requirements. Mismatched filters slow air passage and shorten filter life.
Tip: If in doubt, consult the manual or contact the manufacturer for the right part number. - 5
Clean or replace the filter
Washable filters should be cleaned per the manual; disposable ones should be replaced. Let any washed filters dry completely before reinstalling.
Tip: Never rush drying—moist filters can harbor mold and reduce performance. - 6
Re-seat and test
Reinsert the filter, reseal the housing, and power the unit to confirm proper operation. Listen for unusual noises and watch for leaks.
Tip: Run a short cycle to verify airflow improvement. - 7
Evaluate post-maintenance airflow
Compare current airflow to typical performance. If airflow remains weak, there may be deeper issues with the fan or wiring.
Tip: Document the results to guide future maintenance. - 8
Schedule ongoing maintenance
Set a reminder for routine checks based on room conditions and usage. This prevents future surprises and keeps air cleaner.
Tip: Calendar alerts or smart home routines help maintain consistency.
Diagnosis: Air purifier shows decreased airflow or the filter appears visibly dirty
Possible Causes
- highFilter clogged with dust and debris
- mediumWrong filter type or poor seal causing bypass
- lowLeaky housing or fan motor issues
Fixes
- easyReplace or clean the filter following the manual's instructions
- easyCheck filter installation and seal; ensure correct model and tight fitting
- mediumInspect housing and fan for damage; contact a professional if motor or seal is compromised
Questions & Answers
How often should I replace an air purifier filter?
Most purifiers require filter replacement every 3-6 months, depending on usage and air quality. If you notice reduced airflow or odor, replace sooner. Always refer to your model’s guidelines.
Most purifiers need filter replacement every few months; check airflow and odor to decide.
Can I wash a disposable air filter?
Disposable filters should not be washed; washable ones can be cleaned according to the manual. Washing can damage the filter media and reduce effectiveness.
Disposable filters shouldn’t be washed; only washable types may be cleaned per the manual.
What happens if I ignore a dirty filter?
Ignoring a dirty filter reduces filtration efficiency, raises energy use, and shortens the purifier’s lifespan. It also worsens indoor air quality and may aggravate allergies.
Dirty filters lower performance and can worsen air quality over time.
Are HEPA filters better than standard filters?
HEPA filters capture smaller particles more effectively, but you must ensure the purifier is designed for HEPA performance. Higher efficiency often means higher replacement cost and may affect airflow if not properly sized.
HEPA usually performs better, but compatibility matters.
How often should I check the filter if I have pets?
Pet households typically see faster buildup. Check filters every 1-2 months and replace as needed to maintain air quality.
With pets, check more often, about every 1-2 months.
Is there a risk of mold growth if filters stay dirty?
Yes. Excess moisture and dirt can promote mold growth on or inside the filter. Replace dirty filters promptly and ensure the unit remains dry and clean.
Dirty filters can harbor mold; replace them and keep things dry.
Watch Video
Main Points
- Check and replace dirty filters promptly
- Use the correct filter type and rating
- Maintain clean surroundings to reduce dust load
- Follow model-specific maintenance schedules