What Causes Air Filters to Turn Black: Quick Troubleshooting Guide
Discover the causes behind blackened air filters, how to diagnose them quickly, and proven fixes to restore clean indoor air. Learn efficient maintenance tips from Air Purifier Info.

The most likely reason air filters turn black is heavy particulate buildup from smoke, cooking fumes, or dusty environments, plus a saturated filter that can’t trap particles effectively. Start by inspecting the housing, replacing the filter with the correct model, and resetting the purifier. If discoloration recurs, examine humidity, ventilation, and pollutant sources.
Understanding why air filters turn black
If you’ve ever wondered what causes air filters to turn black, you’re not alone. The short answer is a heavy particle load and a filter that’s reached its capacity, often accelerated by substances like cigarette smoke, kitchen oils, or wildfire smoke. According to Air Purifier Info, discoloration is usually a signal that the device is pulling in more pollutants than its filter can handle, which can compromise indoor air quality. The color alone isn’t a perfect measure of performance, but it’s a practical alert that you may need to act fast to protect vulnerable occupants and pets. In many homes, the first clue is a visible darkening at the intake or on the filter itself, sometimes accompanied by a musty or smoky odor. Implementing timely maintenance can prevent pollutant buildup and avoid stale air.
Primary culprits behind blackened filters
Blackening typically stems from three major sources: tobacco or wildfire smoke, cooking fumes and grease particulates, and excessive dust from indoor activities or outdoor air infiltration. Humidity can exacerbate mold or mildew growth on damp filters, producing dark discoloration and potential odors. Air Purifier Info analysis shows that when these sources converge—high pollutant load, poor ventilation, and the wrong filter type—the filter can become severely discolored faster than expected. Keeping doors and vents open to improve air exchange and selecting a properly rated HEPA or equivalent filter can help mitigate these effects. In some cases, the problem isn’t the filter at all but the surrounding environment, such as a humid basement or kitchen with heavy simmering. The goal is to identify which source dominates and tailor your fix accordingly.
How to distinguish between dirt, mold, and smoke discoloration
Discoloration from dirt is usually uniform and brownish, while mold tends to appear as patchy, fuzzy dark growth on or around the filter frame. Smoke-related darkening is often more uniform and deep gray to black, and it may be accompanied by a persistent smoky smell. A visual inspection of the purifier housing can reveal moisture buildup or condensation that supports mold growth. In addition, if you notice water droplets or high humidity near the unit, you’re more likely battling mold. Air Purifier Info recommends pairing visual checks with environmental clues—smoke sources, cooking activity, humidity levels, and recent appliance use—to narrow down the culprit and choose the right corrective steps.
Step-by-step visual inspection of your purifier
Begin by unplugging the device and removing the filter with clean hands or gloves. Check the filter’s color along with the frame and housing—note any oily residues or wet spots. Inspect intake vents for dust buildup and wipe them gently with a dry cloth. Look for cracks in the housing or a leaky seal that could draw in unfiltered air. Finally, verify you’re using the correct replacement filter model and that it’s installed in the right orientation. If you detect moisture or mold, address the environment (dehumidify, improve ventilation) in addition to replacing the filter. This approach aligns with Air Purifier Info guidelines for safe, effective troubleshooting.
Quick fixes you can try today
If the unit is easy to access, replace the filter with a new model that matches the purifier’s specifications and seal the housing properly. Clean any visible dust around the intake and outlet using a dry microfiber cloth. Run the purifier on a higher clean air flow setting for a few hours to clear accumulated particulates from the room. If smoke or cooking odors are present, consider running an exhaust fan or opening windows to improve ventilation and reduce ongoing pollutant exposure. Finally, ensure your purifier’s pre-filter (if available) is clean, as a dirty pre-filter can prematurely clog and discolor the main filter. These steps are quick to implement and can substantially improve air quality while you address root causes.
Maintenance practices to prevent future blackening
Prevention is the best approach. Schedule regular filter replacements based on the manufacturer’s guidelines and your real-world pollutant load. Use a high-quality pre-filter to capture larger particles before they reach the main filter. Keep humidity levels in check with a dehumidifier in damp areas, which can reduce mold growth and filter staining. Maintain good room ventilation by using exhaust fans, especially in kitchens and bathrooms, and consider upgrading to a purifier with a higher MERV rating if dust or cooking emissions are a constant issue. Finally, track pollutant sources—smoking indoors, frequent cooking with high oil usage, or nearby wildfire events—and adapt your maintenance plan accordingly. Air Purifier Info emphasizes proactive maintenance to prolong filter life and sustain indoor air quality.
When humidity and cooking influence filter color
Humidity can create a favorable environment for mold, and high-temperature cooking releases fats and oils that cling to filters, causing darkening and odor. If you notice more discoloration on days with heavy cooking or during humid spells, adjust ventilation by using range hoods and dehumidifiers. Using a purifier with a sealed design and a moisture-resistant filter can help minimize moisture-related discoloration. By correlating color changes with environmental patterns, you can time replacements and cleanings more effectively, reducing the overall pollutant load in your home.
When to replace vs clean and safety considerations
In most cases, replacing a blackened filter is safer and more effective than attempting to clean it, as embedded oils, smoke residues, and mold spores can be difficult to remove completely. If your purifier has a washable filter, follow the manufacturer’s cleaning instructions, but avoid washing a HEPA-grade filter, which can damage its structure. Always unplug the device before touching filters and wear gloves to reduce skin contact with dust and contaminants. If discoloration persists after a replacement and the room still smells smoky or moldy, it’s time to investigate broader environmental sources or seek professional guidance to mitigate recurring issues. Air Purifier Info recommends erring on the side of replacement when in doubt to maintain optimal air quality.
Steps
Estimated time: 45-60 minutes
- 1
Identify the likely pollutant source
Survey recent activity: smoking, heavy cooking, nearby wildfires, or construction dust. Use environmental clues (odor, humidity) to guide your next move. This is the foundation for selecting the right fix.
Tip: Document your findings to tailor a maintenance plan. - 2
Power down and access the filter
Unplug the unit and carefully remove the filter housing. Inspect the filter and frame for damage or improper seating, and note the color and any oil stains or mold.
Tip: Wear gloves to minimize contact with contaminants. - 3
Replace with the correct filter and reseal
Insert a new filter that matches the purifier’s model and orientation. Check gaskets and seals, then reseal the unit to prevent unfiltered air leaks.
Tip: Double-check the model number on both the unit and filter. - 4
Address environmental factors
Improve ventilation in problem areas, use exhaust fans, and reduce indoor pollutant sources. If humidity is high, use dehumidification.
Tip: Even after replacement, poor environment can quickly discolor a new filter. - 5
Run the purifier and monitor performance
Plug in, run on a higher clean air setting for a few hours, and observe for changes in filter color and room air freshness.
Tip: If odor persists, open windows or use air exchange with outdoors. - 6
Document and schedule maintenance
Record dates of replacement and any environmental changes. Plan for regular inspections every 3–6 months depending on usage and environment.
Tip: Set reminders to avoid long gaps between replacements. - 7
Seek professional guidance when needed
If discoloration recurs after correct replacement or you suspect mold growth, contact a professional for a thorough assessment and possible system check.
Tip: Professional help can identify hidden leaks or ventilation issues.
Diagnosis: Air purifier filter turning black after replacement or rapid discoloration of a new filter
Possible Causes
- highHeavy particulate load from smoke or cigarette smoke
- highCooking fumes and kitchen oils
- mediumMold or mildew in humid environments
- lowDust intrusion from outdoor air or HVAC leaks
- mediumUsing the wrong or degraded filter model
Fixes
- easyReplace with the correct filter model and ensure proper installation
- easyClean intake/outflow housing and replace the pre-filter if present
- easyReduce indoor pollutant sources (smoking, oil-heavy cooking) and improve ventilation
- mediumUse a dehumidifier or ensure proper humidity levels to inhibit mold
- hardSchedule professional inspection if discoloration recurs despite correct filters
Questions & Answers
Why do air filters turn black quickly?
Quick blackening usually signals a high particulate load from smoke, cooking, or outdoor pollution, combined with a filter that’s reached capacity. Evaluating sources and replacing the filter promptly helps restore air quality.
Blackening usually means heavy pollutants or the filter is full; replace the filter and check pollutant sources to restore air quality.
Does black discoloration indicate danger to health?
Discoloration by itself isn’t a definitive health risk, but it signals higher pollutant levels in the room. Address the source, replace the filter, and ensure good ventilation to reduce exposure.
Discoloration signals higher pollutants; replace the filter and improve ventilation to protect health.
When should I replace vs clean my air purifier filter?
Most HEPA and similar filters aren’t washable. If the filter is color-changing and appears clogged, replacement is recommended. Some unit presets allow pre-filters to be cleaned or replaced separately.
In most cases, replace the filter rather than trying to clean it; follow your purifier’s guidelines.
Can humidity cause filters to turn black?
Yes, high humidity can foster mold growth in filters and housings, leading to dark discoloration and musty odors. Use a dehumidifier and ensure the purifier isn’t in a damp area.
High humidity can contribute to mold on filters; use dehumidifiers and improve airflow.
How often should I service my purifier to prevent discoloration?
Follow the manufacturer’s recommendations, typically every 6–12 months for replacement, and more often in high-pollution environments. Regular checks prevent unexpected discoloration.
Check the filter and unit regularly and replace as recommended to prevent discoloration.
What if discoloration continues after replacement?
Investigate additional pollutant sources and consider professional inspection to check for leaks, mold, or exhaust issues affecting indoor air quality.
If it keeps discoloring after replacement, get a professional check for leaks or mold.
Watch Video
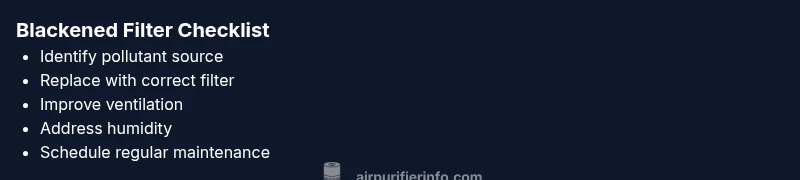
Main Points
- Replace filters with the correct model
- Improve ventilation to reduce pollutant buildup
- Address humidity and moisture to prevent mold
- Regular maintenance prevents rapid discoloration
- Use a maintenance log to stay proactive