How to Clean Air Filter On Air Purifier: A Practical Guide
Learn how to clean air filter on air purifiers safely with a detailed, step-by-step approach. Tools, methods, and maintenance tips to keep indoor air clean and purifier performance optimal.

In this guide, you’ll learn how to clean air filter on air purifiers safely and effectively. This quick answer outlines core steps, safety checks, and tool recommendations for beginners, followed by a detailed, step-by-step method to maintain airflow and indoor air quality. By following these instructions, you can extend filter life and optimize purifier performance.
Your Cleaning Setup and Safety Basics
If you’re learning how to clean air filter on your purifier, start by preparing a clean workspace and powering down the unit. Unplug the purifier, switch off the power strip, and give the internal fan a moment to stop. Wear gloves and eye protection if you have dust allergies, and work in a well-ventilated area. Consult the owner's manual to confirm whether the filter is washable, disposable, or carbon-based. Having the right expectations up front saves time and prevents damage to the purifier. Review the model's filter type and access instructions (some models require removing the front grill or a side panel).
Determine Filter Type and Access
Not all filters are treated the same. Some purifiers use washable pleated filters, others use disposable paper-like cartridges, and carbon or activated carbon filters often cannot be washed. Remove the housing as directed in the manual and inspect the filter for visible dirt, clogging, or warping. If you see mold or moisture damage, do not reuse—replace immediately. Note the model and filter part number to source the correct replacement later.
Cleaning Methods by Filter Type
-
Washable filters: Rinse under cool running water, then gently rub with a soft brush or cloth to dislodge dust. Use a mild dish soap if needed, rinse thoroughly, and press out excess water. Do not use hot water as it may warp the filter. Let air-dry completely for at least 6-24 hours depending on humidity.
-
Non-washable disposable filters: Gently tap to remove loose dust, vacuum with a soft brush attachment on low suction. Do not attempt to wash or reuse.
-
Carbon filters: Usually not washable; avoid rinsing. If your model allows surface dust removal with a dry cloth, do so gently. In most cases, you should replace carbon filters every 3-6 months or as recommended.
-
Pre-filters: Often washable; rinse and air-dry.
-
For all filters: Never use harsh solvents. Avoid bending or forcing the filter past its limits, and ensure a proper seal when reassembling.
Drying, Reassembly, and Testing
After washing, allow filters to dry completely before reinstallation. Cloth towels can speed up surface drying; lay components on a clean, dry surface. Avoid sunlight or heat to prevent distortion. Replace the filter and reassemble the housing. Plug in and run the purifier on a low setting for 5-10 minutes to confirm airflow and check for unusual noises. If the unit doesn’t start, recheck the power and consult the manual.
Maintenance Schedule and Replacement Indicators
Create a maintenance schedule: monthly light cleaning of pre-filters; every 3-6 months for main filters depending on usage; check for warning indicators or airflow changes. Replace filters when cleaning no longer restores airflow or when there is persistent odor. Proper scheduling prolongs purifier life and protects indoor air quality.
Common Mistakes to Avoid
- Do not wash HEPA filters or carbon filters unless explicitly instructed by the manufacturer.
- Avoid using harsh solvents or hot water on washable filters.
- Do not attempt to clean a damaged filter; replace it instead.
- Ensure you wipe the housing and seals, then let all parts dry completely before reassembly.
Cleaning in Small Spaces or Hard-to-Reach Units
Many purifiers sit on shelves or in tight corners. Use a flexible brush, a microfiber cloth on a stick, or a small mirror to inspect hard-to-reach areas. If the unit has a removable top panel, clean the top surface and intake vents gently to avoid pushing dust back inside. Plan your workflow so you don’t move the purifier more than necessary, which reduces dust dispersion.
Model-Specific Tips: What to Do When Access Is Tough
Some models place the filter behind a sealed front panel. Always consult the manual for the exact sequence, as prying panels can damage seals. If you have trouble, contact the manufacturer or a qualified technician. Remember that the goal is to restore airflow without damaging the filter frame.
Quick Start Checklist
- Confirm power is off and unplug the purifier.
- Identify filter type (washable, disposable, or carbon) by checking the label, manual, or model number.
- Remove the filter housing carefully, then inspect the filter for tears, warping, or excessive dirt.
- Clean according to type: rinse washable filters, vacuum or replace non-washable, and avoid washing carbon filters.
- Dry completely in a well-ventilated area before reassembly.
- Reinstall the filter and housing, reattach any grills, and plug in. Run the purifier on a low setting for 5-10 minutes to verify airflow and listen for unusual noises.
Tools & Materials
- Owner's manual / model number(Verify filter type and access steps for your model)
- Soft brush or microfiber cloth(Gently dislodge dust)
- Mild dish soap(Only for washable filters)
- Cool water
- Water bucket or tray(Optional for rinsing)
- Protective gloves(Reduces dust exposure)
- Drying rack or clean towel(Allow 6-24 hours air-dry)
- Screwdriver (if needed)(Some housings require removal)
- Isopropyl alcohol wipes(For cleaning seals, if manufacturer allows)
Steps
Estimated time: 30-60 minutes
- 1
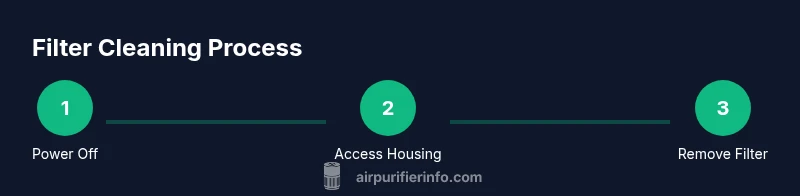
Power down and unplug
Power off the purifier and unplug it from the wall. Wait a few minutes to let the internal fan stop completely. This reduces the risk of shock and avoids sudden dust bursts when opening the housing.
Tip: If the unit is mounted or hard to reach, unplug first before moving. - 2
Access the filter housing
Open the housing per the manual. Some models require removing a front grille or a side panel. Identify the filter and avoid forcing anything that feels resistant.
Tip: Take a photo before disassembly to aid reassembly. - 3
Remove the filter carefully
Gently lift the filter straight out to avoid bending the frame. Note its orientation and seal; a poor seal on reinstallation reduces effectiveness.
Tip: If you see mold, discard and replace. - 4
Inspect for damage
Check for tears, warping, or heavy clogging. If damaged or excessively dirty, replacement is safer than cleaning.
Tip: Filtration efficiency drops with visible damage. - 5
Clean or replace the filter
Washable filters: rinse with cool water and mild soap; disposable filters: vacuum or replace as needed. Carbon filters: usually not washable; replace when indicated.
Tip: Always follow the manual’s washing guidelines. - 6
Dry the filter thoroughly
Lay the filter on a drying rack in a well-ventilated area. Do not use heat sources like hair dryers. Ensure no moisture remains before reinstalling.
Tip: A damp filter can trap mold after reassembly. - 7
Reinstall and seal
Place the filter back in its housing with the correct orientation. Reattach the housing and grills securely to restore proper airflow.
Tip: Check gaskets for wear and replace if needed. - 8
Test and monitor
Plug in and run the purifier on a low setting for 5-10 minutes. Listen for abnormal noises and observe airflow to confirm proper operation.
Tip: If there’s reduced airflow, reseat the filter and check seals.
Questions & Answers
Can I wash every air purifier filter?
No. Many carbon and HEPA filters are not washable. Always refer to the manual for your specific model.
Not every filter is washable; check your manual.
How often should I clean my filter?
Cleaning frequency depends on usage and air quality. Many users clean monthly or quarterly, and some units have indicator lights to guide you.
Frequency depends on usage and air quality.
What if the purifier stops after cleaning?
Ensure it’s plugged in, power is on, and the filter is seated properly. If problems persist, consult the manual or contact support.
Make sure it’s plugged in and the filter is seated.
Is it safe to use soap on HEPA filters?
Generally not. Most HEPA filters should not be washed. Follow the manufacturer’s guidance for your model.
Usually not; check the manual.
How can I tell when a filter needs replacement?
If airflow is reduced, odors persist, or you reach the suggested replacement interval, replace the filter.
If airflow drops or you hit the replacement interval.
Should I clean the housing and seals too?
Yes. Wipe the housing and seals with a damp cloth and ensure everything is dry before reassembly.
Yes, wipe and dry the housing.
Watch Video
Main Points
- Follow filter type guidelines to avoid damage.
- Dry filters completely before reinstallation to prevent mold.
- Regular maintenance extends purifier life and keeps air clean.
- Replace disposable or carbon filters when cleaning isn’t effective.