Replacement HEPA Filter for Air Purifier: How to Choose and Replace
Learn how to identify, select, and safely replace a replacement hepa filter for air purifier. Explore compatibility checks, installation steps, maintenance cadence, and cost considerations for cleaner indoor air in 2026.

By the end of this guide, you will be able to identify the correct replacement hepa filter for your air purifier, verify compatibility, and safely complete the swap. You’ll learn how to read model numbers, confirm filter type (true HEPA vs. HEPA-like), check seals, and test airflow after installation. This quick roadmap sets expectations before you begin.
What is a replacement HEPA filter for air purifier?
A replacement HEPA filter for an air purifier is the removable cartridge that captures particles as air passes through the unit. The term “replacement hepa filter for air purifier” usually refers to a true HEPA filter (often labeled as HEPA H13, H14, or equivalent) or a close variant marketed as HEPA-like. True HEPA filtration traps at least 99.97% of particles as small as 0.3 microns, while HEPA-like or “HEPA-style” filters may offer similar performance at a lower cost or with different efficiency ratings. When you see the phrase in consumer guides, expect guidance on matching the specific model’s size, shape, and gasket to prevent bypass and maintain airflow. According to Air Purifier Info, many customers buy filters that look compatible but don’t fit the housing, leading to reduced effectiveness and increased dust escape. Always verify model compatibility before purchasing and replacing. In 2026, compatibility and fit remain the most important factors for effective filtration and user satisfaction.
How to identify the right replacement HEPA filter for your model
Identifying the correct replacement starts with the purifier’s model number, usually found on the back or bottom plate. You’ll also find a filter part number on the old cartridge. Use these identifiers to search for “replacement hepa filter for air purifier” that matches your exact model, or consult the user manual for the specified part number. Measure the filter dimensions (height, width, depth) and note the frame style (flat panel, cylindrical, or round). Some purifiers use an internal paper or carbon prefilter; in that case, you’ll need to replace both components in the correct order. Always compare the new filter’s drawing to the old one to ensure identical orientation and gasket placement. Air Purifier Info finds that model-level verification dramatically reduces misfits and returns. If you’re unsure, reach out to customer support or refer to the brand’s compatibility guide to confirm the right replacement hepa filter for air purifier.
Compatibility and fit: sizes, shapes, and seals
Compatibility hinges on several details: the exact housing size, the frame shape, and the gasket configuration. Filters come in flat-panel and cylindrical designs; the wrong shape can cause air to bypass the filter, undermining efficiency. Check the arrow indicators that show airflow direction and ensure they align with the purifier’s intake. Pay attention to the gasket integrity—cracked or compressed gaskets create bypass paths that reduce filtration. For fans that use multiple media layers (carbon, prefilter, or pleated sections), confirm you’re replacing the full cartridge rather than a partial insert. True HEPA filters typically seal tightly when seated correctly, while cheaper HEPA-like variants may rely on a friction fit or adhesive seals. Always confirm that the replacement hepa filter for air purifier is listed as compatible for your model and that the dimensions precisely match the old unit.
Installation considerations and safety tips
Before touching the unit, unplug the purifier and wait for the fan to stop. Handle the filter by its edges to avoid dislodging pleats or tearing the media. If you need to remove screws to access the housing, use the appropriate screwdriver and keep track of fasteners. Gently wipe the interior housing with a dry lint-free cloth to remove collected dust—avoid using water or solvents that could damage electronic components. When inserting the new filter, align it according to the directional arrows and ensure the gasket sits evenly against the housing. Reassemble the unit securely, plug it in, and run the purifier on a low setting for a few minutes to verify a uniform airflow without unusual noises.
Maintenance cadence and cost considerations
Most homeowners replace filters on a cadence dictated by usage and air quality. If your purifier runs continuously or you have pets or smoke, expect more frequent replacements. Replacement costs vary by brand, filter type (true HEPA vs. HEPA-like), and where you shop; you’ll often see price ranges across retailers and models. The overall cost of replacement filters tends to be a recurring expense, so budgeting for several replacements per year (or per season) helps. When evaluating options, consider filter life claims, cleanability, and whether the unit supports carbon-impregnated media for odors. Proper maintenance keeps the purifier effective, reduces dust buildup on furniture, and extends overall device life.
Choosing between true HEPA and HEPA-like filters
True HEPA filters meet strict filtration standards and are widely regarded as the safest option for allergy and asthma concerns. HEPA-like or pseudo-HEPA filters can offer strong performance at a lower cost but may degrade more quickly or filter fewer particles per pass. If you or household members have sensitivities, prioritize true HEPA filters with compatible carbon layers for odor removal. Always verify the filter’s rating and compatibility with your model; Air Purifier Info emphasizes that mismatch in either size or filtration type can compromise efficiency and air quality. In short, for high-purification needs, choose true HEPA with proper housing fit; for lower-cost or casual use, HEPA-like options may suffice while still meeting basic standards.
Best practices for long-term performance and disposal
Maintain a consistent replacement cadence aligned with device usage and environmental conditions. Keep spare filters on hand to minimize downtime. When disposing of used filters, follow local guidelines; many districts accept disposable filters in standard waste streams, but some carbon-impregnated or odor-absorbing media require special handling. If your purifier features a recyclable frame or carbon component, separate materials accordingly. Keeping a simple replacement log helps track dates and ensures you don’t skip routine maintenance. For 2026, leveraging official manuals and brand guidelines will help you optimize results and enjoy cleaner air.
Final note on performance expectations
Replacing the filter correctly and on schedule will maximize filtration efficiency, minimize allergens, and extend purifier life. If you notice persistent odors, reduced airflow, or increased noise after a replacement, recheck the fit, orientation, and seals before calling support.
Quick tips from the Air Purifier Info team
- Always confirm compatibility before buying a replacement. The wrong filter can reduce efficiency and void warranties.
- When in doubt, review the purifier’s model number for exact part numbers and view the owner’s manual online.
- Keep a simple replacement log and date stamps on fresh filters to track usage and performance over time.
Tools & Materials
- Replacement HEPA filter for air purifier(Ensure model compatibility (exact part number or filter type) and that it matches the housing size)
- Phillips-head screwdriver (if needed)(To access filter housing screws)
- Gloves(Optional for handling dust and maintaining hygiene)
- Lint-free cloth(For wiping the interior housing surfaces)
- Mask or eye protection(Optional when dealing with dusty filters)
- Marker or label(To note replacement date and model on the new filter)
- Soft brush or small vacuum attachment(To clear debris from the housing before inserting the new filter)
Steps
Estimated time: 15-25 minutes
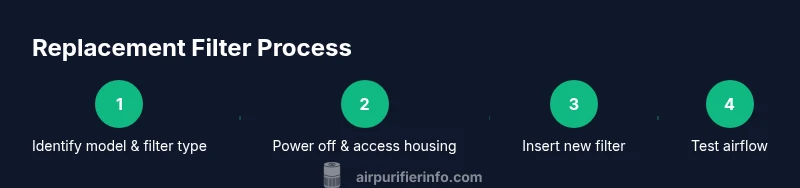
- 1
Identify model and filter type
Locate the purifier’s model number and the old filter’s part number. Confirm the exact replacement hepa filter for air purifier that is compatible with your unit by cross-checking model documentation or the manufacturer’s website.
Tip: Having the model and part number handy prevents mismatches during purchase. - 2
Power off and unplug the purifier
Always unplug the device before starting. This prevents shocks and stops the fan from turning while you work on the housing.
Tip: Wait 60 seconds after unplugging to ensure internal capacitors discharge safely. - 3
Open the housing to access the filter
Remove screws or release latches per your model’s instructions. If there are screws, set them aside in a labeled container to avoid loss.
Tip: Keep the unit steady to avoid bending internal components. - 4
Remove the old filter carefully
Grasp the filter by its edges and lift straight out to minimize dust displacement. Do not shake or bend the pleats, which could damage the medium.
Tip: Place the old filter in a bag to contain dust during disposal. - 5
Inspect housing and gasket
Check the housing for debris and inspect the gasket for cracks or damage. A damaged gasket can cause bypass and reduce filtration efficiency.
Tip: If the gasket looks compromised, replace it or consult support before inserting a new filter. - 6
Install the new filter with correct orientation
Line up orientation arrows on the filter with the housing indicators. Press the filter firmly until seated evenly and the housing closes without gaps.
Tip: Never install a filter upside down; this can block airflow and damage the unit. - 7
Reassemble and test
Secure the housing, plug the purifier back in, and run it on a low setting for several minutes. Listen for unusual sounds and verify smooth airflow.
Tip: If airflow is restricted or noises persist, reopen the housing to recheck seating and gasket alignment.
Questions & Answers
What is the difference between true HEPA and HEPA-like filters?
True HEPA filters meet strict standards for particle filtration and are recommended for allergy and asthma concerns. HEPA-like filters often provide strong performance but may not meet the same certification or lifetime expectations. Always verify model compatibility and filtration efficiency when choosing.
True HEPA meets strict standards, great for allergies; HEPA-like is often cheaper but may be less consistent. Check compatibility and efficiency for your needs.
How often should I replace the filter?
Replacement frequency depends on usage, environment, and filter type. Many households replace every 6-12 months under normal use, more frequently if there are pets, smoke, or heavy dust. Refer to the purifier’s manual and your own usage log.
It depends on use. Typical ranges are several months to a year; track with a simple log.
Can I use a third-party or generic replacement?
Third-party filters can fit some models, but ensure exact compatibility and certification. Mismatched filters can reduce performance or void warranties. Always verify model numbers and read reviews from trusted sources.
Only use compatible, certified filters to avoid performance or warranty issues.
What should I do if the purifier stops working after a replacement?
First, unplug and inspect the filter seating and gasket. Re-seat the filter if needed, and check for alert indicators in the app or purifier. If the issue persists, consult support or the manual for troubleshooting steps.
Unplug, recheck fit, and consult the manual if the issue continues.
Are there eco-friendly disposal options for used filters?
Some municipalities allow used filters in regular waste, while others require special handling for carbon or fiberglass media. Check local guidelines and consider recycling programs where available. Always seal the old filter in a bag when disposing.
Check local rules for disposal and seal the used filter before disposal.
Do all air purifiers use the same filter size and type?
No. Filter sizes and types vary by model. Always verify the exact dimensions, frame shape, and gasket requirements for your unit before buying a replacement.
No, models differ—verify size, shape, and gasket before purchasing.
Watch Video
Main Points
- Identify compatible filter before buying.
- Unplug before maintenance and handle with care.
- Ensure correct orientation and a tight seal.
- Test airflow after replacement to verify performance.
- Follow local disposal guidelines for spent filters.