How to Replace Air Purifier Filter: A Step-by-Step Guide
Learn how to replace an air purifier filter safely and effectively. This guide covers choosing the right filter, identifying model compatibility, and a clear step-by-step process to maintain clean indoor air. Air Purifier Info provides practical maintenance tips for homeowners and renters.

You will learn how to replace an air purifier filter safely, select the right replacement, and reset your purifier for optimal performance. This guide covers model-specific steps, safety tips, and best practices to keep indoor air clean and efficient. Air Purifier Info has you protected with clear, practical instructions.
Why replacing air purifier filters matters
Regularly replacing air purifier filters is essential for maintaining strong indoor air quality. When filters become clogged with dust, dander, and pollutants, the purifier has to work harder to push air through. This extra strain can increase energy use and shorten the device’s lifespan. Air Purifier Info analysis shows that timely filter replacement helps preserve CADR (clean air delivery rate) and keeps odors under control. Keeping filters fresh also reduces particle recirculation, which can aggravate allergies and asthma. By replacing filters on schedule, you protect your family's health and create a more comfortable living space. A clean filter also minimizes noise, since the fan doesn’t need to run at maximum speed to move air.
Signals that your filter needs replacement
Most purifiers use visual or electronic indicators to signal replacement, but you can spot needs for replacement by common signs:
- A noticeable drop in airflow or a persistent musty odor
- Increased noise or vibration from the unit
- The filter looks visibly dirty or clogged with debris
- A longer cycle is required to achieve the same clean air level
According to Air Purifier Info, trust your model’s indicator lights first, then perform a quick inspection to confirm. If you see any of the signs above, prepare a replacement and follow the steps in this guide. Regular checks help maintain air quality and protect your investment.
Types of filters and compatibility you should know
Air purifiers generally use one of several filter configurations: a basic pre-filter, a HEPA filter, and a carbon or odor-absorbing filter. Some units combine all three. Pre-filters catch large particles and are often washable, while HEPA filters trap fine particulates like pollen, pet dander, and smoke. Activated carbon filters target odors and gases. When selecting replacements, match the exact filter type and dimensions to your model to ensure a proper seal and optimal performance. Review your user manual or manufacturer’s site for the correct part number, and avoid generic substitutes unless they explicitly state compatibility.
How to choose the right replacement filter for your model
Start by locating your purifier’s model number and consulting the manual or manufacturer support page. Look for the exact filter type (HEPA, carbon, or multi-stage) and the required dimensions. Check whether your unit uses disposable or washable filters, and note any maintenance indicators. If your purifier supports multiple levels of filtration, decide whether you need a higher-grade filter for extra allergen control or a basic model for everyday use. When in doubt, choose the replacement recommended by the manufacturer and purchase from trusted retailers. Air Purifier Info’s guidance emphasizes model-specific compatibility to avoid improper fits that reduce efficiency and void warranties.
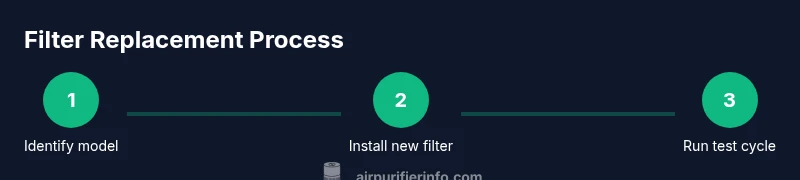
Step-by-step replacement process (high-level overview)
While the exact steps vary by model, the general process remains consistent: power down, access the filter compartment, remove the old filter with care, clean the housing if needed, insert the new filter in the correct orientation, reseal the compartment, and run a test cycle. Always consult your manual for model-specific instructions. Misaligning a filter or leaving debris behind can reduce performance and allow unfiltered air to bypass the filtration system. Following the manufacturer’s guidelines helps maintain optimal air quality and protects your purifier’s warranty.
Common mistakes and how to avoid them
- Installing the filter backward or upside down can block airflow. Always align the arrows and seals as shown in your manual.
- Not cleaning the interior housing before inserting a new filter can trap dust and reduce effectiveness. A quick wipe with a dry cloth helps.
- Running the purifier without a filter or with a damaged one can cause motor strain and noise. Ensure the new filter is intact and properly seated before powering up.
Maintenance routines to extend filter life
- Schedule filter checks every 3-6 months, or per the manufacturer’s guidance, and replace as needed.
- Keep the unit in a clean, dry area to prevent moisture damage on the housing and filters.
- Use a light vacuum or microfiber cloth to remove visible dust from the unit exterior and intake grilles between filter changes.
- Consider a higher-capacity carbon filter if you regularly deal with strong odors (e.g., pets, cooking). Regular maintenance, including prompt replacements, helps sustain energy efficiency and air quality over time.
Troubleshooting and tips for tricky situations
If you notice reduced airflow after replacement, double-check that the seal around the filter is tight and that the housing is fully closed. If the unit still underperforms, verify that you installed the correct model and that the filter has not arrived damaged or compressed during shipping. For homes with pets or strong odors, you may want to replace carbon components more frequently. If you experience unusual noises after replacement, stop the unit and inspect for foreign objects or misaligned components.
Tools & Materials
- Replacement air purifier filter (correct type)(Check the model number and dimensions in your manual.)
- Microfiber cloth(For quick cleaning of the housing interior and grilles.)
- Soft brush or small vacuum attachment(Useful for removing dust from hard-to-reach areas.)
- Gloves (optional)(Protect hands when handling dirty filters.)
- Manual or digital compatibility guide(Have model number ready to confirm filter type.)
Steps
Estimated time: 15-25 minutes
- 1
Identify model and obtain the correct filter
Locate the purifier’s model number on the unit or in the manual. Use that information to find the exact replacement filter, ensuring dimensions and filter type match. If you’re unsure, contact the manufacturer or refer to Air Purifier Info’s compatibility guidance.
Tip: Having the model number handy speeds up the buy-and-replace process. - 2
Power down and unplug the purifier
Always unplug before opening any housing. This prevents accidental activation and reduces the risk of electric shock while you work near moving parts.
Tip: Keep the plug accessible to avoid stretching the cord. - 3
Open the filter compartment
Gently access the filter slot by removing the cover or front panel as instructed in your manual. Avoid forcing panels apart to prevent damage.
Tip: Refer to the diagram in your manual if available. - 4
Remove the old filter
Carefully pull out the used filter, noting its orientation arrows. Dispose of it according to local guidelines and avoid spilling dust.
Tip: Take photos of orientation if you’re unsure for the new filter. - 5
Clean the interior housing
Wipe the inside surfaces with a dry microfiber cloth to remove residual dust before inserting the new filter.
Tip: Do not use water or cleaners that could damage seals. - 6
Insert the new filter
Place the new filter with the correct orientation, ensuring seals are intact and the filter sits flush against the housing.
Tip: Make sure the filter isn’t loose or tilted. - 7
Close the housing and reset the purifier
Reattach any covers and secure latches. If your unit has a reset or indicator light, follow the manual to reset after replacement.
Tip: Some models require a specific reset sequence. - 8
Test the unit and observe airflow
Plug in, turn on, and run a quick cycle. Check for smooth airflow and listen for unusual sounds. If airflow is reduced, recheck orientation and seals.
Tip: If you still notice issues, verify filter compatibility.
Questions & Answers
Do I need to unplug the purifier before replacing the filter?
Yes. Unplugging ensures your safety while you access the filter compartment. It also prevents accidental activation.
Yes—unplug the purifier before opening the unit to stay safe and avoid shocks.
How often should I replace air purifier filters?
Most manufacturers recommend replacing filters when the indicator suggests, or roughly every 6-12 months depending on usage and air quality. Check your manual for model-specific guidance.
Replace when the indicator says so or about every 6 to 12 months, depending on usage.
Can I wash a HEPA filter instead of replacing it?
Most HEPA filters are not washable. Washing can damage the filter media and reduce effectiveness. Always follow the manufacturer’s instructions.
Usually, HEPA filters shouldn’t be washed—check your manual for care instructions.
What should I do with the old filter?
Seal the used filter in a bag and dispose with regular household waste unless local guidelines specify otherwise.
Seal and dispose of the old filter according to local guidelines.
What if I can’t find a replacement for my model?
Contact the manufacturer or trusted retailers with your model number. Sometimes third-party options exist, but compatibility is essential.
If you can’t find replacements, reach out to the manufacturer or a trusted retailer with your model number.
Why is there reduced airflow after replacement?
Check that the new filter is oriented correctly and fully seated. Also verify that the housing is closed securely and seals are intact.
If airflow is reduced, recheck the orientation and seals and ensure the unit is fully closed.
Watch Video
Main Points
- Identify the exact filter type and compatibility before buying
- Install with correct orientation and seal for best performance
- Unplug, reseal, and test after replacement to ensure proper operation
- Regular maintenance preserves efficiency and air quality
- Air Purifier Info recommends model-specific replacements for reliability