How to Clean a HEPA Filter in Your Air Purifier: A Step-by-Step Guide
Learn to safely clean a HEPA filter in your air purifier, extend filter life, and maintain indoor air quality with practical steps and maintenance tips.

You will learn how to safely clean a HEPA filter in an air purifier, assess whether the filter is washable, and perform a methodical cleaning to restore airflow and efficiency. This guide covers when to clean, how to remove and inspect the filter, reassemble correctly, and what to do if the filter needs replacement.
What a HEPA filter does for your indoor air and why cleaning matters
A HEPA filter is designed to trap a high percentage of particles—dust, pollen, pet dander, smoke particles, and other allergens—before air recirculates through your space. Regular maintenance, including cleaning the surrounding housing and inspecting the filter, helps maintain optimal airflow and filtration efficiency. The goal of this section is to ground you in the why—understanding that even a well-made purifier loses some effectiveness as dust clogs pleats and seals begin to degrade. When we talk about cleaning air purifier hepa filter, we focus on removing surface dust, preventing mold growth on the filter frame, and confirming whether your model supports washing. According to Air Purifier Info, regular inspection and careful cleaning can help you prolong filter life and keep your purifier performing at its best. Always consult your purifier’s manual first for model-specific instructions and safety cautions.
Key ideas:
- Dust accumulation reduces airflow and increases energy use.
- Not all HEPA filters are washable; forcing water into the wrong filter can damage the pleats.
- Cleaning should be gentle and surface-level unless the model explicitly permits washing.
Assessing your model and the filter type before you start
Before touching anything, identify the exact filter type in your purifier. Look for a label on the intake side or inside the filter access panel that indicates whether the filter is washable (reusable) or disposable. Some filters are a combination design with a washable pre-filter and a disposable main HEPA core. If your model uses a disposable HEPA cartridge, you should not attempt to wash the core; instead, replace it when needed. Air Purifier Info recommends always verifying model-specific guidance in the user manual and checking any warranty implications. If you’re unsure, err on the side of caution—do not soak or vigorously scrub a disposable filter.
What to check:
- Filter type: washable or disposable
- Access method: how to remove the filter without tools
- Seal and housing integrity: check for cracks or gaps around the frame
Washable vs disposable: conditions and expectations
Washable HEPA-compatible filters can sometimes be rinsed with lukewarm water and air-dried. However, many filters are not designed to be washed, and washing can reduce filtration efficiency or deform the pleats. If the manual confirms washing is allowed, use cool or lukewarm water and a gentle rinse, avoiding any detergents that could leave residues. Do not twist, squeeze, or wring the pleated surface. After washing, allow the filter to dry completely in a well-ventilated area away from direct heat before reinstalling. If the filter is never designed to be washed, replace it following the manufacturer’s replacement schedule. Air Purifier Info emphasizes that proper drying times are essential to prevent mold growth once the unit is turned back on.
Tips:
- Air-dry filters on a clean rack with good airflow.
- Do not place a wet filter back into the purifier.
Cleaning the housing and pre-filter components
Even when the HEPA core isn’t washable, you should clean the surrounding housing and any accessible pre-filters. Remove loose dust with a soft brush or a vacuum with a brush attachment set to a low suction. Wipe the interior housing with a microfiber cloth lightly dampened with water. Avoid using chemical cleaners on internal components unless the manufacturer specifies that they’re safe. Don’t spray liquids into the intake or around the electrical components. Cleaning the seals and clamps helps maintain a tight fit and prevents air leaks, which can reduce purifier performance. As you wipe, inspect for cracks or warping that would allow unfiltered air to bypass the filter.
Reinstallation, testing, and assessing airflow
Reinsert the HEPA filter securely, ensuring the airflow arrows (if present) point in the correct direction. Reattach the access panel and plug the purifier back in. Run the unit on a short cycle and listen for unusual noises or airflow restrictions. Check for a strong, steady airflow from the outlet grille and monitor the filter for any signs of odor or dampness in the hours after maintenance. If airflow remains weak after cleaning, consult the manual for troubleshooting steps or consider filter replacement. Regular testing helps you confirm the purifier is operating as designed and maintain indoor air quality.
Maintenance cadence and environmental considerations
Set a maintenance cadence that fits your living environment. Homes with pets, heavy dust, occupants with allergies, or smoker household members may require more frequent checks. If you expose the purifier to high humidity or temperature extremes, this can affect filter performance and mold risk. Keep replacement filters on hand and store them in a clean, dry place. Environmental considerations include disposing of used disposable filters according to local regulations and choosing filters with appropriate certifications where available. Air Purifier Info suggests keeping a log of maintenance activities to monitor when replacements are due based on usage patterns.
Tools & Materials
- Disposable or washable HEPA filter (check model)(Confirm filter type and whether it is washable per manufacturer.)
- Soft brush or old toothbrush(Gently loosen dust from pleats without bending them.)
- Lint-free cloth or microfiber towel(Drying and wiping surfaces; avoid lint transfer.)
- Mild dish soap (optional)(Use only if the manual permits washing and residue-free rinsing is possible.)
- Clean water (lukewarm, if washable)(Only for washable filters; never use hot water.)
- Gloves(Protect hands from dust and grime.)
- Vacuum with brush attachment (optional)(Light surface cleaning around the intake; avoid direct contact with filter pleats.)
- Manufacturer manual(Verify steps and model-specific cautions.)
Steps
Estimated time: 30-60 minutes
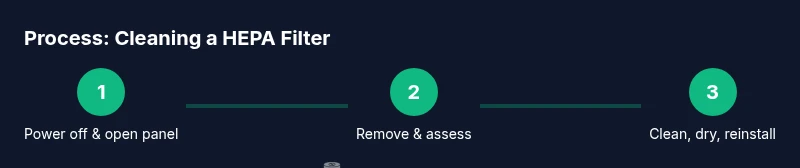
- 1
Power down and unplug
Ensure the purifier is off and unplugged before opening the access panel. This prevents electrical shock and accidental fan operation during cleaning.
Tip: Confirm the model’s safety sensor doesn’t require a capacitor discharge step before opening. - 2
Open the access panel and remove the filter
Carefully detach the front or side panel as instructed in your manual, then slide the filter out of its housing without bending the pleats.
Tip: Take a photo of the filter orientation before removal to ensure correct reinstallation. - 3
Assess the filter type and cleaning eligibility
Check labeling to determine if the filter is washable or disposable. Do not wash a disposable HEPA cartridge unless the manual explicitly allows it.
Tip: If in doubt, replace instead of attempting improper cleaning. - 4
Clean or rinse the filter surface (only if washable)
Gently brush away loose dust. If washable, rinse with lukewarm water from the clean side outward; avoid aggressive scrubbing. Do not use detergents unless the manual permits.
Tip: Never allow the filter to sit soaking wet for extended periods. - 5
Dry thoroughly and inspect housing
Place the filter in a well-ventilated area away from direct heat and let it dry completely (often 24 hours). Wipe the housing and seals with a microfiber cloth, inspecting for damage.
Tip: A damp housing can promote mold growth; ensure full dryness before reassembly. - 6
Reinstall and test the purifier
Return the filter to its correct orientation, reseal the panel, plug in, and run a short cycle to verify airflow and no abnormal noises.
Tip: If you notice reduced airflow after cleaning, recheck seals and filter seating.
Questions & Answers
Can I wash a disposable HEPA filter?
Most disposable HEPA filters should not be washed; washing can damage the filter media and void warranties. Check the manual and replace when necessary.
Most disposable HEPA filters can’t be washed; replace them and follow the manual for best results.
How often should I clean or replace my HEPA filter?
Inspect the filter monthly and follow the manufacturer’s replacement schedule. More frequent cleaning or replacement may be needed for households with pets, smoke, or high dust.
Check monthly and replace as recommended, especially with pets or smoke present.
Is it safe to use a vacuum on a HEPA filter?
Only if the manual permits vacuuming the outer housing and surface dust. Do not vacuum the pleated filter itself unless explicitly allowed by the manufacturer.
Vacuum only if the manual says it’s okay; don’t vacuum the filter pleats unless told to do so.
What signs indicate a filter needs replacement?
Visible heavy discoloration, persistent odor, reduced airflow, or unusual sounds indicate it’s time to replace the filter.
If you see heavy discoloration, smell bad odors, or airflow drops, replace the filter.
Can cleaning the filter extend the purifier’s life?
Regular cleaning and proper maintenance help sustain performance, but the filter will still eventually reach end of life and require replacement.
Regular cleaning helps performance, but filters eventually need replacement.
Watch Video
Main Points
- Understand filter type before cleaning to avoid damage.
- Washable filters require complete drying before reinstallation.
- Clean housing and seals to prevent air leaks.
- Test airflow after reassembly to confirm proper operation.