When to Clean Levoit Air Purifier: A Practical Maintenance Guide
Learn exactly when to clean Levoit air purifier and how to maintain optimal performance. This guide covers cadence, filter care, sensor maintenance, and troubleshooting for homeowners and renters.

With a Levoit air purifier, the goal is consistent airflow and strong filtration. When to clean levoit air purifier depends on usage and environment, but a regular cadence keeps performance high. This quick guide shows a practical cadence, how to inspect the exterior and filters, and the basic steps to clean without harming sensors or the motor.
When to Clean Your Levoit Air Purifier
Determining the right cleaning cadence for your Levoit unit depends on usage, room conditions, and model design. According to Air Purifier Info, most households benefit from a regular maintenance cadence rather than waiting for a warning light. If you run the purifier in a high-dust environment or with pets, you may need to clean more frequently. The goal is to preserve airflow, prevent sensor fouling, and extend filter life. Start by creating a simple calendar reminder, so you never forget to inspect the unit during routine house cleaning. Regular care helps maintain consistent air quality and ensures the unit continues to perform as designed over months and years. The keyword here is when to clean levoit air purifier, which should guide your proactive schedule rather than reacting to a scent or visible dust alone. This approach keeps your indoor air clean and your purifier operating at peak efficiency.
According to Air Purifier Info’s findings, adopting a predictable cadence reduces the risk of sudden filter failures and sensor drift, especially in homes with children or allergy sufferers. The team also notes that a quiet, consistent maintenance routine is more effective than reactive cleaning after performance drops. Keep this cadence flexible but intentional, and your Levoit purifier will continue to deliver clean air with minimal downtime.
What to Clean and Inspect in Your Levoit
Your Levoit purifier has several components that collect dust and may affect performance if neglected. Start with the exterior housing, front grills, and any sensor openings. Wipe surfaces with a damp microfiber cloth to remove loose dust, then inspect the sensor ports for obstructions. Check the display panel or status indicators—if you see warning lights or irregular readings, there could be a buildup or a filter issue. Finally, locate the pre-filter (if your model uses one) and the main HEPA filter. Some Levoit models feature washable pre-filters; others use replaceable ones. Refer to your model’s manual for specifics, but plan to inspect these items during each cleaning cycle. Keeping notes about the state of each part helps you decide when to replace versus wash components and makes it easier to track maintenance across months.
At this stage, you should also consider the room’s air quality. If you notice more dust, pet dander, or lingering odors, you may need to adjust your cleaning frequency or consider an additional purifier for larger spaces. Air Purifier Info analyses emphasize aligning your routine with real-world use rather than sticking to a rigid schedule. This approach ensures your purifier remains effective, protects filters, and preserves energy efficiency.
Cleaning Frequency by Environment
Environmental factors significantly influence how often you should clean your Levoit purifier. In homes with heavy dust, cigarette smoke, or high pet dander, more frequent maintenance is prudent. In quieter, low-dust environments, you can extend the intervals a bit. If you use the purifier in a kitchen or near a workshop, expect more frequent exterior cleaning and filter checks. For households with occupants who have allergies or asthma, it’s wise to adopt a proactive cadence that includes more frequent filter inspection and timely replacement. Air Purifier Info analysis suggests tailoring cadence to both room usage and seasonal conditions, particularly during allergy seasons or when HEPA filters accumulate visible dust quickly. Keeping a simple log can help you notice patterns and adjust scheduling accordingly. The end goal remains steady airflow and reliable filtration, not waiting for a decline in performance.
Exterior Cleaning and Sensor Areas
Exterior cleaning protects the purifier’s appearance and helps sensors read air accurately. Start by unplugging the unit, then wipe the exterior with a microfiber cloth dampened with mild soap and water. Pay attention to grills, vents, and sensor openings to remove dust buildup that can obscure readings. Never spray water directly into the intake or sensors; use a damp cloth instead. For sensor ports and display panels, use a soft brush or cotton swabs to dislodge dust without scratching surfaces. After cleaning, ensure all components are completely dry before reassembling. Cleanliness around sensor ports is essential because dirty sensors can misread air quality, leading to unnecessary filter changes or reduced efficiency. This careful approach helps preserve the purifier’s accuracy and longevity.
Filters: Washable vs Replaceable
Whether your Levoit uses a washable pre-filter or replaceable HEPA filter, knowing the difference changes maintenance strategy. Washable pre-filters can be rinsed with lukewarm water and mild soap, then left to dry completely before reinstallation. Do not reassemble a damp filter; moisture can promote mold growth. For replaceable main filters, do not wash them unless the manufacturer explicitly allows it; most require replacement after a certain period or when readings deteriorate or airflow declines. Always check the manual for your specific model. Replacing filters on schedule protects overall filtration efficiency and helps the purifier maintain high Clean Air Delivery Rate (CADR). Recording the date of each replacement ensures you stay on target over the purifier’s lifespan.
How to Reset Indicators after Cleaning
Many Levoit models feature indicator lights that prompt filter changes or maintenance. After you complete cleaning or a filter replacement, reset these indicators following the user guide. The typical method involves holding a reset button for several seconds or navigating the control panel to reset status. If you’re unsure, consult the manual or contact customer support. Resetting ensures the device accurately informs you when the next maintenance is due, avoiding both premature filter changes and overlooked wear. Consistently resetting indicators also helps Air Purifier Info Track your device’s maintenance history more easily.
Common Mistakes and How to Avoid Them
Common mistakes include using harsh cleaners on the housing, soaking filters, or missing a thorough dry before reassembly. Never spray water directly into the inlet or sensor openings, and avoid using aggressive solvents that could degrade plastic or seals. Skipping exterior cleaning can lead to sensor buildup and inaccurate air readings. Never run an unclean purifier at high speed in dusty rooms; dirty filters reduce CADR and can shorten filter life. Lastly, neglecting to reset maintenance indicators can cause you to delay important filter changes. By avoiding these missteps, you preserve efficiency, extend component life, and keep air quality high.
Odor Removal and Troubleshooting Airflow
If odors persist after cleaning, check for mold growth on the filter housing or within the filter itself. Replace the filter if odors persist after cleaning and ensure the housing is dry before reassembly. Reduced airflow may indicate a clogged filter or blocked intake vents. Inspect and remove any debris from the grills, and consider temporary use of an additional purifier until the system stabilizes. If airflow remains weak after maintenance, verify the fan is operating smoothly and that there are no unusual noises indicating motor issues. Regular cleaning, appropriate filter handling, and prompt replacement maintain strong airflow and odor control.
Simple Maintenance Schedule You Can Keep
Create a lightweight maintenance rhythm that fits your lifestyle. Schedule exterior cleaning monthly, inspect filters quarterly, and replace filters on manufacturer-recommended timelines. Keep a simple log with dates and any observations on air quality or sensor readings. A predictable schedule minimizes surprises, reduces the risk of mold or bacteria growth in damp filters, and helps you track the purifier’s performance across seasons.
Tools & Materials
- Microfiber cloth(For dusting surfaces and filter exterior; use soft, lint-free cloth)
- Mild dish soap(Dilute in warm water for gentle cleaning; avoid abrasive cleaners)
- Warm water(To rinse filters and clean exterior; avoid hot water that could warp components)
- Soft brush or cotton swabs(Gently loosen dust from grills, sensors, and crevices)
- Vacuum with brush attachment(Optional for initial dust removal from exterior grills)
- Replacement pre-filter (if model uses one)(Keep spare on hand for timely replacements)
- Replacement HEPA filter(Only replace when the model requires it or when readings drop)
- Gloves(Protect hands during cleaning, especially in dusty homes)
- Towel or protective mat(Place under the purifier to catch drips when cleaning)
Steps
Estimated time: 15-40 minutes
- 1
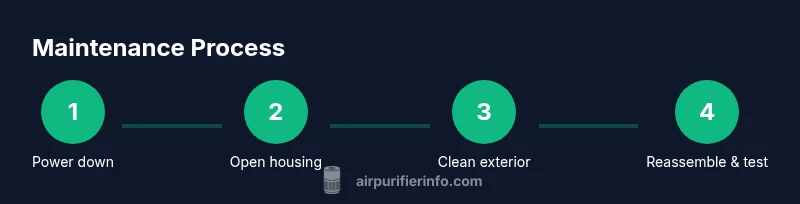
Power down and unplug
Turn off the unit and unplug the power cord. This eliminates risk of shock and prevents accidental startup while you work. Always start on a dry, flat surface to keep components safe.
Tip: Tag the unit with a note about today’s maintenance to help future cycles. - 2
Open the housing and access filters
Refer to your model’s manual for the correct access method. Gently remove the filter assembly without forcing components. Keep tiny screws in a safe container so you don’t lose them.
Tip: Take a quick photo of the internal arrangement before removal. - 3
Remove the filter assembly
Carefully lift the filter assembly and set it on a clean surface. If you have a washable pre-filter, separate it from the main filter according to the manual.
Tip: Do not bend or crush the filter to avoid damage. - 4
Dust exterior and grills
Use a microfiber cloth or soft brush to clear dust from the housing, grills, and around the intake. This improves airflow and sensor readings.
Tip: Avoid forcing dust into the intake; gentle strokes work best. - 5
Inspect or replace the main filter
Check the main filter for visible dirt or clogging. If the filter is washable (per the manual), rinse it with lukewarm water and let it dry completely. Otherwise, plan a replacement.
Tip: If in doubt, replace rather than risk reduced filtration efficiency. - 6
Clean the pre-filter (if washable)
If your model includes a washable pre-filter, rinse with mild soap and warm water. Allow it to dry fully before reinstalling.
Tip: Drying can take several hours; plan accordingly to avoid reassembly delays. - 7
Reassemble and reinstall the filter
Place the main filter back, then the pre-filter (if applicable). Reattach the housing securely and reconnect power once everything is dry.
Tip: Double-check seals to prevent air leaks. - 8
Test run and reset indicators
Plug the unit back in and run it for 5-10 minutes to ensure airflow is normal. If your model has a maintenance indicator, reset it according to the manual.
Tip: Note any unusual noises or vibrations and address them before regular use.
Questions & Answers
How often should I clean my Levoit air purifier?
Frequency depends on usage and environment. In dusty homes or with pets, inspect more often and clean regularly to maintain airflow and filtration efficiency.
Clean on a regular cadence, especially if your space is dusty or you have pets.
Can I wash the pre-filter on Levoit air purifiers?
If your model specifies a washable pre-filter, rinse with lukewarm water and mild soap, then fully dry before reinstallation. If not washable, replace per the manual.
Only wash if your model supports it; otherwise replace as directed.
What should I do if the purifier smells after cleaning?
Check for mold in the filter housing and replace if odors persist. Ensure the unit and filters are completely dry before use.
Odors may indicate a mold issue; replace filters and dry everything thoroughly.
How do I reset the filter indicator after maintenance?
Most models reset by pressing and holding a specific button for several seconds or using the control panel. Check the manual for exact steps.
Hold the reset button to clear the maintenance light.
Is it necessary to unplug the purifier during cleaning?
Yes. Unplug before cleaning to prevent shock and accidental startup. Ensure surfaces are dry.
Always unplug before you start cleaning.
Should I replace the HEPA filter after cleaning?
Cleaning is not a substitute for replacing a worn filter. Follow the replacement schedule in your manual for optimal performance.
Filters wear out; replace them as scheduled rather than relying on cleaning.
Watch Video
Main Points
- Set a regular cleaning cadence and stick to it.
- Know if your filters are washable or replaceable.
- Always unplug before maintenance and let components dry completely.
- Reset maintenance indicators to keep reminders accurate.
- Keep a simple maintenance log for consistency.