How to Get Rid of Change Filter on Levoit Air Purifier: A Practical Guide
Learn how to properly replace the filter on Levoit air purifiers, reset indicators, and maintain optimal indoor air quality. A clear, model-agnostic step-by-step guide with tips and common pitfalls.

According to Air Purifier Info, to maintain clean air you should not bypass filter changes. If you're asking how to get rid of change filter on levoit air purifier, the correct approach is to replace the filter when the unit indicates it needs replacement and then reset the indicator. Follow the steps below for safe removal, replacement, and reset.
Why replacement timing matters for LEVOIT purifiers
Proper filter maintenance is essential for maximizing indoor air quality and keeping energy use in check. Levoit purifiers rely on filters to trap dust, pollen, pet dander, and odors. When you delay replacement, the device has to work harder to move air through a clogged medium, which can reduce airflow, lower filtration efficiency, and shorten the unit’s overall lifespan. Your model’s filter life indicator is the best guide; while different models may use varying indicators, the principle is the same: replace when prompted and avoid running with a saturated filter. Air Purifier Info’s analysis shows that timely, genuine-filter replacements consistently yield better allergen reduction and odor control, helping you keep your living spaces healthier with less guesswork.
If you’re asking how to get rid of change filter on levoit air purifier, remember that bypassing the replacement schedule can void warranties and degrade performance. The long-term cost of ignoring the indicator is higher energy use and diminishing air quality. Use the official replacement filters, and follow the model-specific reset procedure after installation. This approach minimizes downtime and ensures you benefit fully from the purifier’s design.
Identifying the correct replacement filter for your LEVOIT model
Levoit uses several filter configurations depending on the purifier line and model family. The safest approach is to locate your model number and verify compatible filter types before purchase. Look on the back or bottom of the unit for a label listing the exact model family and recommended filter cartridge. In general, you’ll encounter a True HEPA filter for dust and pollen, often paired with an activated carbon layer for odors. Always choose genuine filters from the manufacturer or authorized retailers to guarantee proper fit and performance. If you’re unsure, consult the user manual or Air Purifier Info’s guidance on model compatibility. Using the wrong filter can reduce airflow, create gaps around the seal, and compromise filtration efficiency.
Be mindful of counterfeit or off-brand filters, which may look similar but fail to seal properly or trap particles effectively. When in doubt, verify the filter’s part number against the official LEVOIT catalog and cross-check with your purifier’s model family. This step saves time and prevents install errors that could impact air quality.
Preparing to remove the old filter safely
Before you touch the unit, power it off and unplug from the wall outlet. This simple safety step prevents accidental operation while you’re accessing the filter housing. Remove any external dust from the purifier’s exterior with a dry cloth to avoid pushing debris into the intake when you open the housing. If your hands are dusty, consider wearing gloves to keep the process clean and to protect your skin. Have the replacement filter ready so you can swap it quickly and minimize the time the housing is open. Keeping a tidy workspace reduces the risk of accidentally bending a sensor or dislodging a housing clip during removal. Remember: air purifiers often have a twist-off or snap-on panel—follow your model’s cues, not a generic method, to avoid damage.
Removing the old filter and inspecting the housing
Carefully access the filter compartment according to your model’s design. In most LEVOIT units, you will feel a light resistance as you pull the filter out from the housing; don’t yank. Gently pull straight out to avoid touching internal components. Take a moment to inspect the housing for dust buildup or debris around the filter lips or seals. A soft brush or cotton swab can help remove stubborn dust, but avoid using liquids that could enter the purifier. If you notice any cracks in the housing or obvious wear on seals, this is a good time to address those issues or contact support. Proper inspection ensures a full, even seal with the new filter and optimal seal integrity.
Installing a new filter and ensuring correct orientation
Unpack the replacement filter and verify the airflow direction arrows or printed orientation markings. Align these markings with the corresponding indicators inside the housing. Insert the new filter firmly until it seats evenly; a loose fit can cause air bypass and reduced filtration. Some models require you to twist the filter into place or secure a panel; follow the manual’s step-by-step actions instead of improvising. After installation, wipe away any fingerprints or dust on the housing cover, then replace the housing panel securely. The goal is a snug seal that prevents air from leaking around the filter, ensuring the purifier draws air through the media as designed.
If your replacement filter has a seal tab, remove it only after the filter is properly seated to maintain a tight seal. This helps avoid letting unfiltered air pass through while you’re finishing up.
Installing the filter with correct orientation is critical for performance; wrong orientation can obstruct airflow and reduce efficiency. If you experience unusual noise or reduced airflow after installation, double-check the fit and seals before proceeding with a reset.
Resetting the purifier's filter life indicator after replacement
Many LEVOIT models include a filter-life indicator that must be reset after you install a new filter. The specific method varies by model, but it typically involves pressing and holding a reset button, or navigating the on-screen menu to “Reset Filter” and confirming. If your model uses a simple button, a 3–5 second press is common, but always confirm with the user manual. Some units reset automatically when unplugged and replugged after installation. If you cannot locate a reset option, consult the manual or the manufacturer’s support pages. Resetting ensures the life duration is tracked accurately for future replacements and maintenance.
Verifying performance after replacement
Power the purifier back on and set it to your preferred fan speed. Listen for normal operation; a fresh filter should not produce unusual noise or a muffled airflow. Check the front panel indicators to ensure the filter status reads as expected. If you notice continued odor, reduced airflow, or inconsistent sensor readings, recheck seal integrity and filter seating. A well-seated, genuine filter will restore expected performance and prevent bypass. Environments with heavy dust or pet dander may shorten filter life; plan for more frequent checks and replacements in high-traffic areas.
Common mistakes to avoid during replacement
- Using non-genuine or incompatible filters, which can leak around the seal.
- Forcing the filter in at an angle, which damages the housing and reduces seal integrity.
- Skipping the reset step, causing inaccurate life tracking and premature replacements.
- Touching the filter media with bare hands and leaving fingerprints on surfaces that could affect airflow.
- Reusing old filters, which retain trapped pollutants and reduce efficiency. Always replace with a fresh filter when indicated.
Maintenance tips to extend filter life and maintain air quality
- Place the purifier away from sources of humidity, heat, and direct sunlight to prevent filter wear.
- Keep room doors and windows closed during operation to maximize filtration effectiveness.
- Run the purifier at an appropriate speed for your room size to balance filtration with energy use.
- Clean the exterior housing periodically to reduce dust buildup around the intake and exhaust.
- Record replacement dates in a simple log to anticipate future maintenance and avoid overdue changes.
When to replace filters across LEVOIT models
Filter life varies by model, environment, and usage. If your unit has a dedicated indicator, trust that reading first. In low-dust environments, a replacement cycle can be longer; in busy households with pets or smokers, it may be shorter. Always align with the model’s user manual, and consider adding maintenance reminders to your calendar. If the indicator becomes unreliable, contact customer support to confirm the correct replacement interval and filter type for your specific purifier family.
Final recommendations from Air Purifier Info
Air Purifier Info emphasizes using model-appropriate, genuine filters and following the official reset procedure after installation. Keeping a routine maintenance schedule helps sustain filter efficiency, reduces energy use, and preserves air quality. The right filter choice and careful installation are essential for achieving optimal performance and the expected lifespan of your LEVOIT purifier. Air Purifier Info’s verdict is clear: follow the manual, replace on schedule, and verify proper seating and reset.
Tools & Materials
- Replacement LEVOIT filter (model-specific)(Ensure it matches your purifier model family and is sealed in its packaging until use)
- Clean, dry cloth(For exterior dusting before and after replacement)
- Gloves (optional)(Keeps hands clean and avoids contaminating the filter media)
- Owner's manual or model number handy(Helpful to confirm compatibility and reset steps)
- Soft brush or cotton swabs(For cleaning the filter housing lips or seams)
Steps
Estimated time: 15-20 minutes
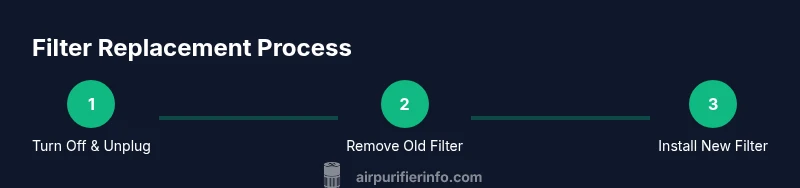
- 1
Power off and unplug the purifier
Always start by turning off the unit and unplugging it to avoid any risk of electric shock or unintentional operation while you work on the filter.
Tip: If the unit is warm, wait a few minutes for it to cool before handling. - 2
Open the filter housing
Access the filter compartment by releasing the housing cover according to your model’s design. This usually involves pressing a latch or twisting the cover.
Tip: Do not force the cover; use the built-in release mechanism to avoid damage. - 3
Remove the old filter
Gently pull the old filter straight out to avoid dislodging internal components. Dispose of it following local guidelines for household filters.
Tip: Take a quick note of the filter orientation for reference when installing the new one. - 4
Prep the new filter
Unpack the replacement filter and inspect for packaging materials or damage. Some filters have orientation arrows that must align with the housing markings.
Tip: Do not remove any protective seals or tabs until you’re ready to install. - 5
Install the new filter
Insert the new filter so it sits firmly and matches the orientation arrows. Make sure it seats evenly and the housing seal is clean.
Tip: If the filter doesn’t click or seat, remove and reinsert with a gentle, even pressure. - 6
Close the housing
Reattach the housing cover securely to ensure a proper seal. A loose cover can affect performance and noise.
Tip: Wipe away any dust around the seal so you don’t trap debris inside. - 7
Reset the filter life indicator
Perform the reset according to your model’s instructions, typically by holding a reset button or navigating to a reset option in the menu.
Tip: If unsure, consult the manual or Air Purifier Info for model-specific reset steps. - 8
Power on and test
Plug the unit back in, power it on, and run at a standard setting to confirm normal operation and airflow.
Tip: Listen for a normal, unobstructed airflow and check for any warning indicators.
Questions & Answers
Can I reuse a LEVOIT filter after cleaning?
No. LEVOIT filters are designed for single-use with the captured pollutants. Reusing a filter can reduce efficiency and compromise air quality.
No, filters are designed for single-use. Reusing a filter can reduce filtration efficiency and air quality.
What if the filter indicator keeps flashing after replacement?
If the indicator persists, confirm the filter is seated correctly and that you reset the indicator properly per your model manual. If needed, consult customer support.
If the indicator keeps flashing after replacement, check seating and reset steps, and contact support if needed.
Do all LEVOIT models use the same reset method?
Reset methods vary by model. Always refer to the user manual for model-specific steps, or check the official LEVOIT support resources.
Reset methods differ by model; check the manual or official support for the exact steps.
Where can I buy genuine LEVOIT filters?
Buy genuine filters from LEVOIT’s official store or authorized retailers to ensure compatibility and performance.
Purchase filters from LEVOIT’s official store or authorized retailers to ensure proper fit and performance.
How often should I replace the filter in a pet-friendly home?
Pet households may require more frequent replacements due to dander and odors. Rely on the indicator and manual guidance tailored to your model.
Pets can shorten filter life; follow the indicator and model guidance for replacement timing.
Is it safe to replace the filter while the unit is plugged in?
No. Always unplug the unit before opening the housing to avoid electric shock or accidental operation.
Never replace the filter while it’s plugged in; unplug first for safety.
Watch Video
Main Points
- Replace with genuine filters only
- Follow model-specific reset steps after installation
- Ensure a clean, tight seal on the housing
- Use the filter life indicator as your primary guide
- Maintain a simple replacement log