When to Clean Air Purifier Filter
Learn exactly when to clean air purifier filter, how to tell when it’s dirty, and a safe maintenance routine tailored to your home—pets, dust, and allergies included.

The right time to clean air purifier filter depends on usage, local dust levels, and indicator signals. Check the filter monthly and clean or replace as recommended by the manufacturer; most homes do this every 3-6 months, but you’ll need it sooner in dusty environments, with pets, or during allergy seasons. Regular checks keep airflow high and indoor air clean.
Why Timing Matters for Air Purifier Filters
Proper filter timing is essential to maintain filtration performance and indoor air quality. An overworked, clogged filter can restrict airflow, strain the purifier’s motor, and allow more particles to circulate. According to Air Purifier Info, the best maintenance approach combines routine checks with clear criteria for cleaning and replacement, tailored to your home environment. By understanding what drives dirty filters—dust levels, pet dander, cooking fumes, and seasonal allergies—you can build a simple schedule that keeps your space healthier and your purifier running efficiently. This is the kind of proactive maintenance Air Purifier Info recommends to homeowners and renters who want reliable results without guesswork. The goal is to move from reactive fixes to a steady, predictable routine, so you’re never guessing when to intervene.
Signs Your Filter Is Dirty (and When to Check)
Filters accumulate dust and debris over time, and several clear signals tell you it’s time to check. Reduced airflow or a noticeable drop in the purifier’s cooling or fan noise can indicate a clogged path. A musty or stale odor in the room may also signal dirty filters and stagnant air. Many purifiers include a status indicator or app notification—use it as a baseline, but don’t rely on it exclusively. For homes with furry pets or heavy cooking, check the filter more often. In those environments, a monthly quick check plus a quarterly deep inspection helps catch problems early. Remember that even if the indicator isn’t lit, air quality can still degrade if the filter is covered in dust. Regular visual checks in between cleanings are part of a smart maintenance plan. Air Purifier Info emphasizes that signs are your friends, not excuses to postponem.
Factors That Change Cleaning Frequency
Several variables affect how often you should touch the filter. The environment matters: homes with high dust or pet dander demand more frequent checks. The purifier model and filter type also matter, because some devices use washable pre-filters while others rely on disposable HEPA cartridges that require replacement. Usage matters too: a purifier running 24/7 in a small, dusty apartment behaves differently from a unit used sporadically in a clean bedroom. Room size, humidity levels, and cooking activity influence how quickly debris collects on the filter. The Air Purifier Info team emphasizes that there’s no one-size-fits-all answer; instead, create a simple routine based on your space, and adjust as needed.
Cleaning vs. Replacing: What's the Right Move?
Cleaning a washable pre-filter is usually straightforward and extends filter life, but not all filters are washable. Disposable HEPA cartridges require replacement when dirty rather than cleaning. If you’re unsure, consult the manufacturer’s guidelines for your model; using the wrong cleaning method can damage the filter media and reduce effectiveness. Some filters can be gently vacuumed to remove surface dust, while others benefit from a mild rinse and air-dry in a clean area. Regardless of method, never use high-pressure water or harsh cleaners, and always ensure the filter is completely dry before reinsertion. In general, aim to strike a balance: clean during routine maintenance, and replace when performance doesn’t recover after cleaning.
How to Inspect Filter Condition Without Removing It
Many devices offer a transparent panel or window that allows you to peek at the filter layer without disassembly. If you can see obvious dust buildup or dark staining on the visible sections, it’s time to check deeper or consult the manual. A simple pinch-and-smell test can help—if you notice strong odors persist after cleaning, the odor source may be deeper in the system or the filter media might be past its useful life. Also, note any changes in noise, fan speed, or motor heat, which can signal airflow restrictions from a clogged filter. Always turn off and unplug the purifier before inspecting. This quick check helps you avoid unnecessary disassembly, saving time and keeping your unit in service longer.
Cleaning Methods for Common Filter Types
Most purifiers use a combination of a pre-filter and a main filter. Washable pre-filters are typically removed, brushed or rinsed with mild soap, and air-dried before reinstallation. For cartridge-based filters, avoid washing the main filter unless the manufacturer explicitly states it’s reusable; many HEPA cartridges are designed for replacement. Vacuuming the exterior of the filter housing can reduce surface dust. After any cleaning, ensure nothing is left damp and that there’s no residue on the seal. Keep replacement schedules in mind and track the dates on a calendar to stay on top of maintenance. By understanding your device’s design, you can choose the safest, most effective method each time.
Maintenance Scheduling by Environment
Create a simple environment-based schedule to reduce guesswork. In homes with frequent dust storms or strong pet presence, check weekly and plan deeper cleanings monthly. In clean, smoke-free spaces with minimal dust, a quarterly deep inspection plus monthly light checks can suffice. If your purifier is in a kitchen or near the stove, extra checks may be necessary to manage cooking oil aerosols. The goal is to tailor the routine to your living conditions, not to rely on a universal timer. Air Purifier Info’s guidance is to stay proactive and adjust as your space changes.
Tips for Prolonging Filter Life and Maintaining Air Quality
Small changes can preserve filter life and keep air clean. Place the purifier away from walls or furniture that block airflow, and position it in a central location for even circulation. Use high-quality replacement filters that match your device’s specifications. Keep humidity in a comfortable range to avoid mold growth on damp filters. Clean or vacuum the housing around the filter to prevent dust from falling onto clean media. Finally, log dates of checks and replacements so you can refine your schedule over time. By pairing a simple routine with mindful operation, you’ll sustain better indoor air quality with less effort.
Air Purifier Info's Verdict
Based on ongoing observations, the Air Purifier Info team recommends establishing a simple maintenance policy: inspect monthly, perform deeper checks quarterly, and tailor frequency to your environment and usage. The goal is to prevent reduced airflow and maintain effective filtration with minimal downtime. Trusting a consistent, manufacturer-guided approach helps homeowners and renters keep indoor air clean and comfortable. Air Purifier Info’s verdict is to treat maintenance as a loop: monitor, clean or replace as needed, and adjust with the seasons and activity level.
Authoritative Sources
- U.S. Environmental Protection Agency (EPA) Indoor Air Quality: https://www.epa.gov/iaq
- Occupational Safety and Health Administration (OSHA) Indoor Air Quality: https://www.osha.gov/indoor-air-quality
- National Institute of Environmental Health Sciences (NIEHS) Indoor Air Quality: https://niehs.nih.gov/health/topics/areas/air-pollution/index.cfm
Tools & Materials
- Soft brush or microfiber cloth(Dust surfaces and housing without scratching components)
- Mild detergent or soap(For washing washable pre-filters only)
- Water for rinsing(Lukewarm water preferred; avoid hot water)
- Towel or rack for drying(Air-dry completely before reassembly)
- Vacuum with brush attachment(Optional for stubborn surface dust on non-washable parts)
- Compatible replacement filter cartridge(Only if you plan to replace disposable filters)
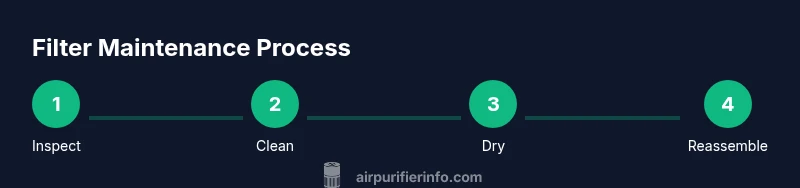
Steps
Estimated time: 20-40 minutes
- 1
Power down and unplug
Turn off the purifier and unplug the unit to ensure safety while inspecting or handling filters. This prevents accidental start-up and protects you from shocks. After unplugging, wait a few seconds for any residual charge to dissipate.
Tip: Wait 30 seconds after unplugging before touching components to avoid any static or charge buildup. - 2
Open the filter compartment
Access the filter housing according to your model’s manual. Do not force covers or pry components; keep dust contained by laying a towel or tray underneath.
Tip: Have a bowl nearby to catch loose dust as you open the housing. - 3
Inspect the filter for dirt
Look for visible grime on the media or pre-filter. If you see heavy dust, dark staining, or persistent odors, plan to clean or replace. Take note of observation date for future reference.
Tip: Document the date so you can track your maintenance cadence. - 4
Clean or rinse as appropriate
If your pre-filter is washable, rinse with mild soap and water, then air-dry completely. If not washable, use a vacuum to remove surface dust. Do not use hot water or harsh chemicals on any filter media.
Tip: Ensure all parts are fully dry before reassembly to prevent mold. - 5
Dry completely
Allow filters to dry in a clean, dust-free area away from direct sunlight. Reassemble only when fully dry to avoid moisture damage to the purifier’s internal components.
Tip: Drying time can vary; plan for at least 1-4 hours depending on humidity. - 6
Reinstall and test
Reinsert the filter securely, plug the unit back in, and run on a low setting for 10 minutes to confirm airflow. Listen for unusual noises and verify that indicator lights return to normal.
Tip: If you hear rattling or feel weak airflow, recheck seating and seals.
Questions & Answers
How often should I clean the air purifier filter?
Most households should check monthly and clean or replace every 3-6 months, depending on environment and usage. If you have pets, smoke, or heavy dust, do it more often.
Most homes should check monthly and clean or replace every 3-6 months; in dusty or pet-heavy spaces, check more often.
Can I wash a HEPA filter?
In many cases, HEPA cartridges are not washable. Follow the manufacturer’s guidance for your model and replace if indicated. Washing can damage the media and reduce effectiveness.
Check your model’s manual—HEPA filters are often not washable, and replacing is usually required.
What if odors persist after cleaning?
If odors persist after cleaning, the source may be deeper in the system or the filter media may have reached the end of its life. Consider replacement and check for other odor sources.
If odors won’t go away after cleaning, replace the filter and check for other sources of odor.
Is it safe to vacuum the filter housing?
Vacuuming the exterior housing to remove dust is generally safe, but avoid disturbing the filter media itself unless the manufacturer allows it. Follow model-specific instructions.
Vacuum the housing if recommended, but don’t damage or dislodge the filter media.
How do I know when to replace rather than clean?
If cleaning doesn’t restore airflow or if the media shows visible wear or damage, replacement is usually the best option. Always follow the manufacturer’s guidance.
If cleaning doesn’t help, it’s time to replace the filter per the manual.
Watch Video
Main Points
- Inspect monthly, clean or replace as needed
- Follow manufacturer guidelines to avoid damage
- Tailor frequency to dust, pets, and cooking activity
- Proactive maintenance improves air quality with less downtime