When to Clean Dyson Air Purifier Filter: A Practical Guide
Learn when to clean Dyson air purifier filters, how to spot signs of dirty filters, and a practical maintenance routine to keep indoor air clean and healthy.

To keep a Dyson air purifier performing at its best, inspect the filter monthly and perform a light clean every one to two months, depending on use and environment. Replace the main cartridge when airflow drops or odors persist, following the manufacturer’s guidance. Maintain a regular cadence to extend filter life and preserve filtration effectiveness. Always unplug before handling components and consult the model’s manual for model-specific steps.
Why cleaning the Dyson air purifier filter matters
Air purifiers help reduce dust, pollen, odors, and pet dander, but their effectiveness depends on a clean filter. If you ignore maintenance, you may notice slower airflow, louder operation, or odor buildup in the room. The question when to clean dyson air purifier filter isn't a fixed calendar day; it depends on usage, air quality, and household conditions. According to Air Purifier Info, a practical starting point is to inspect the filter monthly and perform a light clean every two to four weeks in high-dust environments. Regular care keeps the purifier operating near its designed CADR and helps protect your indoor air quality. By staying proactive, homeowners and renters can enjoy longer filter life and consistent performance. This article provides a clear, task-based approach to keep your Dyson purifier in top shape.
Signs it's time to clean or replace the filter
Most Dyson purifiers use a replaceable cartridge, and signs of wear appear before a failure. If you notice a drop in airflow, the unit runs louder than usual, or you smell stale air, it’s a cue to inspect the filter. Indicator lights on the device can also signal that the filter needs attention. Environmental factors strongly affect timing: a home with pets, heavy cooking, or high indoor dust will accelerate buildup. If these signs appear, plan a maintenance check sooner rather than later. Remember: running a purifier with a clogged filter can reduce its efficiency and may put more particulate back into the room. Air Purifier Info emphasizes a proactive cadence to avoid surprises and keep rooms comfortable.
Routine cleaning schedule: how to plan around your home
Most households find a practical cadence is to check the filter status monthly and perform a light cleaning every two to four weeks in dusty spaces. In milder environments, a deeper clean every two to three months may be sufficient, but always adjust based on odors, particle counts, and visible dust. If your purifier has a filter indicator, reset it after replacing the cartridge to keep track of maintenance. Air Purifier Info notes that a predictable schedule reduces guesswork and helps you avoid extended runtimes with dirty filters. Use a calendar reminder and keep a spare filter on hand to simplify timing. A well-planned calendar reduces interruptions to your daily routine and keeps air quality stable over time.
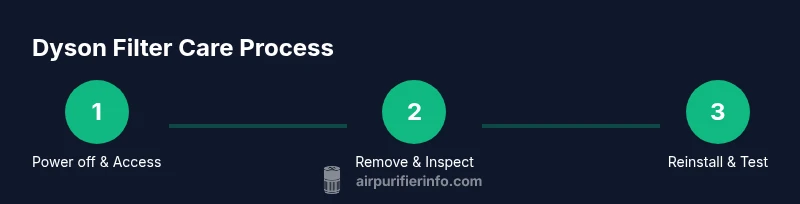
How to perform a safe filter clean (step-by-step overview)
First, unplug the unit and place it on a stable surface. Remove the front grille and the filter cartridge according to the model’s design. Gently tap or brush loose dust into a trash bag, avoiding high-pressure air that could push debris deeper into the housing. Wipe the interior with a dry microfiber cloth; do not immerse the filter in water unless the manufacturer explicitly permits it. If the filter is heavily soiled, consider replacement rather than washing. Allow any loosened dust to settle before reassembling. Finally, reinsert the filter, close the housing, and plug the unit back in. Run the purifier for a few minutes to ensure proper operation. This step-by-step keeps your purifier running smoothly without risking damage to filtration media.
What to clean and what not to clean around the filter area
Focus your cleaning on the housing, vents, and exterior surfaces; the filter itself should be handled gently and replaced if stained or deformed. The main filter is designed to capture fine particles; washing it can damage the filtration media and reduce performance. Non-washable components, such as seals and sensors, should be wiped with a dry cloth. If your model includes a pre-filter, you can vacuum or dust it lightly, but follow the manufacturer’s instructions. Keeping the intake grills clear prevents new dust from accumulating and helps maintain airflow. Regular exterior cleaning can prevent dust from re-entering the system and improve overall operation over time.
How to decide between cleaning and replacing: a practical rule
Cleaning extends the filter life only if the unit is still performing well; when in doubt, replace. A simple rule is to replace the cartridge whenever visible signs of degradation appear or when the filter indicator reaches the end of its life. In households with heavy use, plan for more frequent replacement; in lighter usage, a single replacement may last longer. Always use genuine or compatible replacement filters designed for your Dyson model, and avoid mixing different filter types within a single unit. Keeping a small stock of replacement filters helps you act quickly when timing is right.
Putting it all together: a maintenance cadence you can trust
By combining monthly checks, regular light cleanings, and timely replacements, you can keep your Dyson air purifier working efficiently. Air Purifier Info recommends documenting maintenance dates and watching for changes in airflow or odors as primary cues. In addition, maintaining a clean surrounding environment—vacuuming floors, washing fabrics, and reducing sources of strong odors—supports the purifier’s performance. The practice reduces dust circulation in living spaces and helps protect sensitive occupants, such as allergy sufferers. Following a clear cadence minimizes guesswork and maximizes air quality over time. The Air Purifier Info team recommends staying consistent and revisiting your plan each season.
Tools & Materials
- Soft-bristle cleaning brush(Used to dislodge dust from the filter housing without bending delicate parts)
- Microfiber cloth(For gentle wipe-down of housing and sensors)
- Vacuum with brush attachment(Optional for removing dust from the unit exterior and housing crevices)
- Mild dish soap (optional)(Only if manufacturer allows cleaning non-filter parts; avoid the filter media)
- Latex gloves(Protection when handling dirty filters)
- Replacement filter cartridge(Use model-compatible cartridge; replace when performance declines)
Steps
Estimated time: 20-30 minutes
- 1
Power down and unplug the purifier
Unplug the unit and place it on a stable surface before touching any internal parts. This protects you from electric shock and prevents misreads from sensors during maintenance.
Tip: Always unplug first and keep the power cord away from the cleaning area. - 2
Open the housing and access the filter
Depending on the model, remove the front grille and slide out the filter cartridge. Handle carefully to avoid disturbing delicate seals or the sensor area.
Tip: If you’re unsure of the opening method, check the user manual for your exact model. - 3
Inspect the filter and housing for dust
Visually assess the filter for heavy discoloration, tears, or deformation. Inspect the housing for dust buildup near vents and seals, which can impede airflow.
Tip: Take a quick photo to document the filter’s condition before cleaning. - 4
Clean the housing and non-filter parts
Wipe interior surfaces with a dry microfiber cloth or a lightly damp cloth if allowed by the manual. Do not submerge the filter or soak seals. Vacuum nearby crevices if needed.
Tip: Don’t use harsh chemicals near sensors or seals; moisture can trigger damage. - 5
Decide between cleaning or replacing the filter
If the filter shows heavy soiling or odor, replace instead of attempting a wash. Some dust can be removed, but filtration media should not be compromised.
Tip: Keep a replacement on hand to minimize downtime when timing is critical. - 6
Reinstall the filter and reseal the unit
Insert the clean or new filter securely, reattach the grille, and ensure seals are seated. A loose seal can reduce efficiency and reintroduce dust.
Tip: Double-check the arrow alignment or label orientation to ensure correct placement. - 7
Test operation and reset indicators
Plug the unit back in, power it on, and run it briefly to verify airflow. If your model has a maintenance indicator, reset it after replacing the cartridge.
Tip: Listen for steady airflow and observe any unusual sensor alerts during the first run.
Questions & Answers
How often should I check the filter status on my Dyson purifier?
Use the device's indicator lights and signs of odor or reduced airflow to guide maintenance. A monthly check is a practical starting point for most homes.
Check the status monthly using indicator lights and any changes in odor or airflow.
Can I wash Dyson filters?
Generally, the main filter should not be washed. Cleaning should focus on exterior surfaces and housing unless the manufacturer specifies otherwise.
No—do not wash the main filter unless the manual explicitly allows it.
What should I do if airflow remains low after cleaning?
If airflow stays low, inspect for damage, obstructions, or degraded filtration. Replace the cartridge and ensure vents are clear.
If airflow stays low after cleaning, check for damage or obstructions and replace the filter if needed.
Do replacement filters differ by model?
Yes, use replacement filters designed for your Dyson model. Mixing filter types can reduce effectiveness and may violate warranty terms.
Yes—use the filter made for your exact model.
Is it safe to operate the purifier while cleaning?
No. Always unplug the unit before handling internal parts to avoid shock and sensor misreads.
No—unplug before starting, then reassemble after cleaning.
Watch Video
Main Points
- Inspect monthly for signs of wear or odor.
- Do not wash the main filter; replace when necessary.
- Keep the intake clear and clean surrounding areas.
- Use model-specific replacement filters for best performance.
- Document maintenance dates to maintain consistent air quality.