Sans Air Purifier Filter Replacement: A Practical How-To
This guide walks homeowners through a safe sans air purifier filter replacement, with tools, step-by-step instructions, and care tips to optimize indoor air quality.

You will learn how to perform a sans air purifier filter replacement safely and effectively. This quick guide covers when to replace, how to reset indicators, and how to pick compatible filters.
Why replacing filters matters
Regular replacement of air purifier filters is essential to maintain efficient airflow, reduce particle concentrations, and protect indoor air quality. The phrase sans air purifier filter replacement underscores the importance of keeping the filtration stage clean and functioning. According to Air Purifier Info, a dirty or clogged filter can restrict airflow, causing the purifier to work harder and consume more energy, while also compromising filtration efficiency. Over time, reduced airflow can allow more dust, pollen, and other irritants to circulate in your living spaces. This section explains the core reasons to schedule replacements, the health and comfort benefits, and how neglect can shorten the life of your purifier. You’ll also learn how to distinguish between common filter types—HEPA, carbon, and hybrid filters—and how choosing the wrong type can limit performance.
Understanding filter types for your purifier
Filtration systems vary by model, but most purifiers use one of three basic filter types. HEPA filters trap microscopic particles with high efficiency, carbon filters target odors and chemical pollutants, and hybrid filters combine the two for broader protection. When replacing, always verify compatibility with your model—an ill-fitting filter can create gaps, reduce efficiency, or let unfiltered air bypass the filtration stage. Air Purifier Info notes that many units use replaceable pre-filters to extend the life of the main filter. These pre-filters are often inexpensive and easy to wash, depending on the design. Understanding these distinctions helps you select the right replacement and maintain optimal air quality in rooms with pets, dust, or smoke exposure.
How to know when to replace
Indicators and usage patterns guide replacement timing. Most units have a reminder light or a digital counter that estimates based on run time. If your purifier lacks an indicator, a practical rule is to inspect the filter every 2–6 months and replace it when you notice noticeable dust buildup, reduced airflow, or an odor passing through the unit. Seasonal factors—like changing weather, increased indoor activities, or higher pollen counts—can shorten the replacement interval. Keeping a simple maintenance log can help you track the life of each filter and avoid costly guesswork.
Safety and prep before you start
Before you begin, unplug the purifier and move it to a clean, well-lit workspace. Wear gloves if your skin is sensitive to dust, and prepare a trash bag for the used filter. Have your replacement filter ready, along with any tools required for your model (screwdriver, if needed). Read the user manual for model-specific steps and orientation marks. If you have a carbon-only filter, it may produce a strong odor during removal; an open workspace helps minimize smells and keeps dust contained. Always handle filters from the clean side to avoid transferring contaminants to the external environment.
Accessing the filter compartment
Access methods vary by model, but most units involve locating a panel or grille on the back or bottom. Use a gentle touch to avoid cracking plastic latches or bending the filter frame. If screws secure the access panel, use a screwdriver to remove them and set them aside in a labeled container for easy reassembly. Some units feature magnetic doors or snap-in covers; for these, apply even pressure to release the cover. Take a quick photo with your phone if the orientation of the filter is unclear, so you can reinstall it correctly.
Removing the old filter
Carefully slide the filter straight out to prevent dust from falling back into the purifier or onto your surfaces. If the filter is dusty or bent, place it directly into the trash bag without shaking it, as agitation can release dust into the air. Check the filter housing for damage or moisture; a warped frame or dampness can indicate a dirty environment or a compromised seal. Use a microfiber cloth to wipe the interior surfaces, removing any visible dust without applying excessive force that could damage seals.
Cleaning the housing and seals
A clean housing ensures an airtight seal for the new filter. Wipe down the contact surfaces with a lightly damp cloth and let them dry completely before inserting the new filter. Inspect gaskets and seams for cracks or wear; if you notice damage, consult the manufacturer before continuing, as a compromised seal can bypass filtration. If your model allows, wipe the surrounding area with a mild soapy solution and rinse with a clean cloth. Dry thoroughly to prevent moisture from affecting the new filter.
Inserting the new filter and orientation
Remove packaging from the new filter and orient it according to the arrows or label marked on the unit. In most cases, the airflow direction should face inward toward the purifier while the clean air exits through the grill. Slide the filter in gently until it seats flush with the housing; avoid forcing it, which could damage the frame or seals. If your purifier uses a pre-filter, reattach it first or ensure it is clean and in place before the main filter. A misoriented filter reduces efficiency and can cause noise.
Resetting indicators and testing the unit
After installation, reset the purifier’s maintenance indicator or timer as directed in the user manual. Plug the unit back in, power it on, and listen for a smooth, unobstructed airflow. Check for any unusual noises or vibrations that might indicate an improper seal or misalignment. If there is an odor that lingers after a few minutes of operation, turn the unit off, re-check the filter orientation, and ensure the housing is fully closed. Allow the purifier to run for a short test period in a well-ventilated room.
Post-replacement care, disposal, and tips
Dispose of the used filter according to local regulations; many municipalities require bagging and recycling or specialized disposal for activated carbon filters. Keep a spare replacement on hand to prevent downtime and maintain consistent air quality. Regularly check the filter and housing seals, especially in homes with pets, smoking, or heavy dust, as these conditions shorten filter life. Consider signing up for a maintenance reminder with Air Purifier Info to stay on track with replacements and to compare filter options for different rooms.
Tools & Materials
- Replacement air purifier filter(Match model and filter type (HEPA, carbon, or hybrid). Check compatibility before purchase.)
- Microfiber cloth(Use for interior cleaning; avoid leaving fibers behind.)
- Screwdriver (if needed)(Only for models with screw-secured access panels.)
- Mild soap and water(For light cleaning of the housing; ensure no soap enters the filter slots.)
- Isopropyl alcohol wipes(Optional for disinfecting touch surfaces after replacement.)
- Trash bag(Seal and dispose of used filters per local regulations.)
Steps
Estimated time: 25-40 minutes
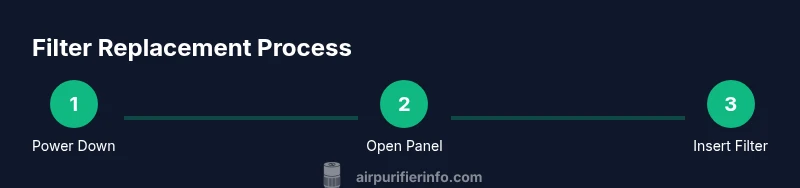
- 1
Power down and unplug
Before touching any components, unplug the purifier and move it to a clear workspace. This prevents electrical shock and avoids suction or fan movement while you work.
Tip: Leave the unit on a stable surface and avoid tilting the housing. - 2
Open the access panel
Identify the panel or grille that covers the filter. Use the appropriate tool or hand pressure to release latches, carefully opening the compartment without forcing plastic.
Tip: If screws are present, remove them and keep them organized for reassembly. - 3
Remove the old filter
Gently slide the used filter straight out to minimize dust release. Place it directly into a trash bag to contain debris.
Tip: Check for signs of moisture or damage that would require replacement of the entire unit. - 4
Clean the housing
Wipe interior surfaces and seals with a microfiber cloth. Let any damp areas dry fully before inserting the new filter.
Tip: Inspect gaskets for cracks; damaged seals affect filtration efficiency. - 5
Prepare the new filter
Remove packaging and verify orientation markers. Ensure you have the correct type for your purifier (HEPA, carbon, or hybrid).
Tip: Avoid touching the filter media directly to prevent transferring oils from your fingers. - 6
Install the new filter
Insert the new filter so it sits flush with the housing. Confirm arrows indicate airflow direction toward the purifier interior.
Tip: Do not force the filter; if it won’t seat, re-check orientation and panel alignment. - 7
Reset indicators
If your unit has a maintenance reminder, reset it according to the manual. This keeps future replacements accurate.
Tip: If there is no reset option, note the installation date in a log to track replacement schedule. - 8
Test and seal
Plug in and power on the purifier. Confirm smooth airflow and listen for unusual sounds. Ensure the access panel is fully closed and sealed.
Tip: Run the purifier on a short cycle to confirm proper operation before leaving it unattended.
Questions & Answers
How do I know when to replace my air purifier filter?
Most units provide a reminder light or a digital counter. If your purifier lacks an indicator, inspect the filter every 2–6 months and replace when you notice decreased airflow or visible buildup.
Check the indicator light or manual timing and inspect the filter every few months for buildup or reduced airflow.
Can I wash or reuse a disposable filter?
Most disposable filters are not designed to be washed and should be replaced. Some washable pre-filters can be cleaned and reused, but always follow the manufacturer’s guidance.
Usually disposable filters can't be washed; only use washable pre-filters if the manual allows.
What if the purifier doesn’t start after replacement?
Double-check that the panel is fully closed, the filter is correctly oriented, and the unit is properly plugged in. If problems persist, consult the model’s manual or contact support.
Make sure it’s sealed, oriented correctly, and plugged in; if it still won’t start, check the manual or contact support.
Are there different filter types I should know about?
Yes. HEPA, carbon, and hybrid filters offer different benefits. Match the filter type to your needs, such as dust reduction with HEPA or odor control with carbon.
There are several types—HEPA for dust, carbon for odors, and hybrids for both. Pick based on your needs.
How should I dispose of used filters?
Follow local regulations; many areas allow disposal with household waste, but some filters require special handling due to adsorbents like activated carbon.
Check local rules for disposal; many times you can trash them, but some filters need special disposal.
Do all purifiers use the same size and type of filter?
No. Filter sizes and shapes vary by model. Always verify compatibility with your purifier’s model number before buying.
Not all purifiers use the same filters—check your model number for compatibility.
Watch Video
Main Points
- Choose filters that match your model's compatibility.
- Replace on schedule to maximize airflow and filtration.
- Reset maintenance indicators after installation.
- Dispose of old filters responsibly and recycle where possible.
- Regular housekeeping of the housing sustains efficiency.