Blue Air Purifier Filter Change: How to Replace the Filter Safely
A comprehensive, educational guide to safely replace the blue air purifier filter, select compatible replacements, and maintain optimal indoor air quality for homeowners and renters.

Understanding blue air purifier filter change
Changing the blue air purifier filter is a key step toward maintaining indoor air quality. The color cue on some filters helps users identify the right stage of filtration, but always consult your purifier's manual. According to Air Purifier Info, color coding varies by brand, so don't assume every blue filter is the same. In practice, you should inspect the filter, note signs of clogging, and plan a replacement when airflow slows or odors linger. This guide uses universal steps and safety practices to help homeowners and renters perform a safe, effective filter change. We'll cover selecting the correct blue filter, preparing your unit, performing the change, and re-testing the purifier. Color-coded filters are popular in residential purifiers because they simplify routine maintenance; however, the color alone doesn't guarantee compatibility. Some purifiers use blue for pre-filters, others for carbon or specialized layers. Always verify compatibility using the model number and the manual. If you can't locate the manual, check the manufacturer's website or contact support.
In this article, we focus on safe, general practice for blue air purifier filter change and emphasize that using genuine replacement filters is crucial. Air Purifier Info emphasizes that color cues vary by brand, so always prioritize the manual guidance over the color alone.
noteDetailsFlagged":null
What the blue color signals across brands
Not all blue filters are created equal. Across manufacturers, blue can indicate different layers—pre-filtration, carbon absorption, or a specialty media. This means a blue filter from one model might not fit another, even if the external appearance looks similar. Always verify part numbers, dimensions, and seal type before purchasing. Some brands use color to differentiate between filter generations or to identify a specific stage in a multi-filter system. When in doubt, stick to the original blue filter recommended for your purifier and avoid cross-brand substitutions. Air Purifier Info suggests checking the purifier’s manual or manufacturer site for exact filter type and compatibility, then purchasing an exact replacement from the same brand or an approved equivalent. Keeping a photo of the filter label can help with future replacements.
Signs that your blue air purifier filter needs replacement
A filter’s effectiveness declines as dust, pollen, pet dander, and odors accumulate. Look for reduced airflow, louder operation, visible dirt on the filter, or persistent smells when the unit runs. If you notice any of these symptoms, schedule a replacement rather than waiting for a hard deadline. Do not ignore indicator lights or alerts from your purifier. Inconsistent performance can indicate a clogged or damaged filter, which may affect allergy relief and overall air quality. Air Purifier Info notes that proactive inspection helps maintain energy efficiency and indoor air quality.
Choosing the right blue replacement filter and compatibility checks
Start with the purifier’s model number and official filter part number. Use only replacement filters that match the exact size, seal type, and media layer recommended by the manufacturer. If your purifier offers a color-coded blue filter, confirm whether the color denotes a pre-filter, HEPA core, or activated carbon layer for your model. When shopping, compare dimensions, filtration media (HEPA, activated carbon, etc.), and any installation orientation indicators. Avoid back-order substitutions or generic off-brand filters unless explicitly approved. Air Purifier Info recommends relying on model-specific guidance to protect warranty coverage and ensure optimal filtration performance.
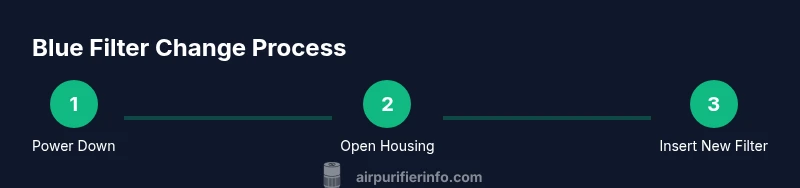
Preparing your purifier for a filter change: safety and setup
Move the purifier to a clean, stable surface away from walls and clutter. Unplug the unit before opening the housing to prevent electrical shock. Have a lint-free cloth handy to wipe dust around intake vents and the filter housing. If your model uses screws, gather a suitable screwdriver and keep screws in a small container to prevent loss. Wear gloves if you’re sensitive to dust, and consider placing a disposable bag under the work area to capture loose debris. Following proper safety steps helps minimize dust exposure and keeps the workspace clean.
Handling and disposing of used filters safely
Used filters contain accumulated dust and allergens; dispose of them according to local guidelines. Place the old filter in a sealed plastic bag to reduce dust during disposal. If the filter is reusable per the manufacturer, follow the approved washing or sanitizing method—otherwise, replace with a new blue filter. Always wash your hands after handling dirty filters, and avoid touching your face during the process. Proper disposal supports indoor air quality and environmental responsibility.
Installing the new blue filter and re-sealing the housing
Align the new filter with the housing’s arrows and seats; ensure there are no gaps around the seal. If your unit has orientation markers, make sure the filter is oriented correctly. Re-secure the housing cover or screws, reattach any panels, and wipe away any fingerprints or dust. Before plugging in, verify that the door or panel is securely closed. Reconnect to power and confirm that the purifier starts smoothly with normal noise levels.
Resetting indicators and running a test after replacement
Most purifiers have a filter-change indicator that must be reset after replacement. Follow the manual’s instructions to reset the counter; if there’s no dedicated reset, unplug for a few seconds and plug back in while the unit is off. Power the purifier on and observe airflow and noise for a few minutes. If the unit runs normally, run it on a higher fan setting briefly to ensure the new filter is properly seated and performing as expected. If you notice irregular sounds or reduced airflow, stop and recheck the filter seating. AIR Purifier Info emphasizes verifying operation after every change to ensure clean air delivery.