Levoit Air Purifier Cleaning: A Complete Step-by-Step Guide
Learn how to clean your Levoit air purifier safely and effectively. This guide covers exterior cleaning, filter handling, and maintenance tips to improve indoor air quality in 2026.

Levoit air purifier cleaning can be done safely at home with a clear, step-by-step routine. This guide covers unplugging, exterior wiping, filter handling, and how to decide when to replace filters. By following the steps, you’ll maintain airflow, reduce odors, and keep your purifier running efficiently in 2026.
Why Cleaning Your Levoit Air Purifier Matters
Maintaining your Levoit air purifier through regular cleaning is essential for optimal performance and indoor air quality. Dust, pet dander, kitchen odors, and smoke can accumulate on grills, sensors, and filters, reducing airflow and filtration efficiency. For homeowners and renters, this task is not merely cosmetic; it directly affects allergen control, odor reduction, and energy use. According to Air Purifier Info, regular upkeep extends filter life and sustains peak CADR (clean air delivery rate), helping you get the most from your investment in 2026 and beyond. In this guide, you’ll learn a safe, step-by-step approach to cleaning without compromising components.
Understanding Levoit Purifier Components
Most Levoit units use a three-stage filtration system: a pre-filter, a true HEPA filter, and an activated carbon filter. The exterior panels and intake grills are designed to be wipe-clean, while the filter compartment is accessed by removing the front or side panel (model variations may differ). Keeping the pre-filter free of hair and dust helps prevent the main filter from clogging prematurely. While features vary by model, the core principles of cleaning and maintenance stay consistent, making this guide broadly applicable for Levoit owners.
Safety First: Unplug and Inspect
Before any cleaning, unplug the unit from the power source and switch the purifier off. Place the purifier on a stable surface with good lighting so you can see dust in nooks and crevices. Avoid using wet cloths on electrical components and never immerse the purifier or filters in water. If you notice any visible damage or frayed cords, stop and contact the manufacturer for service. These precautions keep you safe while you refresh the device.
Preparing Your Cleaning Space and Schedule
Choose a well-ventilated area to clean the purifier—a kitchen counter or laundry room works well. Gather tools and materials ahead of time and set aside a time window you can commit to, such as a low-usage period. A light, routine maintenance session every couple of months helps preserve performance; heavier cleaning can be done seasonally or when you notice reduced airflow or lingering odors. Keeping a simple calendar reminder can help you maintain a steady rhythm.
Exterior Cleaning: Wipe Down and Vents
Begin with a dry microfiber cloth to remove surface dust from the housing and control panel. For stubborn grime on plastic surfaces, dampen the cloth lightly with water or a mild soap solution, then wipe away. Pay special attention to the intake and exhaust grills, as dust tends to accumulate there and can impede airflow. If the unit has a removable front panel, wipe the inner surfaces gently and ensure there is no residue on the tactile buttons that could affect operation.
Handling Filters: When to Clean vs Replace
Levoit filters typically come in three components: pre-filter, true HEPA filter, and activated carbon filter. The pre-filter is usually washable or reusable, but the HEPA and carbon sections are generally not washable and should be replaced according to the manufacturer’s recommendations. If your purifier begins to emit odors, if airflow slows, or if a cleanable pre-filter appears worn, prepare to replace the main filter assembly. Always consult your model’s manual, as instructions vary by variant.
Cleaning the Filter Tray and Housing
If your model allows filter removal, take out the entire filter cartridge as directed by the manual. Use a dry microfiber cloth or a soft brush to remove dust from the filter housing and tray. Do not use water on the filter cartridge itself; instead, wipe the housing with a slightly damp cloth and then dry completely before reinstalling. Ensure the gasket seats evenly to prevent air leaks and maintain optimal filtration.
Cleaning the Intake, Outlet, and Sensors
Dust can accumulate on the intake and outlet vents, sensors, and any display panels. Use a soft brush or cloth to remove debris from these areas. For sensors, avoid harsh cleaners; a dry microfiber wipe is often sufficient. If your model includes a UV-C or ionization feature, refer to the manual for safety guidance; some components should remain off during cleaning to prevent unexpected operation.
Deep Cleaning and Vacuuming Dust from Internal Louvers
In some models, you can access internal louvers or channels where dust collects. Gently vacuum these areas with a brush attachment, holding the nozzle at a safe distance to avoid bending delicate components. This step helps restore airflow and prevents dust from recirculating back into the room. Refrain from using high-powered vacuums directly on filters; filters are designed to capture dust, not to be vacuumed aggressively.
Drying, Reassembly, and Testing Airflow
Let all components dry completely before reassembling. Reinsert the HEPA and carbon filters (if applicable) and reseat the front panel securely. Plug the unit back in and run it on a low setting to ensure it starts without unusual noises. Check that air is flowing smoothly from the vents and that any indicator lights behave normally. If you notice unusual sounds or odors after reassembly, power down and recheck seals.
Replacement Filters: What to Buy and When
Filter replacement needs vary by model and usage. Keep a spare set of the correct replacement filters on hand and replace within the manufacturer’s recommended interval. If you see a noticeable drop in CADR, persistent odors, or increased energy consumption, it may be time to replace the filters rather than attempting a deep clean. Always buy genuine or manufacturer-approved replacements to protect performance and warranty.
Maintenance Rhythm: A Practical Schedule for 2026
Create a simple maintenance rhythm that matches your home environment. In homes with heavy dust or pet dander, perform a light exterior wipe monthly and a full filter check every 2-3 months. In quieter environments, a bimonthly exterior clean and quarterly filter review may suffice. Document clean dates and model-specific recommendations to build a predictable routine that supports clean air in 2026 and beyond.
Tools & Materials
- Soft microfiber cloth(For exterior surfaces and grills; avoid scratches)
- Mild soap or detergent(Dilute in water for light cleaning)
- Isopropyl alcohol 70%(Disinfect exterior surfaces; use sparingly)
- Vacuum with brush attachment(Gently remove dust from vents and housing)
- Replacement filter set(Only replace with manufacturer-approved filters)
- Screwdriver (Phillips)(Only if your model requires panel removal)
- Cotton swabs(Detail cleaning in small crevices)
- Gloves(Protect hands during cleaning)
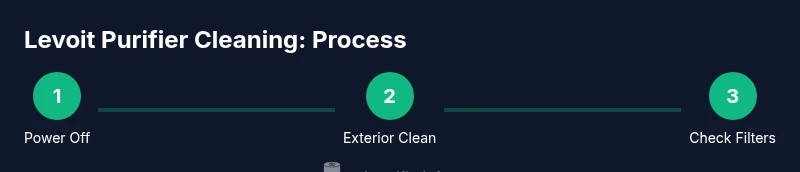
Steps
Estimated time: 40-60 minutes
- 1
Power down and unplug
Switch the unit off and unplug from the power source. Allow a moment for any residual power to dissipate and place the purifier on a stable surface. This protects you from electrical shock while you clean.
Tip: Label the cable or set a reminder so you don’t forget to unplug before each cleaning. - 2
Access the filter compartment
Open the front panel or filter door as directed by your model’s manual. Remove the filter cartridge carefully to avoid dislodging dust into the unit. If your model uses a sealed housing, skip this step and follow the manufacturer’s instructions for access.
Tip: Handle filters by the frame to minimize damage and keep the sealing edge clean. - 3
Clean exterior and grills
Wipe the exterior housing with a microfiber cloth. Use a damp cloth with a mild soap solution on stubborn marks, then dry. Clean the intake and exhaust grills to remove accumulated dust that can impede airflow.
Tip: Do not spray water directly onto the unit; avoid electrical components altogether. - 4
Treat the pre-filter and main filter
If your pre-filter is washable, rinse and air-dry completely before reinsertion. Do not attempt to wash HEPA or carbon filters unless specifically allowed by the manufacturer. Inspect the filter for tears and replace if damaged or discolored.
Tip: Establish a filter schedule that aligns with usage and environmental conditions. - 5
Clean the filter housing
Wipe the filter tray and housing interior with a dry microfiber cloth. If needed, use a lightly damp cloth to remove residue, then dry completely. Ensure there is no moisture before reassembling.
Tip: Keep the housing free of moisture to prevent mold growth. - 6
Inspect sensors and interior components
Gently wipe sensors and interior surfaces with a dry microfiber cloth. Avoid harsh cleaners near sensors, as chemicals can affect accuracy and operation. Check for any loose parts or misaligned seals before reassembly.
Tip: Use cotton swabs for tight corners but avoid applying liquid near sensors. - 7
Reassemble and reseal
Place the cleaned or replaced filter back into the housing, reseat the panel securely, and ensure all clips engage properly. Reconnect the power and prepare to test.
Tip: Double-check gasket alignment to prevent air leaks. - 8
Test airflow and indicators
Plug the purifier in and run on a low setting to verify airflow. Listen for unusual noises and verify indicator lights function. If airflow is weak, recheck filter seating and seals.
Tip: If airflow remains poor, consider professional service or replacement filters.
Questions & Answers
How often should I clean my Levoit air purifier?
Use a regular schedule based on usage and environment. Light cleaning monthly and a full check every 2-3 months works for many homes, with more frequent attention in dusty or pet-heavy households.
Clean regularly—monthly exterior checks and a full filter check every 2-3 months suit most homes.
Can I wash the filters?
Most Levoit true HEPA and carbon filters are not washable. Washing can damage filtration efficiency and void warranties. Replace filters as recommended by the manufacturer.
No, don’t wash the HEPA and carbon filters; replace them when needed.
What should I do if there’s still a smell after cleaning?
If odors linger after cleaning, replace the carbon filter and inspect for mold or moisture in the housing. Ensure the area around the purifier is dry and well-ventilated.
Replace the carbon filter and check for moisture or mold in the housing.
Are UV-C lights or ionizers safe during cleaning?
If your model includes UV-C or ionization features, use them only as directed by the manufacturer. Some manufacturers advise turning off these features during cleaning to reduce exposure risks.
Use UV-C or ionizers only as the manual directs; turn off during cleaning unless advised otherwise.
Do I need to replace filters for every cleaning?
Not every cleaning; you typically replace filters at model-recommended intervals or when performance declines. Regular checks help you decide the right time.
Only replace filters when needed, per the model’s recommendations.
Watch Video
Main Points
- Regular exterior and vent cleaning helps maintain airflow
- Avoid washing HEPA and carbon filters unless approved by the manufacturer
- Replace filters on schedule to maximize filtration efficiency
- Unplug before any cleaning and recheck seals after reassembly