How to Clean a Levoit Air Purifier: Step-by-Step
Learn how to clean your Levoit air purifier safely and effectively. This guide covers pre-filter care, HEPA filter tips, drying times, and maintenance to keep indoor air clean. Based on Air Purifier Info analysis, routine cleaning sustains airflow and filtration performance.

By following these steps, you’ll clean a Levoit air purifier safely, maintain airflow, and extend filter life. Start by unplugging and removing the front cover, then wash or vacuum the pre-filter as directed, avoid wetting the main HEPA filter, and dry all components completely before reassembly. According to Air Purifier Info, routine cleaning improves performance and air quality.
Why Regular Cleaning Improves Performance
Regular cleaning helps maintain optimal airflow, reduces dust and allergens circulating in the room, and extends filter life. According to Air Purifier Info Team, a dust-free intake means the purifier works more efficiently, which can translate into better odor removal and faster particle capture. This section explains the core benefits of routine cleaning and how neglecting maintenance can reduce pollutant removal over time.
If you’re comparing models or cleaning schedules, remember that cleaner air means less irritation for sensitive households and pets. A clean unit also runs more quietly because it doesn’t struggle to pull air through clogged media. When you clean a Levoit air purifier, you preserve the unit’s design integrity and maintain manufacturer-recommended performance ranges.
Understand Your Levoit Model's Design
Levoit purifiers share a common design language—an outer shell, intake grills, a front cover, a pre-filter, and a main HEPA filter. Some models include a charcoal filter for odors. While the general cleaning approach is similar, always consult your model’s user manual for screw locations, clip mechanisms, and filter order. The Air Purifier Info Team notes that while the basics stay the same, certain models require different disassembly steps, so adapt accordingly.
Grasping these design elements helps you access filters without damaging clips or seals. It also informs you which parts you can safely clean with water and which you should avoid applying moisture to. Proper disassembly minimizes parts breakage and speeds up reassembly.
Safety First: What Not to Do
Never spray liquids directly into the purifier’s vents or internal chambers. Do not soak HEPA media or the motor housing, and avoid aggressive scrubbing on fragile surfaces. If moisture enters the electronics, you risk short-circuiting and voiding warranties. Always unplug before any handling and work in a dry, well-ventilated area. The goal is to remove surface dust while preserving the integrity of filtration media.
To minimize risk, keep liquids away from electrical components and dry all parts completely before powering the unit again. If you’re unsure about a specific model, defer to the manual or contact the manufacturer’s support line for guidance.
The Cleaning Schedule: When and How Often
How often you clean depends on usage, environment, and whether you have pets or smoke nearby. In typical homes, a light surface dusting every 2–4 weeks and a full pre-filter clean every 1–3 months helps maintain airflow. The Air Purifier Info analysis shows that higher dust loads or allergen exposure may require more frequent attention. Use your judgment: if you notice reduced airflow or smell a stale odor, it’s time to clean.
Keep a simple calendar or reminder, so you don’t miss maintenance. Consistency matters as much as thoroughness when maintaining air quality within living spaces.
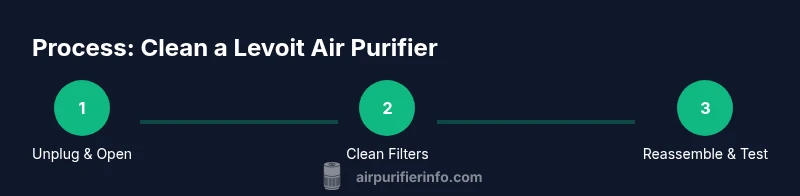
Step-by-Step Cleaning Overview
This overview outlines the main actions you’ll perform in the detailed steps that follow. It’s designed to set expectations and help you prepare the right tools. Remember, the exact sequence can vary by model, so refer to the user manual if needed.
- Unplug and prepare the workspace
- Open the housing and access filters
- Clean or replace the pre-filter per model guidance
- Clean exterior surfaces without moisture near electronics
- Reinsert filters in correct order and reassemble
- Run a quick test to ensure proper operation
Cleaning the Pre-Filter and Exterior
The washable pre-filter is usually the first line of defense against dust. If your Levoit model supports washing, rinse the pre-filter under lukewarm water with mild soap to remove embedded dust. Do not use hot water, bleach, or harsh cleaners. For non-washable pre-filters, use a soft brush or vacuum to lift loose debris. Wipe exterior surfaces with a damp microfiber cloth and dry with a separate clean cloth. Allow all parts to air-dry completely before reassembly. This step helps prevent mold growth and keeps odors at bay.
Air Purifier Info emphasizes checking the pre-filter condition before replacement. A lightly soiled pre-filter is often enough to extend time before replacement while preserving overall filtration efficiency.
How to Handle the HEPA Filter: Cleaning vs Replacement
The HEPA filter is the core filtration stage and is not designed for washing in most Levoit models. Washing can deform the media and reduce filtration performance. Instead, inspect for visible dust and replace when discolored or excessively clogged. You can wipe the exterior of the HEPA housing to remove surface dust, but avoid moisture contacting the media. If you’re unsure about the filter’s condition, refer to the manufacturer’s replacement schedule and guidelines. This approach preserves air quality and reduces particle breakthrough.
If your unit uses a charcoal or odor filter, wipe the exterior of that filter housing as well, and replace per the model’s recommendations. Frequent odor complaints often point to filter aging rather than improper cleaning.
Reassemble, Test, and Optimize Performance
Once all filters are dry, reinsert them in the correct order and reseal the housing. Plug in the purifier and power it on. Listen for smooth operation without rattling or unusual vibrations. If the unit shows any error indicators, double-check filter seating, seals, and the housing alignment. Proper sealing ensures that the purifier draws air efficiently and eliminates drafts around the case.
After cleaning, run the unit on a standard setting for 5–10 minutes to stabilize internal airflow. Observe for consistent intake and outlet airflow and confirm that LED indicators reflect normal operation. A clean unit should feel like a steady breeze rather than a gust of dust being pushed back into the room.
Troubleshooting Common Issues After Cleaning
If airflow seems weak after cleaning, verify that all filters are seated, the front cover is fully engaged, and there are no obstructions near the intake or outlet. Uneven airflow might indicate a damaged gasket or misalignment of the filter. If audible rattling occurs, reseat the filters and ensure clips or screws are secure. For persistent problems, consult the user manual or contact support. Regular maintenance reduces the likelihood of recurring issues and helps preserve device longevity.
Air Purifier Info Team notes that user mistakes during disassembly are a common source of post-cleaning problems. Take your time and follow the exact steps for your model to avoid inadvertent damage.
tipNameKeyFromStepOverride? null
Tools & Materials
- Soft microfiber cloth(For dusting exterior and pre-filter surfaces)
- Warm water(Lukewarm; to rinse or wash pre-filter)
- Mild dish soap(Gentle cleaner for pre-filter and exterior)
- Vacuum with brush attachment(Optional for dust removal)
- Replacement pre-filter (if applicable)(Have spares on hand if model uses washable pre-filter)
- Screwdriver (if model uses screws)(Only if your unit requires opening via screws)
- Isopropyl alcohol 70%(For sanitizing exterior surfaces (avoid contact with electronics))
Steps
Estimated time: 30-60 minutes
- 1
Unplug and prepare
Before touching the unit, unplug the purifier and move it to a clean, dry workspace. Remove any decorative grills carefully; refer to your model’s manual for exact hinge locations.
Tip: Power off and wait for the unit to cool if it’s recently running. - 2
Open housing and remove filters
Gently open the outer shell per your model’s instructions and remove the pre-filter and main filter. Do not yank; some models use twist-off housings or clips.
Tip: Note the order and orientation of filters for reassembly. - 3
Clean the pre-filter and exterior
Rinse the washable pre-filter under lukewarm water with mild soap, if your model allows washing. If not washable, use a vacuum to remove dust. Wipe the exterior with a damp cloth.
Tip: Let the pre-filter air-dry completely before reuse. - 4
Care for the HEPA filter exterior and replacement
Do not wash most HEPA filters; gently brush or vacuum the exterior to remove surface dust. If the HEPA filter is visibly dirty or discolored, plan for a replacement per manufacturer guidance.
Tip: Avoid soaking the HEPA filter or using liquids directly on it. - 5
Reassemble and test
Place the filters back in their correct order, reseal the housing, and plug in the unit. Turn it on and listen for unusual noises to confirm proper seating.
Tip: If you hear rattling or the unit doesn’t start, double-check filter seating.
Questions & Answers
Can I wash the HEPA filter in a Levoit air purifier?
Most Levoit HEPA filters should not be washed; washing can damage the filtration media and reduce effectiveness. Check your model’s manual for replacement guidance and only clean the exterior or housing as directed.
Usually you should not wash the HEPA filter; replace it when needed after checking your manual.
How often should I clean or replace filters?
Clean the pre-filter monthly or as dust accumulation dictates; replace the HEPA and carbon filters per manufacturer recommendations, typically every 6-12 months depending on usage and air quality.
Check the user guide for replacement intervals, and adjust if you have pets or smoke nearby.
Is it safe to use water on the exterior of the purifier?
Lightly dampen a cloth to wipe the exterior; avoid excess moisture near electrical components. Do not spray water directly into vents or on internal parts.
Yes, a damp cloth is fine for the exterior, but avoid sprays near the electronics.
What should I do if the purifier won’t start after cleaning?
Ensure the unit is properly seated and all filters are installed in the correct orientation. If it still won’t start, consult the manual or contact support.
Make sure everything is plugged in and filters are correctly installed.
Where should I store spare filters?
Store spare filters in a cool, dry place away from sunlight and humidity to preserve their media.
Keep spare filters in a dry place away from direct sun.
Watch Video
Main Points
- Unplug before cleaning and follow model-specific instructions
- Wash or vacuum the pre-filter as allowed; never soak the HEPA filter
- Drying time is essential to prevent fungi or damage
- Reassemble carefully and test for proper operation