How to Remove Do From Philips Air Purifier: A Step-by-Step Guide
Learn how to remove do from philips air purifier with a practical, model-agnostic approach: clean the housing, refresh or replace filters, and reset indicators for consistently fresher air at home.

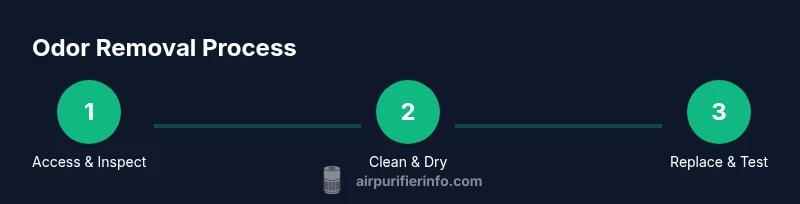
Unplug the purifier, access the filter stack, inspect for odor buildup, clean the housing and pre-filter, replace carbon/HEPA filters if present, dry all parts completely, reassemble, and reset the indicator. This model-agnostic approach helps manage odors in Philips units.
Understanding DO and Odor in Philips Purifiers
In this guide, we address the phrase how to remove do from philips air purifier? Odor buildup is a common reason people seek maintenance steps. When filters saturate with pollutants or dust accumulates inside the housing, smells can linger even after normal use. The goal is to reduce odor while preserving filtration efficiency. By following a model-agnostic routine—cleaning the housing, refreshing or replacing filters, and keeping components dry—you can restore a fresher indoor air quality without risking damage to the purifier. This approach aligns with best practices recommended by the Air Purifier Info team, and it applies across many Philips models. For model-specific details, always refer to your manual.
Safety First: Power Down and Prepare
Before you touch any internal components, ensure safety. Unplug the purifier from the outlet and wait at least 60 seconds to let any residual charge dissipate. Do not operate the device with open panels or while damp. If your purifier has an electronic panel on the housing, avoid direct water contact with sensors or circuitry. This preparation minimizes the risk of electric shock or moisture damage and sets up a clean, safe workspace for inspection and cleaning.
Tools and Materials You'll Need
Gather these essentials before you start: a soft microfiber cloth, mild soap, isopropyl alcohol (70%), a small vacuum with a brush attachment, replacement carbon and HEPA filters if needed, a screwdriver if your model requires access panels, and a dry towel for drying parts. Optional but helpful items include a small paintbrush for dust in tight corners and a model-specific user manual for reference. Having these on hand helps keep the process efficient and reduces the chance of accidental spills or missed steps.
Removing the Filter Stack: Accessing Odor-Causing Areas
Carefully remove the outer grille or front panel as indicated in your model’s manual. Lift out the filter stack and set it on a clean surface. Inspect each layer for mold, wet spots, or excessive dust. Odors often originate from the activated carbon absorbing particles; if the carbon layer looks saturated or discolored, plan to replace it. Keep track of how the layers were arranged so reassembly is straightforward and correct.
Cleaning the Housing and Pre-Filter
With the filters removed, use a dry microfiber cloth to wipe down the interior surfaces. A lightly damp cloth with mild soap can help remove residue along the seams, but avoid soaking any electronics or fans. If your unit has a washable pre-filter, remove it and rinse gently under lukewarm water, then air dry completely before reinstalling. Ensure every surface is completely dry to prevent mold or moisture damage.
Replacing Filters: Carbon and HEPA Considerations
Most Philips purifiers use a combination of carbon and HEPA filters to trap odors and particles. If you notice persistent smells after cleaning, inspect the carbon layer and the HEPA layer for saturation. Replace the carbon filter first if odor absorption seems diminished; follow with a fresh HEPA filter if it’s reaching the end of its life. Always use manufacturer-approved filters designed for your exact model to maintain performance and warranty.
Drying, Reassembly, and Indicator Reset
After cleaning and replacing filters, allow all parts to dry completely before reassembly. Reinstall the filter stack in the correct order, reattach the grille or front panel, and plug the unit back in. If your purifier has a filter-indicator light or app notification, perform the reset according to your model’s directions—usually a button hold or menu option. This ensures the unit accurately tracks when a replacement is due.
Testing Performance and Odor Observation
Turn the purifier on and run it in a normal room setting for 10–20 minutes. Check for improved odor levels and ensure there is consistent air output. If odors persist, inspect surrounding sources such as fabrics or cooking odors, and consider repeating the cleaning cycle with fresh filters. Regular maintenance—roughly every 6–12 months depending on usage—helps sustain odor control and overall air quality.
Long-Term Odor Prevention: A Simple Maintenance Plan
Create a recurring routine that includes quick monthly dusting of the exterior, a semiannual filter inspection, and an annual filter replacement aligned with your environment. Place the purifier away from damp areas or strong-smelling sources like cooking exhausts when possible. By combining routine cleaning with timely filter changes, you reduce odor buildup and extend the life of your Philips purifier.
Tools & Materials
- Flathead screwdriver (if required by model)(Check screws on access panel; Phillips may be used instead depending on model)
- Soft microfiber cloth(For wiping housing and sensors without scratching surfaces)
- Mild soap or gentle cleaning spray(Use sparingly on non-electronic surfaces)
- Isopropyl alcohol (70%)(For spot cleaning and disinfection of contacts)
- Vacuum with brush attachment(Gently lift dust from filters and interior)
- Replacement carbon filter(Use model-appropriate part if odor is persistent)
- Replacement HEPA filter(Use model-appropriate part if a filter is due)
- Dry towel(Patience for drying components fully)
Steps
Estimated time: Total time: 30-45 minutes
- 1
Unplug and prep
Power down the unit and unplug it from the wall. Clear a clean workspace and remove any nearby liquids or damp items.
Tip: Wait at least 60 seconds after unplugging to ensure internal capacitors discharge. - 2
Access the filter stack
Use the manual to locate the removable grill or panel. Gently remove the cover to expose the filter stack.
Tip: Keep track of the orientation of each filter layer. - 3
Remove and inspect filters
Take out carbon and HEPA filters. Look for saturation, discoloration, or mold on the edges and seals.
Tip: Replace carbon filters every 6-12 months depending on use. - 4
Clean the pre-filter and housing
Wipe the interior surfaces with a microfiber cloth. Rinse or wash a washable pre-filter, then dry completely.
Tip: Avoid exposing electronic components to water. - 5
Replace filters as needed
Install new carbon and HEPA filters in the correct order. Ensure seals are snug and orientation is correct.
Tip: Always refer to the model’s guide for exact filter order. - 6
Dry and reassemble
Let all components air-dry fully before reassembly. Reattach the grill and secure any screws.
Tip: Do not force panels; align tabs before snapping into place. - 7
Reset indicators
Reset the filter indicator using the device controls or app as applicable to your model.
Tip: If no reset option is visible, consult the manual for steps unique to your unit. - 8
Test operation
Plug in, power on, and run the purifier for 10–20 minutes in normal room conditions to observe airflow and odor reduction.
Tip: Consider testing with doors/windows closed for consistent results.
Questions & Answers
What does 'DO' mean on my Philips air purifier?
There is no universal 'DO' code across Philips models. Odor buildup or maintenance indicators are common reasons to perform cleaning or filter replacement. Always check your specific model’s manual for accurate meanings.
There isn't a universal DO code on Philips purifiers. Odor or maintenance indicators are common reasons to check filters and perform cleaning according to your model’s manual.
Can I wash the purifier’s filters?
Most carbon and HEPA filters in Philips purifiers are not designed to be washed. Washing can damage media and reduce effectiveness. Check the manual for exceptions and always replace when recommended.
Most Philips carbon and HEPA filters shouldn’t be washed. Replace them as directed by the manual.
How often should I replace the carbon filter?
Replacement intervals vary by use and environment, but a typical range is every 6 to 12 months. Consider local air quality and odor persistence when deciding.
Typically every 6 to 12 months, depending on usage and environment.
How do I reset the filter indicator?
Reset methods differ by model. Generally, you press and hold a reset button or use the control panel/app. Refer to your manual for exact steps.
Reset methods vary by model; consult the manual for exact steps.
What if odors persist after maintenance?
If odors persist, verify correct filter installation, ensure proper placement away from odor sources, and consider replacing filters again. If problems continue, contact customer support for guidance.
If odors persist after cleaning and filter changes, check installation and environment, then contact support if needed.
Watch Video
Main Points
- Inspect filters for odor buildup and replace when necessary.
- Clean the housing and pre-filter to remove trapped contaminants.
- Always use manufacturer-approved filters for your Philips model.
- Reset indicators to maintain accurate maintenance scheduling.
- Establish a regular maintenance routine to prevent odors.