How to Clean an Air Purifier Filter: Step-by-Step Guide
Learn how to safely clean air purifier filters, distinguish washable vs non-washable, and maintain peak performance. Includes step-by-step instructions, troubleshooting, and a maintenance schedule.

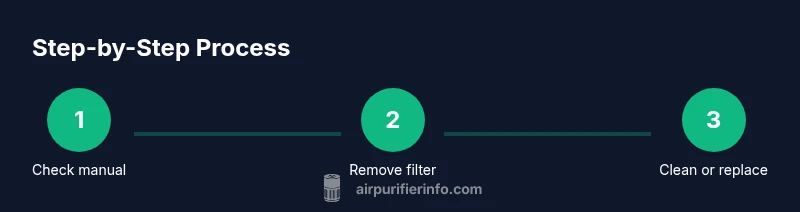
To clean an air purifier filter, identify whether the filter is washable. Turn off and unplug the unit, then remove the filter following the manual. For washable filters, rinse with lukewarm water and let air-dry completely before reinstallation. Non-washable filters should be vacuumed or replaced according to the manufacturer’s guidance. Never use hot water or detergents unless approved.
Why cleaning your air purifier filter matters
Regular maintenance of your air purifier filter is essential for airflow, energy efficiency, and overall indoor air quality. According to Air Purifier Info, regular filter maintenance improves efficiency, reduces energy use, and extends purifier life. When filters stay clogged, air flow can decline, noise may increase, and particles can accumulate, reducing filtration effectiveness. In homes with dust, pet dander, or smoke, a clean filter makes a noticeable difference in odor reduction and overall purifier performance. This section explains when and why to clean, how often to perform maintenance, and what signals indicate it’s time for a refresh. By understanding your filter type and following manufacturer guidance, you’ll get the most from your device while avoiding unnecessary replacements. Air Purifier Info’s guidance highlights practical steps homeowners can take to sustain indoor air quality over time.
Understanding filter types and care routines
Filters vary widely in construction and care requirements. Most households encounter three common categories: pre-filters, main HEPA or equivalent media, and carbon or odor-absorbing stages. Washable or reusable filters require water-based cleaning and thorough drying, while disposable or non-washable variants are typically vacuumed or replaced. Air Purifier Info analysis shows that following model-specific care instructions substantially extends filter life and maintains filtration efficiency. Always read the model manual for specifics like approved cleaners, drying times, and safe reinstallation practices. Regular pre-filter maintenance can prolong the life of the main filter and improve odor control. Tailor maintenance to your environment—pets, cooking habits, and smoking can accelerate dirt accumulation and odor buildup, making a more frequent cleaning plan worthwhile.
How to determine if your filter is washable
First, locate the filter label or your purifier’s manual and check for a washability designation. If the documentation states washable or reusable, you can wash using water (and only detergents approved by the manufacturer). If no washability is indicated, treat the filter as non-washable and opt for vacuuming or replacement. Always power down and unplug before touching the filter, and wear gloves if you have sensitive skin or allergies. Some models require removing the filter frame or housing first, so refer to the illustrations in the manual. When in doubt, contact customer support or consult the model’s online guidance.
Common maintenance mistakes and how to avoid them
Avoid hot water, bleach, or strong detergents unless explicitly approved by the manufacturer; they can damage media and create chemical residues. Never reinstall a damp filter—moisture promotes mold growth and can harm electronics inside the purifier. Don’t assume all filters are washable just because some are; confirm with the manual. For non-washable filters, don’t scrub or press hard with a brush; gentle vacuuming is acceptable in many cases, but replace as recommended. Finally, ignore indicator lights or performance declines—dust and trap buildup reduce efficiency and air quality.
Quick-start maintenance schedule for most homes
A practical rhythm is easy to maintain: inspect monthly, clean or vacuum every 1–3 months, and replace per the manufacturer’s recommended timeline. Homes with pets, children, or high dust levels may need more frequent attention. Smokers or heavy cooks will benefit from more frequent pre-filter cleaning and considering an air purifier with higher CADR (clean air delivery rate). Keeping a simple log of cleaning dates helps ensure you don’t miss critical maintenance and preserves indoor air quality over time.
Tools & Materials
- User manual for your purifier model(Essential for model-specific steps and filter type)
- Soft brush or microfiber cloth(Dust off surfaces without scratching)
- Lukewarm water(For washable filters only)
- Mild dish soap (optional)(Only if approved by manufacturer)
- Clean bowl large enough to submerge filter(For washing rinse)
- Towels or a drying rack(For drying and air circulation)
- Vacuum with brush attachment(Useful for non-washable or pre-filter dust)
Steps
Estimated time: 60-90 minutes
- 1
Power down and locate the filter
Turn off and unplug the purifier. Open the housing according to the manual and carefully remove the filter, minimizing dust escape. If the purifier uses a filter frame, remove it as directed. Keeping the area clean prevents dust from spreading during handling.
Tip: Have a trash bag or sealable container ready to capture dust as you remove the filter. - 2
Identify washable vs non-washable
Check the filter label or manual to determine washability. If the instructions permit washing, proceed to the next steps. If not, prepare for vacuuming or replacement. This decision affects cleaning method and drying time.
Tip: Note the model number and filter type to avoid using incompatible cleaners. - 3
Rinse or clean a washable filter
Rinse the filter under lukewarm running water until the water runs clear. Use minimal agitation to prevent damage. Do not use detergents unless the manufacturer approves them. Gently shake or pat dry with a clean towel to remove excess moisture.
Tip: Avoid wringing the filter; excessive squeezing can distort media. - 4
Dry the filter completely
Place the filter on a clean rack in a well-ventilated area away from direct sunlight. Allow full drying for the time recommended by the manufacturer (typically 12–24 hours). Do not reinstall while still damp, as moisture can foster mold.
Tip: If you’re in a hurry, use a fan to speed up air circulation—never use heat sources like a hairdryer. - 5
Clean or replace non-washable filters
For non-washable filters, use the vacuum’s brush attachment to remove loose dust from the surface and edges. Do not scrub or soak. If visible wear, cracks, or persistent odors occur, replace the filter following the manufacturer’s timetable.
Tip: Don’t apply excessive force with the vacuum; gentle strokes preserve filter integrity. - 6
Reinstall and test
Reinsert the filter in the correct orientation and reseal the housing. Plug the purifier back in and run it on a low setting to confirm airflow is normal and no unusual noises occur. Observe filter indicator lights to ensure the unit recognizes a correctly installed filter.
Tip: If the unit doesn’t start correctly, double-check that the filter is seated properly and the housing is fully closed.
Questions & Answers
Can I clean a HEPA filter?
Most HEPA filters are not washable; washing can damage the media and reduce effectiveness. Vacuum around the unit and replace per the manufacturer’s guidance. Some units use a washable pre-filter that can be cleaned separately.
Most HEPA filters should not be washed; vacuuming around the unit and replacing on schedule is the safer approach.
What if the filter is damaged after cleaning?
If the filter is bent, torn, or shows mold growth after cleaning, replace it immediately. A damaged filter compromises filtration and could release particles back into the room.
If you see damage after cleaning, replace the filter right away.
How often should I clean washable filters?
Cleaning frequency depends on usage, environment, and manufacturer guidance. Many users clean every 1–3 months; higher dust loads or pets may require more frequent cleaning.
Clean more often if you have pets or smoke indoors.
Is it safe to use detergents on filters?
Only use detergents if the manufacturer approves them. In most cases, water alone is enough to clean washable filters and detergents can damage the media or leave residues.
Only use approved cleaners; otherwise, stick to water.
What should I do with non-washable filters?
For non-washable filters, vacuum gently or replace according to the manufacturer’s schedule. Do not scrub or immerse in water.
Non-washable filters should be replaced on schedule and cleaned only as advised.
How do I know when to replace the filter?
Follow the purifier’s indicator lights and the manufacturer’s replacement timeline. Signs like reduced airflow or persistent odors indicate it’s time to replace.
Watch the indicator and follow the replacement schedule.
Watch Video
Main Points
- Know your filter type before cleaning.
- Washable filters require thorough drying.
- Avoid harsh chemicals unless approved.
- Regular maintenance improves air quality and purifier efficiency.