How to Wash an Air Filter: A Step-by-Step Guide for 2026
Learn how to safely wash a reusable air filter, determine when to wash, and reassemble for optimal purifier performance and improved indoor air quality.

In this quick guide, you’ll learn how to safely wash a reusable air filter, how often to wash it based on your environment, and how to dry and reinstall correctly. Proper washing preserves airflow, reduces strain on the purifier, and helps maintain better indoor air quality for homes with dust, pets, or allergies.
Why wash air filter matters
A clean air filter is essential for maintaining effective purification, steady airflow, and lower energy use from your purifier. Washable air filters are designed to be cleaned rather than discarded, which can save money over time and reduce waste. When a filter becomes clogged with dust, pollen, pet dander, or smoke particles, the purifier works harder and may struggle to maintain the recommended air flow. Regular washing, following the purifier manufacturer’s guidance, helps remove trapped particles and keeps the filtration system operating as designed. According to Air Purifier Info, well-maintained washable filters contribute to more consistent performance and better indoor air quality in households dealing with allergies, humidity fluctuations, or pet dander. This guide focuses on safe practices that protect both you and your purifier, so you can enjoy cleaner air without damaging components.
Understanding washable vs disposable filters
Not all filters are meant to be washed. Disposable filters are designed to be replaced when dirty, while washable filters can be cleaned and reused multiple times. Washable filters often use materials like synthetic fibers or metal mesh that tolerate water and mild soap. Before washing, always check the model’s manual or the purifier’s label for “washable” or “reusable” guidance. If a filter is not clearly labeled as washable, assume it is disposable and replace it when dirty. Using the wrong method can reduce filtration efficiency or introduce moisture inside the purifier, so accuracy matters.
How to identify a washable filter in your purifier
To determine if your filter is washable, look for explicit labeling on the filter frame or packaging (e.g., “washable,” “reusable,” or a care instruction). If the manual mentions a “wash” cycle or shows steps for cleaning with water, it’s a washable option. Some purifiers use multiple-stage filters where only the outer pre-filter is washable while deeper stages are disposable. Take note of the model number for quick lookup if you’re unsure. Proper identification prevents accidental damage and helps you follow the correct care routine.
Frequency guidelines by environment
Washing frequency depends on usage, environment, and household conditions. In high-dust, smoke-prone, or pet-heavy homes, you may need to wash more often—potentially every 1–2 months. In low-dust settings with minimal pet exposure, quarterly washing may suffice. A good rule of thumb is to check the filter monthly for visible dirt and odor; if you can see or smell contaminants, it’s time to wash. Over-washing can reduce filter longevity, while under-washing can allow contaminants to bypass filtration. Air Purifier Info recommends tailoring the schedule to your specific environment to maintain consistent purifier performance.
Safety considerations before washing
Safety first: unplug the purifier before removing the filter to avoid electric shock or sudden startup. Wear gloves if you have sensitive skin, and work in a well-ventilated area to minimize inhaling dust. Do not use boiling water, bleach, or harsh solvents on washable filters. Keep away from sharp objects that could puncture the filter frame. If the filter has any visible signs of damage, such as tears or warping, replace it instead of washing to maintain protection against pollutants.
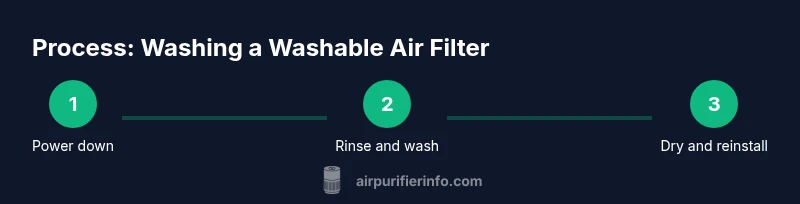
Washing process overview (Part 1)
Set up your washing station with a sink or basin large enough to submerge the filter. Rinse the filter under lukewarm water to remove loose dust. Use a mild soap solution—dish soap diluted in warm water is usually sufficient. Avoid hot water, as it can damage certain filter materials. Gently agitate with your hands or a soft brush to dislodge trapped particles without tearing the fibers. Rinse thoroughly until no soap residue remains, which can otherwise attract more dust later.
Washing process overview (Part 2)
For stubborn debris, repeat a light wash and rinse. Do not wring or twist a wet filter; instead, press gently to remove excess water. If the filter frame is metal, ensure it is completely dry before reassembly to prevent rust or corrosion. Air-drying is preferred over towels in many cases to minimize fiber shedding onto the purifier’s interior. If a manufacturer recommends air-drying for a specific duration, follow that guidance to prevent warping.
Drying and reinstallation considerations
Allow the filter to dry completely in a clean, ventilated area before reinstalling. Depending on the filter material, drying can take several hours to a full day. Reinstall the filter only when it is fully dry and reseat it securely to prevent air bypass. After reassembly, run the purifier on a low setting for 10–15 minutes to confirm normal airflow and listen for unusual noises. If you notice reduced airflow or persistent odor after drying, recheck the seal or consider replacing the filter if damage is suspected.
Common mistakes and how to avoid them
Common mistakes include using hot water, using harsh chemicals, wringing the filter, and skipping the manufacturer’s care instructions. Always verify whether the pre-filter is washable first and whether carbon components are replaceable rather than washable. While some people use a dishwasher on a gentle cycle, this is generally not recommended unless explicitly approved by the manufacturer. Keeping the washing process gentle preserves fiber integrity and filtration efficiency.
Replacing vs washing: deciding what’s best
Some filters are designed to be washable for a limited number of cycles, after which performance declines. Others are intended to be disposed of after a given period or when the filter shows wear. If you notice persistent odors, visible degradation, or reduced filtration efficiency after washing, it may be time to replace the filter instead of attempting another wash. Always prioritize manufacturer guidance and the purifier’s performance needs over convenience.
Maintenance schedule for different environments
For homes with pets or heavy cooking odors, a more frequent washing schedule—every 4–8 weeks—may be beneficial. In smoke-prone environments or areas with high outdoor pollution, you might wash every 1–2 months. In clean, low-dust spaces, a quarterly wash could suffice. Keep a simple calendar or reminder system to track cycles and prevent misses, which helps sustain consistent purifier performance over time.
Authority sources
- Centers for Disease Control and Prevention (CDC): https://www.cdc.gov
- Environmental Protection Agency (EPA): https://www.epa.gov
- National Institute of Environmental Health Sciences (NIEHS): https://www.niehs.nih.gov
Get started: build your own washing routine
Begin by selecting a dedicated washable filter care routine that fits your lifestyle. Create a simple checklist that includes: unplugging the purifier, inspecting the filter, performing the wash, confirming dryness, and re-installing. By following a consistent policy, you’ll keep your air purifier functioning at peak efficiency and enjoy higher indoor air quality. Remember: consult your purifier’s manual and Air Purifier Info’s guidance to tailor the process to your specific model and home environment.
Tools & Materials
- Mild dish soap(Diluted in lukewarm water (5–10 ml per liter of water))
- Water (lukewarm)(For rinsing and cleaning; avoid hot water that can warp materials)
- Soft brush or microfiber cloth(Gently agitate without tearing fibers)
- Bucket or basin(Large enough to submerge the filter)
- Gloves(Optional for sensitive skin)
- Towel for drying(Lay the filter flat to dry; ensure it’s fully dry before reinstall)
- Owner’s manual for purifier model(Helpful to confirm washable status and care steps)
Steps
Estimated time: 30-60 minutes
- 1
Power down and access the filter
Unplug the purifier and locate the filter housing. Remove the front cover and gently extract the filter frame without forcing it. This initial step prevents electrical hazards and sets up a clear workspace.
Tip: If unsure how to access, consult the model’s manual or manufacturer support. - 2
Rinse off loose dust
Hold the filter under lukewarm running water to remove loose dust and debris. Avoid using hot water, which can warp some materials. Gently shake the filter to help dislodge trapped particles.
Tip: Do not use high-pressure sprays that could damage delicate fibers. - 3
Prepare a mild cleaning solution
Mix a small amount of mild dish soap with lukewarm water in your basin. Submerge the filter and avoid scrubbing aggressively. Let it soak for a few minutes if there’s stubborn dirt.
Tip: Use a soft brush or cloth for tough spots rather than abrasive tools. - 4
Gently clean the filter
Gently agitate the filter with the brush or cloth to lift embedded dust. Rinse again with lukewarm water until all soap residue is gone. Ensure you reach all folds and corners.
Tip: Soap residue can attract more dust if not fully rinsed. - 5
Rinse until clear
Continue rinsing until the water runs clear and free of suds. Inspect for any remaining debris that may block airflow later.
Tip: If you still see visible residue, repeat the washing step briefly. - 6
Drain and lightly squeeze excess water
Gently press to remove excess water without wringing. Wringing can deform the filter structure. Avoid twisting to protect the integrity of the fibers.
Tip: Support the filter with both hands to prevent bending. - 7
Dry the filter thoroughly
Place the filter on a clean towel in a well-ventilated area. Allow it to air dry completely—this may take several hours or up to a full day depending on humidity.
Tip: Do not use a hair dryer or heater directly on the filter. - 8
Inspect for warping or damage
Check that the filter frame is straight and that no fibers are protruding. If you notice tears, warped sections, or persistent odor after washing, consider replacement.
Tip: A damaged filter cannot seal properly and may bypass filtration. - 9
Reinstall the filter and seal the housing
Once fully dry, reinsert the filter and reseal the housing. Ensure it sits evenly and that the edges are flush with the purifier body.
Tip: A loose seal can allow unfiltered air to bypass the filter. - 10
Run a quick test with the purifier
Turn the purifier back on and run it on a low setting for 10–15 minutes to verify airflow. Listen for unusual sounds and observe any residual odors.
Tip: If airflow remains weak, recheck the installation or consider professional service. - 11
Document the wash and set a schedule
Note the date of washing and set reminders based on your environment. Regular captures help maintain consistent performance over time.
Tip: Consistency beats ad-hoc cleaning for filter longevity.
Questions & Answers
Can all air filters be washed?
No. Only washable or reusable filters should be washed. Disposable filters should be replaced when dirty. Always check the purifier manual or filter packaging before attempting to wash.
No. Only washable filters should be cleaned with water; disposable filters must be replaced.
How often should I wash washable filters?
Washing frequency depends on usage and environment. If you have pets or high dust levels, inspect monthly and wash every 1–2 months as needed. In low-dust homes, quarterly washing may be sufficient.
It depends on your environment; check monthly and wash as needed.
Will washing damage the filter?
Washing can damage some filters if done aggressively or with harsh products. Use mild soap, lukewarm water, and gentle scrubbing. If fibers tear or if the filter becomes misshapen, replace it.
If it tears or warps, replace it instead of washing again.
Is air-drying enough or should I use a dryer?
Air-drying is preferred and safest for most washable filters. Avoid using hair dryers or towels to rub dry, which can damage fibers. Ensure it is completely dry before reinstalling.
Air-drying is best; avoid heat sources that could warp the filter.
Are carbon filters washable?
Most carbon filters are not washable; they are replacement items. Consult your model’s manual to confirm whether the carbon layer can be non-washed or if a replacement is recommended.
Carbon layers usually aren’t washable; check your manual to be sure.
What about pet odors or smoke odor after washing?
Persistent odors may indicate the filter is past its usable life or that odor-causing particles have penetrated deeper layers. Consider replacement if odors persist after washing and drying.
If odors persist after washing and drying, replace the filter.
Watch Video
Main Points
- Wash only washable filters per manufacturer guidelines
- Allow full drying before reinstallation to prevent mold
- Use gentle soap and lukewarm water; avoid harsh chemicals
- Inspect for damage and replace if needed
- Maintain a simple washing schedule based on environment