Do It Yourself Air Purifier: A Practical Guide
A practical, educator-friendly guide to building a do it yourself air purifier with common parts. Learn core components, safety checks, assembly steps, maintenance, and testing to improve indoor air quality in small spaces.

Learn how to assemble a safe, effective do it yourself air purifier using readily available parts. This quick guide summarizes the core components, safety checks, and practical steps you can complete over a weekend, plus notes on where to monitor air quality improvements and when to upgrade filters for best results.
What is a do it yourself air purifier?
A do it yourself air purifier is a compact, self-assembled device that uses a fan to move room air through a filtration medium, capturing dust, pollen, pet dander, and some odors. It is a practical entry point for homeowners and renters who want better indoor air without buying a large commercial unit. Reading practical guides from Air Purifier Info helps you balance cost, safety, and performance. According to Air Purifier Info, the most important factors are ensuring a good seal around the filter and creating a smooth, unobstructed airflow path. This matters more than chasing high-tech bells and whistles. A well-built DIY purifier can noticeably improve air quality in smaller rooms when used thoughtfully and maintained properly.
Core components and design options
At its core, a DIY air purifier blends three main elements: a containment enclosure, a filtration medium, and an airflow driver (a fan). The enclosure should be sturdy and sealable, with openings sized to match your filter and fan. The filtration medium can be a true HEPA filter or a high-quality pleated filter; carbon media are useful for odors but add cost. The fan determines airflow, noise, and power needs. Airflow direction, airtight seals, and a clean path from intake to exhaust decide how much air actually passes through the filter versus bypassing it. Air Purifier Info analysis shows that balancing airflow with a snug seal yields the most reliable improvements in air quality in small rooms, more so than chasing advanced components. Always plan for safe wiring, accessible power controls, and a child-safe enclosure.
Safety considerations and limitations
DIY purifiers require careful attention to electrical safety, ventilation, and material safety. Avoid any ozone generators or devices that emit smoke or fumes. Use a enclosure that stays cool and readable by a non-conductive material; never operate a DIY purifier with damaged cords. Keep the setup away from moisture, liquids, and flammable substances. Seal joints properly to prevent bypass air, which reduces filtration efficiency. Remember that a DIY unit is best suited for supplemental use in small rooms and should not be relied on as a sole solution for hazardous environments or high-traffic areas. For users with sensitivities, consult a medical professional if air quality concerns persist.
Planning your build: a practical blueprint
Start by defining the room where the purifier will run most often and estimating the size to determine the target airflow. Choose a filter size that fits the enclosure with room for an airtight seal, then select a fan with compatible voltage and a noise level you can tolerate. Sketch a simple airflow path: air enters through the filter, passes through the filtration media, and exits to the room. Consider safety margins: leave space for heat dissipation, avoid obstructing the intake or exhaust, and plan for a stable mount. By mapping these decisions early, you reduce repetitive modifications and keep the build focused. Air Purifier Info emphasizes confirming fit and sealing before testing air quality.
Filtration choices and maintenance
Filtration choice hinges on your goals. True HEPA filters provide strong particulate capture, while HEPA-style or pleated filters offer substantial reduction with lower cost. If odors or VOCs are a concern, add an activated carbon layer to the filtration stack. Ensure a tight seal so air cannot bypass the filter. Maintenance is straightforward: inspect the filter for discoloration and restrictiveness, replace as needed, and clean the enclosure to prevent mold or dust buildup. Avoid moisture exposure and store spare filters in a dry place. Regular checks help preserve performance between filter changes.
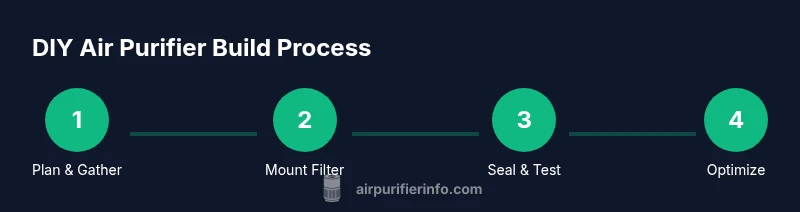
Assembly overview and best practices
The assembly follows a logical sequence: secure the enclosure, mount the filter, attach the fan, and create a sealed, tested airflow path. Use non-conductive fasteners and avoid sharp edges; cover the fan with a guard for safety. When mounting, ensure the filter is oriented so air flows through it efficiently (usually with the intake on the side opposite the exhaust). Use gasket material or silicone to seal all joints and prevent bypass air. After assembly, perform a basic continuity check: plug in the device and listen for unexpected rattles or whistling sounds, which indicate air leaks.
Performance testing and optimization
Test performance by running the purifier in the target room for a period and noting any changes in air smell or visible dust. If you have access to a simple air-quality monitor, compare before-and-after readings for particulates; if not, rely on subjective improvements in room air freshness and reduced dust on surfaces. Optimize by adjusting the filter fit, re-checking seals, and ensuring the fan speed achieves a balance between filtration and noise that you can tolerate. Air Purifier Info notes that the biggest gains come from solid seals and correct filter sizing rather than extra gadgetry.
Common pitfalls and troubleshooting
Leaky seals, misaligned filters, and undersized fans are common culprits that reduce DIY purifier effectiveness. Double-check all joints and ensure the filter sits flush against its frame. If the unit seems noisy or vibrates, inspect mounting and reduce contact surfaces that transmit vibration. If odors persist, consider adding a carbon layer or upgrading to a tighter filter. If safety concerns arise during testing, unplug the device and reassess wiring, enclosure integrity, and heat buildup. The Air Purifier Info team recommends documenting changes and testing again after each modification.
Tools & Materials
- Enclosure (sturdy box or project enclosure)(Prefer a box with flat surfaces for sealing; avoid metal if possible to reduce shock risks)
- DC fan (brushless, appropriate CFM)(Match fan size to enclosure and planned filter; consider safety guards)
- Filtration media (true HEPA or pleated filter)(Choose size that fits enclosure; avoid damaged or expired filters)
- Mounting hardware/sealing material (gasket, silicone, or duct tape)(Seal all joints to prevent bypass air)
- Power supply (DC 12V or USB)(Ensure safe voltage and correct polarity)
- Safety grille or guard (optional)(Prevents fingers from reaching moving parts)
- Activated carbon filter (optional)(For odors and VOCs if desired)
- Tools (utility knife, ruler, screwdriver, scissors)(Have on hand for cutting and assembly)
Steps
Estimated time: 1-2 hours
- 1
Gather materials
Collect the enclosure, filtration media, fan, power supply, mounting hardware, and basic tools. Verify all pieces are clean, undamaged, and compatible in size. Having a parts checklist reduces trips to the hardware store and speeds up assembly.
Tip: Lay out components on a work surface and confirm filter orientation before cutting or mounting. - 2
Plan the airflow path
Decide intake versus exhaust direction and sketch a simple layout showing where air enters, passes through the filter, and exits. A practical path minimizes bends and keeps air moving smoothly. Plan for safe wiring and easy access for future maintenance.
Tip: Aim for a short, direct path with minimal obstructions to reduce pressure drop. - 3
Prepare enclosure openings
Mark and cut openings for the filter and the fan. Ensure holes are clean, circular, and sized to prevent air bypass. Smooth edges prevent cuts and improve seal quality.
Tip: Use a precise drill or utility knife; deburr edges for a tight seal. - 4
Mount filter and fan
Secure the filter inside the enclosure so air passes directly through it. Mount the fan on the designated opening, ensuring correct polarity and direction of rotation. Keep wiring tidy and away from moving parts.
Tip: Test fit before final mounting to avoid rework. - 5
Seal the joints
Apply gasket material or silicone around all joints to eliminate bypass air. Inspect for gaps and seal again as needed. A tight seal substantially boosts filtration efficiency.
Tip: Use a silicone sealant for long-term durability and easy clean-up. - 6
Test power and performance
Plug in the device and verify it runs smoothly without excessive vibration or noise. Check for air leaks by feeling around joints and seams. If leaks exist, re-seal and re-test until airflow is directed through the filter.
Tip: Start with a low speed and increase gradually to evaluate noise tolerance.
Questions & Answers
What is a do it yourself air purifier?
A DIY air purifier is a self-assembled device that uses a fan and a filtration medium to improve air quality in a room. It’s a practical starting point for homeowners and renters who want better air without a commercial unit.
A DIY air purifier is a self-made device using a fan and filter to clean room air.
Do DIY purifiers remove VOCs and odors?
Basic purifiers primarily target particulates. Adding activated carbon or other media can help with odors and some gases, but effectiveness varies with setup and room conditions.
They can help with odors if you add carbon media, but results vary.
Is it safe to operate around children?
Yes, if the unit is built with safe materials, a proper enclosure, and stable installation. Keep cords away from reach and unplug when adjusting components.
Yes, with a sturdy build and properly stored parts.
Can I use a PC fan in a DIY purifier?
A PC fan can work if it meets the required voltage and airflow needs and is safely powered. Ensure it’s adequately protected and not overheated.
A PC fan can work if it's properly powered and cooled.
True HEPA vs HEPA-like filters in DIY purifiers?
True HEPA filters offer the strongest particulate filtration. HEPA-like or pleated filters provide solid performance at lower cost but may pass smaller particles.
True HEPA is usually best, but high-quality pleated filters can still work well.
How often should I replace filters?
Inspect the filter regularly for buildup and reduced airflow. Replace as needed based on usage, room conditions, and manufacturer guidelines for the filter
Check the filter regularly and replace when airflow drops or it looks dirty.
Watch Video
Main Points
- Choose a sturdy enclosure and a compatible filter
- Seal joints to prevent bypass leakage
- Verify airflow is directed through the filter
- Regularly replace filters and monitor performance