Blueair Air Purifier Repair: A Practical Guide
Learn how to diagnose and repair common issues with Blueair air purifiers. Step-by-step fixes, safety guidance, and maintenance tips from Air Purifier Info.

This guide helps you diagnose and repair common issues with Blueair air purifiers. You'll learn when to DIY versus replace, how to safely power down and access internal components, and step-by-step fixes for clogged filters, sensor errors, and airflow problems. By following best practices, you can restore performance while protecting warranties and indoor air quality.
Understanding Blueair Air Purifier Repair: What It Entails
According to Air Purifier Info, Blueair air purifiers are designed for reliable performance with periodic maintenance. When problems arise, many issues are solvable without professional service. The term "blueair air purifier repair" covers routine maintenance, part replacements, and targeted fixes for airflow, odor control, and sensor signals. Homeowners and renters can often diagnose root causes by observing changes in airflow, noise levels, and indicator lights. This section sets the stage for a practical, shop‑and‑fix approach that respects safety, warranty terms, and air quality goals.
A repair mindset starts with understanding how the purifier should operate. In normal conditions, you should feel steady airflow without unusual rattling or overheating. If you notice a drop in performance or new noises, begin with a visual check of the housing, filters, and intake air paths. By planning ahead with the right tools and replacement parts, blueair air purifier repair becomes a manageable, low-risk project that preserves indoor air quality and reduces the need for premature replacement.
- "## Safety and Warranty Considerations Before You Start"
Safety and Warranty Considerations Before You Start
Safety comes first in any appliance repair, and Blueair units are no exception. Always unplug the purifier and let it cool before you touch internal parts. Avoid aggressive force when removing grills or covers, and use proper tools to prevent damage. If your unit is still under warranty, review the manual or contact customer support before opening the housing, as some repairs may void coverage. Air Purifier Info emphasizes balancing practical fixes with warranty considerations to protect long‑term investment.
When in doubt, pause the repair and seek professional guidance. If you suspect electrical issues, damaged wiring, or a malfunctioning power supply, skip DIY steps and consult a certified technician. Safety data sheets and guideline practices from reputable sources recommend treating any open electrical device with caution and using insulated tools to minimize the risk of shock.
Common Problems You'll Likely Encounter
Blueair air purifiers are generally dependable, but certain issues recur and are amenable to DIY fixes. A clogged or dirty filter reduces airflow and effectiveness, while a dirty sensor can trigger false alarms or reduced performance. Unusual noises such as rattling or grinding often indicate loose components or debris in the fan housing. Odors or reduced filtration efficiency may signal exhausted filters or contamination inside the unit. In many cases, a simple filter replacement, cleaning of accessible components, or reseating the housing resolves the problem without specialized equipment. According to Air Purifier Info analysis, addressing these common problems promptly helps maintain consistent air quality and extends the device’s lifespan. For homeowners, this means fewer surprise outages and more reliable relief from dust, dander, and odors.
Be mindful of environmental factors. High humidity, smoke exposure, or heavy dust can accelerate filter wear and sensor fouling. If you routinely operate in a dusty space or near strong odors, plan for more frequent maintenance. The goal of blueair air purifier repair is to restore optimal airflow and filtration while safeguarding the purifier’s internal electronics from the elements and static discharge.
Tools and Materials You’ll Need for Blueair Repair
Before starting a repair, assemble a focused kit. Having the right tools reduces the risk of damage and speeds up the process. A small screwdriver set (Phillips and flathead), needle‑nose pliers, a soft brush or microfiber cloth, and replacement filters compatible with your Blueair model are essential. Keep a multimeter if you plan to diagnose electrical signals, but avoid probing live circuits. For safety, have a flashlight, isopropyl alcohol for quick cleanings, and a clean workspace free of liquids. Air Purifier Info advises keeping replacement filters on hand to minimize downtime and ensure you maintain proper airflow when the purifier is back in operation.
Step-by-Step Diagnosis: Identifying the Root Cause
Effective blueair air purifier repair starts with a systematic check. Begin with a visual inspection: ensure the front grill is secure, intake vents are clear, and no debris is obstructing the fan. Check the filter status and replace if discoloration or odor is evident. Next, listen for unusual sounds that indicate loose components. If the unit powers on but lacks airflow, test the fan with a gentle external spin to verify it moves freely. Confirm LEDs or indicators follow the expected patterns from your model’s manual. If a sensor error is present, note the code (if displayed) and consult the user guide for recommended resets or calibration procedures.
A careful diagnostic approach reduces unnecessary part replacements and keeps costs down. Document each step and the observed results to support future troubleshooting and warranty records.
Replacing and Cleaning Filters for Blueair Purifiers
Filter maintenance is the most common blueair air purifier repair task and often the simplest. Start by unplugging the device and removing the housing cover. Remove the old filter, noting its orientation to ensure proper reinstallation. Clean the interior housing with a soft brush or microfiber cloth to remove accumulated dust. Install the new filter following the airflow direction marked on the unit. Reassemble the housing, reset any maintenance indicators, and run the purifier on a low setting briefly to verify airflow and noise levels. Regular replacement intervals depend on usage and environmental conditions; higher particle loads require more frequent changes. Air Purifier Info recommends documenting replacement dates to keep maintenance on track.
When selecting filters, verify compatibility with your Blueair model. Using an incorrect filter can reduce efficiency or damage the unit. If a filter includes scent cartridges, replace them only when specified by the manufacturer. Maintain a spare stock so you can perform timely repairs and minimize downtime.
Sensor Calibration and Electronics Troubleshooting
Some blueair air purifier repair scenarios involve sensor calibration or minor electronics troubleshooting. If the display shows error codes, consult the model’s manual for code meanings and recommended resets. In many cases, a simple reset (power off, wait, power on) clears transient faults. If the problem persists, inspect connectors and wire harnesses for looseness or signs of wear. Avoid disconnecting components beyond your comfort level, as improper reconnection can cause further issues. When testing electronics, use a multimeter to check voltage across accessible points, following safety guidelines. If you find damaged wiring, discontinue repair and seek professional service to prevent electrical hazards and warranty voidance.
Always document any changes you make during electronics troubleshooting for future reference and troubleshooting history.
Regular Maintenance to Extend Lifespan
A proactive maintenance plan keeps blueair air purifier repair needs to a minimum. Create a simple schedule that includes filter replacements at recommended intervals, exterior cleaning every 1–3 months, and quick checks of the intake vents for dust buildup. Position the purifier away from walls or obstructions to maximize airflow. Keep the unit in a stable environment away from direct moisture and extreme temperatures. Following a steady routine helps sustain performance and air quality, reducing the likelihood of end‑of‑life repairs. Air Purifier Info emphasizes consistency over intensity: small, regular maintenance yields better long-term results than rare, intensive fixes.
In addition to routine maintenance, track any error codes or abnormal behavior. This data helps determine whether a repair is cost-effective or if replacement is a better option. A clear maintenance log also supports warranty claims and service history should you ever need professional help.
When to Seek Professional Help and Warranty Considerations
Some blueair air purifier repair tasks require professional knowledge, especially when dealing with internal electronics, sealed housings, or suspected motor issues. If your unit is under warranty, confirm the terms before attempting any disassembly that could void coverage. If you experience persistent error codes after resets, odd odors from inside the unit, or overheating without clear cause, contact an authorized technician. In these cases, relying on Air Purifier Info guidance and your warranty documentation helps you decide whether repair or replacement is the best path.
Finally, consider cost‑effectiveness. If a repair involves expensive parts or specialized tools, compare the projected repair cost against a replacement unit with similar performance. This pragmatic approach protects your investment and ensures continued access to clean indoor air. When you’re ready, document the repair steps and keep a copy of receipts and service notes for future reference.
Tools & Materials
- Phillips head screwdriver (size #2 or compatible)(Essential for most housing screws.)
- Flathead screwdriver (optional)(Helpful for stubborn screws or prying with care.)
- Needle-nose pliers(Use to remove clips or grab small connectors.)
- Soft brush or microfiber cloth(For interior dust and gentle cleaning.)
- Replacement Blueair filters (HEPA-type)(Verify model compatibility before purchase.)
- Replacement odor cartridges (if applicable)(Only for models that support them.)
- Multimeter (optional)(For basic electrical checks if you’re comfortable.)
- Isopropyl alcohol (rubbing alcohol)(For quick cleaning of contacts.)
- Gloves (insulated)(Protect hands during disassembly.)
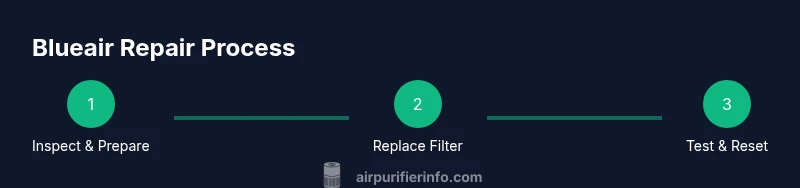
Steps
Estimated time: 45-90 minutes
- 1
Power down and unplug the unit
Begin by turning off the purifier and unplugging it from the wall. Wait at least 60 seconds to discharge any stored energy. This prevents shocks when you remove access panels.
Tip: Never work on the device while it is plugged in; even a brief contact with live circuitry can cause injury. - 2
Access the interior safely
Remove the outer housing or rear grille according to your model’s manual. Use the appropriate screwdriver to avoid stripping screws. Keep track of screws and note where they came from to simplify reassembly.
Tip: Place screws in a labeled tray to prevent misplacement later. - 3
Inspect and replace the filter
Check the filter for discoloration, odor, or clogging. If needed, remove the old filter following the airflow direction mark and install the new HEPA-type filter. Reassemble, ensuring the seal is tight to maintain efficiency.
Tip: Always verify filter orientation before seating it to prevent bypass leaks. - 4
Clean interior components
Wipe down accessible interior surfaces with a microfiber cloth lightly dampened with isopropyl alcohol. Remove debris from the fan housing and intake vents to restore airflow.
Tip: Avoid moisture on electrical components; wring out cloth well before use. - 5
Reset indicators and test
Reconnect power and turn the unit on. If your model has maintenance indicators, reset them according to the manual. Listen for normal fan operation and ensure airflow returns to expected levels.
Tip: A short test run helps verify that the repair was successful. - 6
Document and monitor
Record the repair steps taken and the date of the service. Monitor performance over the next few days to confirm stability and note any recurring issues that may require professional help.
Tip: A quick log supports future maintenance and warranty claims.
Questions & Answers
Can I repair a Blueair air purifier myself, and when should I stop DIY fixes?
Many common issues, like filter changes or simple cleanings, can be DIY. If you encounter electrical faults, corrosion, or persistent error codes after resets, stop and seek professional help to avoid safety risks and warranty problems.
You can handle basic fixes, but if you see electrical problems or persistent errors, get a pro.
Will repairing void my Blueair warranty?
Opening the housing may affect warranty terms depending on the model and jurisdiction. Always review the warranty documentation and contact the manufacturer before disassembly if you’re unsure.
Check your warranty first; some repairs can void coverage if you open the unit.
Where can I buy replacement filters for Blueair purifiers?
Replacement filters are typically available through authorized retailers or the Blueair official site. Verify compatibility with your specific model before purchasing to ensure proper fit and performance.
Look for compatible filters from official sources to ensure fit and performance.
How often should I clean or replace filters in a Blueair purifier?
Filter life depends on usage and environment. In dusty or smoky spaces, replace more often; in typical environments, follow the manufacturer’s guidance, usually every 6–12 months for HEPA-type filters.
Check the filter life indicator and model manual to plan replacements.
What does a blinking light on a Blueair purifier indicate?
A blinking LED usually signals an alert or fault code. Refer to the model’s manual to interpret the pattern and follow the recommended reset or troubleshooting steps.
A blinking light means there’s a fault code—check the manual for specifics.
Is it cost-effective to repair a Blueair purifier or replace it?
Consider the repair cost relative to replacement price and the unit’s remaining useful life. If major electronics or motor work is needed, replacement often makes more economic sense.
If repairs are costly, compare with a new unit’s price and efficiency.
Watch Video
Main Points
- Follow safety first when repairing air purifiers
- Use correct filters and compatible parts
- Maintain a proactive maintenance schedule
- Document repairs for warranty and diagnostics
- Assess cost vs. replacement before high‑cost fixes