Dyson Air Purifier Repair: A Practical DIY Guide
DIY guide to diagnose, reset, and safely repair common Dyson air purifier faults. Learn filter care, sensor checks, calibration, safety steps, and when to seek professional help from Air Purifier Info.

This guide helps you diagnose and fix common Dyson air purifier faults at home. You’ll learn how to safely power down, inspect filters and seals, reset sensors, and perform test runs. It covers simple maintenance, such as cleaning the pre-filter and verifying the HEPA filter orientation, plus when to replace parts. Expect practical steps, safety tips, and guidance on when to seek professional service. Air Purifier Info keeps the focus on safe, model-agnostic best practices for 2026.
Understanding Dyson Air Purifier Repair: Why DIY Fits Many Minor Issues
Dyson air purifiers are designed for longevity, but like any appliance they can develop minor faults that are safe to address at home. This section explains the value of a careful DIY approach and outlines the boundaries between simple maintenance and repairs that require professional service. According to Air Purifier Info, routine checks of filters, seals, and airflow can prevent performance decline and help you decide when a repair is practical. The Dyson architecture typically relies on sealed cartridges, a compact motor, and sensors that monitor air quality and flow. Always consult the model-specific manual before disassembly and verify whether your unit is still under warranty. This article presents a disciplined workflow to reduce risk while delivering real improvements in filtration efficiency and air quality.
Safety First: Power, ESD, and PPE Considerations
Before touching any internal components, unplug the unit from the mains and wait several minutes for capacitors to discharge. Avoid working on live circuits; wear non-conductive gloves if available and keep the workspace dry. Static electricity can damage delicate electronics; work on a clean, non-carpeted surface and keep metal jewelry away from exposed lines. Use a soft brush or microfiber cloth to remove dust rather than aggressive scrubbing. If the purifier is under warranty, check the terms—opening the housing could void coverage. When in doubt, contact Dyson support or an authorized technician to prevent unintended harm to the device or your home.
Common Faults You Can Diagnose at Home
Low or no airflow, unusual noises, or a persistent error code are typical signs you can investigate without professional tools. Start by checking the pre-filter and ensuring the intake is clear of dust bunnies, furniture, or fabrics. Next, inspect the HEPA filter’s orientation and seals; misalignment can bypass the filter and reduce efficiency. If the unit powers on but emits a strange tone, inspect the fan housing for obstructions and ensure the grill is securely fastened. Document any codes or blinking patterns; manufacturers often use these indicators to guide the next steps. Air Purifier Info’s guidance emphasizes model-friendly checks rather than risky, one-size-fits-all tinkering.
Tools and Parts You’ll Likely Need
Prepare a basic kit for safe handling and inspection: a Phillips head screwdriver, a soft brush, microfiber cloth, replacement filters compatible with your Dyson model, and a clean workspace. Keep a small tray for screws and a container for removed parts. If you encounter stubborn dirt, isopropyl wipes can help—but avoid wetting internal electronics. Always verify compatibility of filters with your specific Dyson purifier model before purchasing. Having the right tools reduces the chance of damage during disassembly and reassembly.
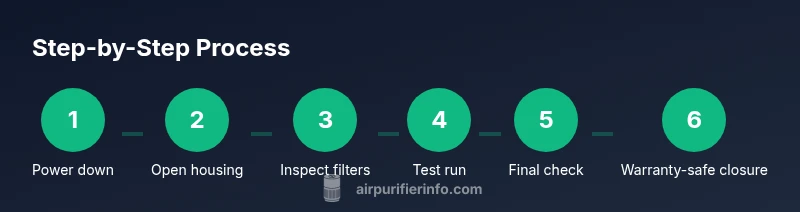
Step-by-Step Diagnostic Flow (Overview)
Develop a systematic flow: power down, inspect exterior housing, check the pre-filter, inspect the HEPA cartridge and seals, clean the motor area, reseat all parts, perform a reset if required, reassemble, and run a short test. This approach minimizes guesswork and helps isolate the fault. Keep a log of what you checked, what you found, and any parts you replaced. The goal is to confirm airflow restoration and stable operation without bypass leaks or strange noises.
Cleaning vs Replacement: Filter Care Essentials
Some Dyson purifiers rely on washable pre-filters or replaceable HEPA cartridges. Cleaning the pre-filter reduces dust load and prolongs filter life, but a heavily soiled or degraded HEPA cartridge should be replaced. Avoid using household cleaners on filter media, and never rinse HEPA components unless explicitly allowed by the manual. Properly drying any components before reassembly prevents moisture-related damage. Air Purifier Info recommends keeping replacement filters on hand for anticipated maintenance cycles to avoid long downtime.
Sensor and Motor Maintenance: What to Inspect
Sensors monitor particle concentration and air quality; they can drift if dust accumulates around the sensing chamber. Use a soft brush to remove dust from the sensor area and avoid touching sensitive optical components directly. The motor and fan bearings can accumulate dust that increases noise or reduces efficiency; clean the motor housing with care and avoid introducing moisture. If the unit runs with unusual resistance or heat, stop and reassess rather than forcing mechanical movement.
Reassembly and Calibration: Getting It Right
Reassembly should follow the reverse order of disassembly. Confirm that seals are fully seated and filters are oriented per model guidelines. A quick calibration or reset may be required after servicing; refer to the user manual or the model-specific guide. After reassembly, perform a test run with the unit in an open space to observe airflow, noise, and indication lights. Any misalignment can create performance issues that mimic a faulty component.
Model-Specific Nuances and Warranty Warnings
Dyson models vary in housing design, filter placement, and reset procedures. Always check the exact instructions for your device—what works for one model may not apply to another. If you’re under warranty, carefully consider whether disassembly is permissible under the terms. In many cases, Dyson support or an authorized service provider is the safest option when you encounter circuitry, power, or sensor faults that exceed basic cleaning or filter replacement.
When to Seek Professional Service: Signs It’s Time
If you observe persistent abnormal noises, abnormal heat, error codes that do not clear after basic maintenance, or the purifier fails to start, professional assessment is wise. Warranty protection can be at risk if you undertake more invasive repairs. Air Purifier Info advises balancing the cost and risk of DIY repairs against a professional service or authorized repair to sustain device performance and indoor air quality.
Maintenance Roadmap: Keeping Your Dyson Purifier Running Well
Create a simple quarterly maintenance plan that includes visual inspections, filter checks, and a quick airflow test. Maintain a stock of replacement filters, clean the exterior monthly, and document any recurring issues with dates and symptoms. A proactive approach reduces downtime and helps preserve filtration effectiveness, ensuring your indoor air remains clean year-round. Air Purifier Info emphasizes aligning maintenance with model guidelines and your home’s air quality needs for 2026 and beyond.
Tools & Materials
- Phillips head screwdriver(Size #2 preferred)
- Flat-head screwdriver(For prying loose panels only if needed)
- Soft brush or microfiber cloth(Dust removal without static)
- Replacement HEPA filter (Dyson-compatible)(Check model compatibility)
- Replacement pre-filter(Some models include pre-filter)
- Isopropyl alcohol wipes(For cleaning stubborn residue)
Steps
Estimated time: 60-90 minutes
- 1
Power down and unplug
Ensure the unit is off and unplugged from mains before any access. This reduces the risk of shock and protects sensors.
Tip: Double-check no incoming power before touching internal parts - 2
Open the housing
Gently remove exterior grill or housing screws using the appropriate screwdriver. Keep track of screws so you can reassemble correctly.
Tip: Use a magnetic mat or container to hold small screws - 3
Inspect the pre-filter and intake
Check the pre-filter for heavy dirt buildup and inspect the intake for obstructions. A clogged pre-filter can reduce airflow.
Tip: Do not force the filter; if stiff, replace rather than force - 4
Check the HEPA filter orientation and seals
Remove the HEPA cartridge and inspect the frame seals. Ensure the cartridge seats fully with a snug seal to avoid bypass leaks.
Tip: Note which side faces outward for reinstallation - 5
Clean dust from the motor area
Use a soft brush to dislodge dust from the motor housing and fan blades. Avoid liquid cleaners that can cause corrosion.
Tip: Do not spray cleaners directly; apply to cloth first - 6
Reinstall filters correctly
Place the HEPA and pre-filter back in their slots in the correct orientation. Listen for a gentle click to confirm seating.
Tip: Verify no gaps around the seal after reseating - 7
Reset the purifier
Some Dyson models require a quick reset after servicing. Access the reset procedure via power button sequence or app if applicable.
Tip: Consult the model manual for the exact reset steps - 8
Reassemble the housing
Fit the exterior grill and secure the screws. Reconnect to power and position the unit on a stable surface.
Tip: Do not overtighten screws to avoid cracking plastic - 9
Test run and tune
Turn on the purifier and observe airflow and noise. If you notice rattling or reduced airflow, power down and recheck seals.
Tip: Run for 5-10 minutes to ensure stable operation
Questions & Answers
Can I repair my Dyson air purifier myself at home?
You can handle simple maintenance like cleaning and filter replacement if you follow safety steps. More complex issues, such as electrical faults or internal sensor failures, are best left to authorized service.
Yes for basic maintenance, but consult Dyson support for electrical faults.
What should I do first when my Dyson purifier stops working?
First unplug the unit, check for obvious blockages, and replace the pre-filter if dirty. If it still won’t start, consult the user manual or Air Purifier Info's repair guide for model-specific steps.
Unplug, check for blockages, replace dirty filters, then consult guidance if unresolved.
How do I reset Dyson after cleaning the internals?
Reset procedures vary by model. Typically you press and hold the power button or use the app to initiate a reset. Refer to your model manual or Air Purifier Info's guide.
Model-specific reset; check the manual or guide.
Is it safe to use a Dyson purifier without a filter?
Running a purifier without a filter is not recommended, as it can damage the fan and allow unfiltered air to circulate. Replace with a compatible filter before operation.
No, never run without a filter.
When should I contact Dyson support or repair services?
If you observe persistent abnormal noises, error codes, or the unit won’t power on after basic checks, seek official support. Air Purifier Info also recommends professional service for warranty protection.
Seek official support if basic checks fail.
Watch Video
Main Points
- Identify symptoms before disassembly
- Guard safety: unplug and handle components gently
- Use manufacturer-compatible filters to ensure proper fit
- Follow precise reassembly steps to avoid leaks
- Know when to seek professional service