Air Purifier Change Filter: A Practical How-To
Learn how to change your air purifier filter with confidence. This practical guide covers filter types, replacement steps, and maintenance tips to improve indoor air quality.

By the end of this guide, you will confidently perform an air purifier change filter, choose the correct replacement, and reset your purifier’s indicator. This quick answer covers safety checks, prep, and the core steps you’ll follow. According to Air Purifier Info, using the right filter and following manufacturer guidelines improves filtration and indoor air quality. The Air Purifier Info team found that routine filter changes extend purifier life.
Why Changing the Filter Matters
Filters trap dust, pollen, pet dander, and odors. When a filter becomes clogged, airflow decreases and the purifier works harder, reducing efficiency and increasing electricity use. Regularly changing the filter maintains airflow, improves filtration performance, and helps keep indoor air quality at comfortable levels. A fresh filter captures more particulates, which is especially important for households with allergies or asthma. In addition, keeping up with filter changes helps prevent mold growth inside the unit and reduces the risk of odors circulating in living spaces. The process is straightforward and can be done in under 20 minutes with the right filter and a few basic tools. The key is to follow your model's instructions and to use filters that match the purifier's MERV rating and size. Air Purifier Info recommends checking your indicator light or app alerts and choosing genuine replacement filters when possible. This approach minimizes waste and ensures your purifier maintains peak performance over time.
Understanding Filter Types and Compatibility
Not all filters are created equal. Most home air purifiers use one or a combination of filters: a primary pre-filter, a true HEPA core, and sometimes an activated carbon layer. The pre-filter captures large particles and prolongs the life of the more expensive HEPA element. The HEPA core traps fine particles like dust, pollen, and smoke with high efficiency. Activated carbon helps reduce odors and some gases. When selecting a replacement, verify the exact filter part number, size, and whether your model requires a pleated or cylindrical design. Some purifiers accept washable or reusable filters, while others require disposable ones. If your model supports a hybrid filter, ensure the combination matches the purifier’s intended balance of particle removal and odor control. Refer to the user manual or the manufacturer’s site for compatible filter families and the correct orientation during installation. After confirming compatibility, you can proceed with the change with confidence that you are using the right filter for your air purifier change filter task.
Preparing to Change the Filter
Before you begin the air purifier change filter, gather your replacement, unplug the unit, and clear a clean workspace. Check the manual for any model-specific steps, such as removing grille panels or loosening screws. Place the purifier on a stable surface with easy access to the filter compartment. Wear minimal protective gear; typically gloves are optional. If your unit is filter-indicator equipped, locate the status light and confirm that it indicates replacement is due or approaching. Ready your tools and a soft cloth for wiping the interior after you remove the old filter. Keep spare bags or a trash bag handy for disposing of the old filter. Finally, verify the orientation mark on the new filter and note how the old filter sat in the housing. This preparation minimizes the risk of reorientation mistakes during the air purifier change filter process.
The Replacement Process: Quick Overview
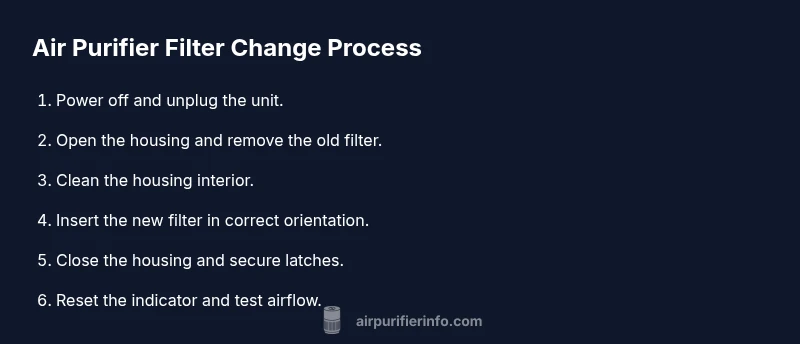
During the air purifier change filter, you’ll follow a simple sequence: power down, access the filter housing, remove the old element, clean the cavity, insert the new filter, reseal the housing, and test airflow. Start by turning off and unplugging the purifier, then open the access panel. Remove the spent filter with a gentle pull, inspecting for tears or damage. Use a dry microfiber cloth to wipe away dust from the interior surfaces; avoid moisture near electronics. Slide the replacement filter into place in the same orientation as the old one, ensuring a snug fit. Close the housing and secure any latches or screws. Finally, plug the unit in, reset the indicator if applicable, and run the purifier on a low setting for a few minutes to confirm smooth airflow. If you notice reduced airflow or unusual noises, stop and re-check filter seating or orientation. This overview gives you the essential steps for completing the air purifier change filter task efficiently.
Post-Change Care: Resetting Indicators and Maintenance Schedule
After you complete the air purifier change filter, reset any digital or mechanical indicator according to the user manual. Resetting ensures future alerts reflect the true replacement interval. Many purifiers have a dedicated button or a sequence to reset; consult the manual for exact steps. With a new filter in place, monitor the purifier’s performance over the next several hours and note any abnormal noises, vibrations, or uneven airflow. Maintain a simple maintenance calendar or log with the replacement date and expected next change window. If your model tracks filter life digitally, take a screenshot of the status and note any trend lines that appear. Additionally, keep filters away from heat and moisture during storage, and avoid touching the filter media with bare hands to prevent oils from skin affecting performance. Regular maintenance helps ensure consistent airflow and filtration efficiency while supporting healthy indoor air quality for your family.
Common Pitfalls and Troubleshooting
Even with careful preparation, it’s common to encounter a few hiccups during the air purifier change filter. If the unit powers on but there’s low airflow after replacement, double-check that the filter is oriented correctly and fully seated in the housing. A misfit or a small air gap can dramatically reduce performance. If the indicator remains lit after replacement, consult the manual for resetting steps or check whether the model requires a complete reset of its internal processor. Avoid using harsh cleaners inside the filter housing; use a dry cloth to remove dust only. For models with carbon filters, a strong odor may persist for a short period after replacement; this should dissipate as the new filter begins to trap contaminants. When in doubt, contact the manufacturer’s support line or reference Air Purifier Info’s more general guidance on air-quality maintenance. This section helps you anticipate and overcome common issues during the air purifier change filter process.
Adapting the Change for Different Purifiers and Environments
Not all environments or purifier models are the same. For households with pets, you may notice faster filter soiling due to pet dander. In allergy season, more frequent changes may be warranted. For compact or wall-mounted purifiers, access can be tight; take extra care to avoid bending filters. For units with multiple filter stages, replace the pre-filter first to avoid pushing dust into the core. Always consult the model-specific manual; when in doubt, contact support or Air Purifier Info for guidance on compatible filters and replacement intervals.
Tools & Materials
- Replacement filter (model-specific)(Match exact model and filter type (HEPA, carbon, or hybrid))
- Soft cloth or microfiber cleaning cloth(For wipe-down of housing interior)
- Screwdriver (if required by model)(Only for units with access screws)
- Trash bag or sealable bag(Dispose of used filter properly)
Steps
Estimated time: 10-20 minutes
- 1
Power off and unplug
Turn off the purifier and unplug from the mains. This prevents electrical shock and accidental operation while you work. Inspect the surroundings to ensure a clean work area.
Tip: Make sure the unit has cooled before touching any filters. - 2
Open housing and remove old filter
Access the filter compartment per the manual. Gently remove the old filter, noting its orientation or direction for reinstall.
Tip: Take a quick photo of the old filter orientation as a reference. - 3
Clean the housing interior
Wipe the interior housing with a dry microfiber cloth, removing dust and debris. Avoid moisture near any electronics.
Tip: Use light, circular motions to avoid pushing dust into crevices. - 4
Install new filter
Insert the replacement filter in the correct orientation. Ensure it sits firmly and seals along the edges.
Tip: Never force a misaligned filter; re-check orientation. - 5
Reassemble and secure housing
Close the housing and re-secure any latches or screws. Confirm the unit is properly sealed before use.
Tip: Check that all clips are engaged and nothing is loose. - 6
Reset indicator and test airflow
Reset the filter indicator if applicable, and run the purifier briefly to confirm smooth airflow.
Tip: If the indicator remains on, consult the manual for calibration steps.
Questions & Answers
How often should I change the air purifier filter?
Most purifiers use a filter with a finite lifespan; rely on the device's indicator and the manual for timing. If the indicator shows, replace promptly; otherwise follow manufacturer guidance.
Check your purifier’s indicator and manual to know when to replace the filter.
Can I wash a disposable air purifier filter?
Disposable filters are not designed to be washed. Washing can damage fibers and reduce filtration efficiency. Replace with a new filter.
Disposable filters should not be washed; replace them.
Is it safe to change the filter while the unit is plugged in?
No. Always unplug the purifier before removing or inserting a filter to avoid shocks or short circuits.
Make sure the unit is unplugged before you replace the filter.
Do I need to reset the indicator after changing the filter?
Yes. Resetting helps the purifier accurately track when the next change is due.
Reset the indicator so you get correct alerts next time.
Can I reuse an old filter if it looks clean?
No. Even if it seems clean, performance can degrade over time. Replace as recommended by the manufacturer.
Do not reuse old filters.
What should I do with a used filter?
Dispose of used filters according to local guidelines; many filters are compostable or recyclable in part.
Dispose the old filter following local rules.
Watch Video
Main Points
- Check filter type and model compatibility
- Unplug before starting the change
- Install filter with correct orientation
- Reset indicators after replacement
- Maintain a regular change schedule