Air Filter Not Working: Troubleshooting Guide
Urgent guide to diagnose and fix when your air filter isn’t working. Learn common causes, power checks, and step-by-step fixes to restore airflow and improve indoor air quality fast.

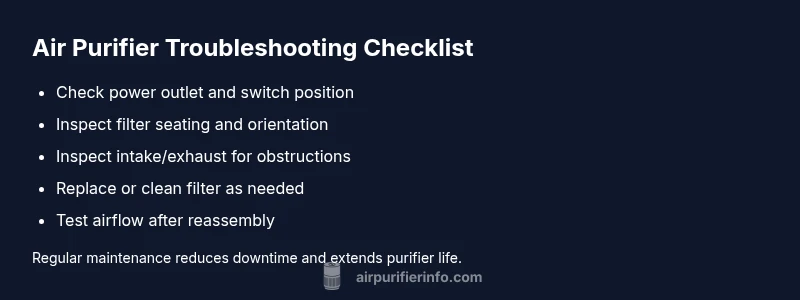
Most likely, your purifier isn’t working because the filter is clogged, installed incorrectly, or the unit isn’t receiving power. Start by unplugging, opening the housing, reseating the filter, and confirming the door switch is engaged. If it still won’t run, perform a full reset and recheck compatibility.
Quick checks before diving deeper
If your air filter is not working, start with the simplest explanations. According to Air Purifier Info, most failures are caused by power issues, incorrect filter installation, or a clogged filter. First, confirm the unit is powered and the outlet is live. Test the outlet by plugging a lamp or phone charger into the same socket to ensure power is present. Then check the purifier’s power switch, ensure the device is turned on, and verify the door or lid is securely closed — many models will not operate if the access panel isn't latched. Next, inspect the filter seating: remove the filter, look for tears or blocks, and reinsert it with the correct orientation. Make sure any gasket or seal sits flush against the housing. Finally, try a full reset or unplug for 60 seconds, reseat the battery if your unit has one, and plug back in. If it still won’t run, move to the diagnostic flow below.
Common causes of air filter not working
There are several predictable culprits that can stop airflow or prevent startup. A clogged or saturated filter is the most common reason; dust and debris reduce airflow and can trigger safety shutoffs. Using the wrong filter size or type for your model also prevents proper operation. Installation errors, like placing the filter upside down or misaligning the latch, are frequent mistakes—especially in homes where replacements are mixed. A dirty intake, blocked exhaust, or fan obstruction can choke the unit and lower performance. Electrical issues, including a tripped outlet, a blown fuse, or a failing switch, can mimic a filter problem. Finally, sensor or control-board glitches—rare, but possible—may surface after power surges or firmware updates. Identifying the most likely cause helps you choose the right fix first and save time and money.
Safety and power verification
Safety comes first. Unplug the purifier and wait 30 seconds before opening the housing. Inspect the power cord for cuts or nicks; a damaged cord is a fire hazard and should be replaced by a qualified technician. If your outlet is controlled by a wall switch, ensure the switch is ON and there’s no tripped breaker. For GFCI outlets, press the reset button and verify the purifier isn’t on a higher-load circuit. If the unit uses a battery or power buffer, ensure it isn’t drained. When you reassemble, only use power adapters and cables recommended by the manufacturer. Finally, confirm that the filter and housing are clean and free of moisture; dampness can damage electronics and encourage mold growth. These steps address power issues safely without risking injury or further damage.
Cleaning vs replacement: when to replace the filter
Filters aren’t permanent. Reduced airflow, unusual odors, or louder operation can signal a worn-out filter. Replace according to the manufacturer’s recommended interval—typically every 3-6 months for typical homes—and more often in spaces with pets or heavy dust. If the filter is torn, bent, or discolored around the frame, discard it rather than attempt a cleaning. Washable filters can be rinsed and dried completely before reinsertion; disposable ones should never be washed. After replacement, reset the purifier if required and run a short test cycle to confirm airflow has returned to normal. Check the filtration rating (MERV or PM2.5) to ensure compatibility and performance for your room.
Reassembly and testing after fixes
Reassemble the unit carefully. Re-seat the filter so airflow arrows align with the housing and ensure the gasket is evenly pressed into place. Close the panel and fasten all latches securely. Plug the purifier into a known-good outlet and power on. You should hear the fan start within a few seconds. If nothing happens, unplug again and recheck power, switch position, and safety interlocks. Some models require a firmware or factory reset after a filter replacement; consult the manual and avoid resets unless you’re confident. Run a 15-20 minute test in a typical room to confirm consistent airflow and indicator readings. If issues persist, escalate to professional help.
Preventative maintenance to avoid future issues
Maintain a simple routine to keep your purifier running smoothly. Replace filters on schedule, vacuum the intake grill monthly, and wipe the housing to remove dust. Use manufacturer-approved filters to guarantee a proper seal and performance; avoid mixing brands. In homes with pets or cooking, you may need to replace sooner. Store spare filters in a dry, dark place to prevent moisture damage. Regular inspections of seals and gaskets help catch cracks early. After every maintenance activity, test the purifier to verify airflow and indicators are functioning properly. If problems linger after these steps, contact customer support or a licensed technician.
How to choose the right filter size and model for your purifier
Choosing the correct filter size and filtration level is essential for restoring performance. Start by checking the model number and user manual to identify the exact filter type (pre-filter, HEPA, activated carbon) and the replacement interval. Compare MERV ratings and PM2.5 capture to match your indoor air quality needs—pets, smoke, odors, and dust require different configurations. Ensure compatibility with the housing seal and latch when upgrading. For allergy and asthma concerns, select HEPA-class filters and consider activated carbon for odor control. Also consider cost and availability of replacements in your region and set a reminder for future replacements. This proactive approach minimizes downtime and keeps air quality high.
Steps
Estimated time: 20-30 minutes
- 1
Power down and access the housing
Unplug the unit and wait 30 seconds. Remove the outer panel to access the filter area. Inspect the power cord for damage and ensure the outlet is live using a known-good device. This step prevents shocks and ensures accurate testing.
Tip: If you hear a hum but no airflow, the fan may be stuck or blocked. - 2
Inspect the filter
Take out the filter and examine for tears, dents, or heavy buildup. If it’s disposable, do not wash; if washable, follow the care instructions and dry completely before reinstalling. Confirm the correct filter type and orientation for the model.
Tip: Handle the filter with clean hands to avoid introducing oils or contaminants. - 3
Reseat the filter and seals
Align the filter so airflow arrows point in the correct direction. Press the filter firmly into place and ensure the gasket sits flush. Reattach any panels and confirm all latches engage fully.
Tip: A misaligned seal is a common, easily fixed cause of reduced airflow. - 4
Power cycle and test
Plug back in and power on. Listen for the fan start and observe indicator lights. If the unit doesn’t respond, perform a factory/reset only if your manual allows it. Run a short test cycle in a normal room.
Tip: Keep a log of the steps you perform for future troubleshooting. - 5
Replace or clean as needed
If airflow remains weak, replace the filter with a compatible option or, if washable, clean and dry thoroughly before reinstallation. After replacement, check for odors or unusual noises that indicate a misfit.
Tip: Verify you’re using the right MERV/PM2.5 rating for your space. - 6
Confirm and document results
Run the purifier for 15-20 minutes in the room to confirm consistent airflow. If performance is restored, note the replacement date and set reminders for future maintenance. If not, escalate to professional support.
Tip: A successful test is airflow that is steady and audible without unusual sounds.
Diagnosis: Air purifier won’t start or shows no airflow after filter installation
Possible Causes
- highPower issue (outlet, switch, fuse)
- highFilter seated incorrectly or wrong type
- highClogged or saturated filter
- mediumBlocked intake/exhaust or fan obstruction
- lowElectrical fault or damaged cord
Fixes
- easyCheck outlet and switch; plug into a known-good outlet and reset the purifier
- easyRemove and reseat the filter; verify correct orientation and that the gasket seals
- easyReplace a clogged or saturated filter with a manufacturer-approved option
- easyClear any intake/exhaust obstructions and vacuum the grills
- mediumIf electrical fault is suspected, consult a qualified technician
Questions & Answers
Why is my air purifier not starting after I replaced the filter?
Most commonly, the interlock or filter seating isn’t engaged correctly. Recheck orientation, reseat the filter, and perform a reset if the manual allows. If it still won’t start, inspect the power supply and door switch.
Check the filter orientation and reseat it, then reset. If it still won’t start, verify power and interlocks.
Can a dirty or saturated filter cause the purifier to stop working?
Yes. A clogged filter reduces airflow and can trigger safety shutoffs. Replace or clean (if washable) the filter according to the manufacturer’s guidance.
A clogged filter reduces airflow and can stop the unit; replace or clean as directed.
Is it safe to wash a disposable air-filter?
No. Disposable filters should not be washed; they lose effectiveness when wetted. Only washable filters can be cleaned and dried completely before reuse.
Don’t wash disposable filters; replace them. Washable ones can be cleaned and dried fully.
How often should I replace my air purifier filter?
Most homes use replacement every 3-6 months, depending on usage, pets, and dust levels. In high-dust environments, replace more often.
Typically every 3 to 6 months, more if you have pets or heavy dust.
What if the purifier won’t run after a filter change even though it powers on?
Check for a firmware or factory reset requirement in the manual. If there’s no resolution, contact support. There could be a sensor or control-board issue.
If it powers on but won’t run, check reset steps in the manual or contact support.
Should I call a professional for electrical issues?
Yes. If you suspect wiring, a damaged cord, or a burning smell, stop use immediately and contact a licensed technician to prevent fire risk.
If you suspect an electrical problem, stop using it and call a professional.
Watch Video
Main Points
- Check power and seating first before deeper fixes
- Replace clogged filters promptly to restore airflow
- Always use compatible filters and seals
- Test in a real room after maintenance