How to Fix an Air Purifier: A Complete Guide
Learn how to fix air purifier issues with a practical, step-by-step approach. This guide covers common faults, filter care, safety tips, and maintenance to restore clean indoor air.

If you’re wondering how to fix air purifier issues, this guide helps you diagnose common faults, perform safe maintenance, and decide when DIY fixes are enough or when to seek professional help. Start with simple steps like cleaning the exterior, checking the power, and replacing the filter if needed. These quick actions restore airflow and quiet operation in most cases.
Why Regular Maintenance Matters for Air Purifiers
Maintaining an air purifier is essential for reliable performance and healthier indoor air. If you’re asking how to fix air purifier problems, start with the simplest explanations: clogged filters, sensor issues, and obstructed airflow are the most common culprits. According to Air Purifier Info, routine cleaning and timely filter replacement dramatically reduce the frequency of breakdowns and loud operation. Before you begin any troubleshooting, unplug the unit, review the user manual, and confirm you’re using the right filter for your model. In this section we’ll outline the typical failure modes and how to verify that the purifier is drawing in air effectively. With proper maintenance, you’ll notice improved airflow, lower noise, and better energy efficiency. Remember, safety first: never service electronics while plugged in, and never use water on live circuitry.
This foundation sets the stage for practical fixes and long-term care that keep your indoor air clean without unnecessary downtime.
Common Fixes You Can Try at Home
Many purifier issues can be resolved with readily available steps. Start by ensuring the unit is unplugged and placed on a stable surface. Check the filter status—if the filter looks dirty, replace it with the model-specific filter. A clogged filter reduces airflow and can trigger sensors to shut down the device to protect itself. If the unit still won’t start, inspect the power cord and outlet for damage or loose connections. Dust buildup around the intake vents can cause overheating or poor performance; a gentle brush or compressed air can clear debris from the vents. For odor or visible residue, wipe the exterior with a damp microfiber cloth and a mild detergent solution. If you have an LED indicator, consult the manual to interpret error codes and avoid guessing about the problem. These basic checks often fix the majority of user-reported issues and set you up for deeper troubleshooting if needed.
Diagnosing No-Power Issues (Powering On)
Powering on is the first gatekeeper of effective troubleshooting. Start by unplugging the purifier and inspecting the power cord for cuts or kinks. Plug it into a known good outlet; avoid extension cords for safety. If the outlet is fine, check the unit’s power switch and any safety lock features that might prevent startup. Some models have a child safety lock or a status indicator that must be reset after a power interruption. If there’s no display, listen for the fan when you press the power button; absence of sound often indicates a power supply issue rather than a motor fault. If you continue to see no response, the problem may be internal wiring or a blown fuse—these situations typically require professional service or replacement of the unit.
The goal is to confirm power delivery before moving on to filter or sensor diagnostics, because no amount of filter maintenance will fix an electrical failure.
Filter-Related Fixes: Cleaning vs Replacement
Filters are the lifeblood of an air purifier. When you ask how to fix air purifier performance, the most impactful step is addressing dirty or overdue filters. If your unit uses a washable pre-filter, remove it and clean it according to the manufacturer’s instructions, usually with running water and a mild soap. If the purifier uses disposable or sealed filters, replace them with the exact model recommended by the manufacturer. Improper filter installation can cause air leaks or reduced efficiency, so reseat the filter firmly and ensure any frames or seals are intact. After changing a filter, run the purifier on a low setting for a few minutes to confirm air intake is smooth and that there are no unusual noises. Regular replacement intervals vary by usage and environment, but consistent maintenance dramatically extends device life and keeps air quality high.
Cleaning the Exterior and Vents Without Damaging Filters
Exterior hygiene directly affects performance, because dust can be drawn into the intake and clog delicate components. Wipe the housing with a microfiber cloth dampened with water or a mild detergent. Avoid harsh chemicals that might damage plastics or leave residues that get drawn into the unit. Never spray liquid directly into the intake grills or the filter compartment. While cleaning, inspect the vents for hair, pet dander, or large particles and remove them with a soft brush or compressed air. Protect internal filtration by ensuring the intake isn’t blocked by nearby objects. Proper exterior care reduces strain on the motor and ensures consistent airflow.
Sensor and Indicator Troubleshooting
Many air purifiers rely on sensors to detect air quality and adjust speed. If indicators seem erratic or a fault code appears, consult the manual for code meanings and reset procedures. Sensor problems can mimic more serious malfunctions, so ruling out airflow and power issues first is essential. Sometimes cleaning the sensor housing with a soft brush and a small amount of isopropyl alcohol on a cotton swab can improve readings, but avoid saturating the sensor or applying liquid directly to the electronics. If the device continues to display errors after cleaning, it may require a replacement sensor or professional service. Regular calibration according to the manual helps maintain accurate readings over time.
Noise, Odor, and Reduced Efficiency: Solutions
Loud operation often signals a blockage, degraded filter, or a failing motor. Start by inspecting for physical obstructions and cleaning out dust from the intake and fan blades. Replace clogged filters promptly, as lingering debris robs you of meaningful airflow. Unpleasant odors can indicate mold growth or trapped contaminants; in such cases, replace the filter and clean the interior surfaces using a mild cleaning solution and a dry cloth. If you notice reduced efficiency in capturing particles or diminished airflow, consider whether the purifier size matches room volume. An undersized unit works harder, producing more noise and heat. In such cases, you may need to upgrade to a higher-capacity model rather than pushing an older unit to perform beyond its design.
When to Seek Professional Help or Replace Unit
If basic maintenance and safe fixes fail to restore performance, it’s time to evaluate professional service or a replacement. A technician can diagnose issues with internal wiring, circuit boards, or motor windings that aren’t user-serviceable. If your unit is several years old and you’ve replaced filters multiple times without achieving satisfactory results, replacement may be more cost-effective than ongoing repairs. When considering a new device, model a purifier for your room size, existing air quality concerns, and energy efficiency. The goal is to balance long-term cost, reliability, and the health benefits of cleaner air. Remember that older purifiers may lack modern filtration standards or safety features, so upgrading can be a wise investment for ongoing indoor air quality.
Preventive Maintenance Schedule and Long-Term Care
Establishing a maintenance routine helps you avoid frequent issues and extends device life. Create a simple calendar to remind you to inspect filters, clean vents, and test performance. Always refer to the manufacturer’s schedule and recommendations for replacement intervals, which vary by model and environment. Keep spare filters on hand to minimize downtime during replacements, and maintain a small cleaning kit for regular exterior care. By staying proactive, you’ll minimize downtime and maintain strong air quality throughout the year.
Tools & Materials
- Replacement filters (model-specific)(Use the exact filter type specified by the purifier manufacturer)
- Microfiber cloth(For exterior cleaning and gentle wiping of sensors)
- Soft brush(Used to dislodge dust from vents and crevices)
- Screwdriver set (Phillips #0/#1, flathead)(Useful for opening access panels on some models)
- Isopropyl alcohol (70%+)(Dampens cloth for sensor or housing cleaning; avoid liquid on electronics)
- Compressed air can(Careful bursts to clear dust from vents; hold can upright)
- Mild detergent(For exterior cleaning when dirty; dilute and wipe with cloth)
- Gloves (optional)(Protect hands and avoid transferring oils to filters)
Steps
Estimated time: 1-2 hours
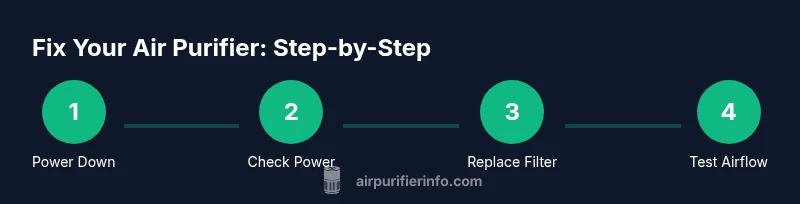
- 1
Power down and prepare
Unplug the purifier and move it to a clean, open workspace. Gather tools and spare filters. This prevents accidental shock and makes every subsequent step safer.
Tip: Always unplug before handling internal components to avoid electric shock. - 2
Check power and outlets
Test the power outlet with another device to confirm it works. Inspect the power cord for cuts or kinks, and ensure any surge protector isn’t inhibiting power.
Tip: If the purifier uses a dimmed LED or display, check the manual for reset steps after power issues. - 3
Access the filter compartment
Open the front panel or access door according to the user manual. Remove the old filter and inspect the gasket for damage or warping that could cause leaks.
Tip: Take a photo of the filter position before removing it to aid proper reinstallation. - 4
Clean or replace the filter
If the filter is washable, rinse with lukewarm water and let it dry completely before reusing. If disposable, replace it with the model-approved filter. Ensure a snug fit to maintain airflow.
Tip: Never reuse a heavily soiled filter; clogged filters degrade performance and can damage the motor. - 5
Clean the interior and vents
Wipe interior surfaces and vents with a microfiber cloth; use a soft brush to remove stubborn dust. Avoid applying liquids directly to internal electronics.
Tip: A quick blast of compressed air can help dislodge dust from tight crevices—do not shake the unit. - 6
Reassemble and test
Reinsert the filter, reseal the access panel, and power up. Observe the startup sequence and listen for unusual sounds. If the unit runs smoothly, run it in a low setting for a few minutes to verify airflow.
Tip: If there’s any odor or smoke, power off immediately and consult a professional.
Questions & Answers
Do I need to unplug the purifier before opening the case?
Yes. Always unplug the unit before opening the case or touching internal components to prevent electric shock and damage to electronics.
Yes—unplug the purifier before opening it to stay safe and protect the device.
How often should I replace the filters?
Follow the manufacturer’s recommended schedule and check for reduced airflow or visible dirt. A dirty filter is the most common cause of poor performance.
Check the manual for replacement intervals and watch for reduced airflow as a sign to replace.
Can I clean HEPA filters?
Most HEPA filters are not washable. Cleaning can damage the filtration media. Replace with the recommended filter instead.
HEPA filters aren’t usually washable; replace them as advised by the manufacturer.
Why is there a strange odor after maintenance?
Newly replaced filters can emit a temporary odor. If the smell persists, recheck seal integrity and consider replacing the filter again.
A temporary odor after changing a filter is common—if it lasts, check seals and recheck the installation.
When should I upgrade my air purifier?
If the purifier can’t maintain airflow in your room size after fixes, or if it’s older and lacks newer safety features, upgrading may be more cost-effective.
If it can’t keep up after fixes and you're using an older model, upgrading may be wiser.
Is it safe to use compressed air on the unit?
Yes, with caution: use short bursts and hold the can upright to avoid moisture. Do not spray directly into electronic components.
Yes, but use short bursts and avoid spraying into electronics.
Watch Video
Main Points
- Inspect filters regularly and replace when dirty
- Follow the manual to avoid improper disassembly
- Unplug before service to stay safe
- Test airflow after maintenance to confirm fix
- Consider upgrade if issues persist