Why Is My Air Purifier Blowing Out Air? Troubleshooting Guide
An urgent troubleshooting guide to diagnose why your air purifier is blowing out air. Learn quick checks, common causes, and safe fixes to restore airflow and improve indoor air quality.

If your air purifier is blowing out air in odd ways, the most likely causes are a dirty intake filter, a blocked intake, or the wrong fan setting. Start by unplugging the unit, inspecting the intake grille for dust, cleaning or replacing the filter, and clearing nearby obstructions. If the problem persists, check the exhaust path and seals.
Why Your Air Purifier Might Be Blowing Air
If you’re asking why is my air purifier blowing out air, you’re not alone. In many homes, this symptom means the purifier is moving air, but not necessarily delivering clean, filtered air. The most common culprits are a dirty intake filter, a blocked air path, or an incorrect fan setting. An air purifier operates by pulling room air through an intake grille, pushing it through a series of filters, and expelling cleaned air via the exhaust. When airflow feels off — such as air rushing from the unit or a noticeable surge in noise — the cause is almost always either dust buildup or a misconfiguration. In addition, placement matters; placing a purifier against a wall or behind furniture can redirect airflow in unexpected ways, making it seem like the unit is failing. This section will walk you through practical checks you can perform before calling for professional help, with a focus on safe, non-destructive steps. The aim is to restore natural airflow, improve indoor air quality, and reduce irritants like dust, odors, pet dander, and smoke.
Air Purifier Info emphasizes that addressing intake cleanliness and correct placement yields fast improvements for most households.
First Quick Checks You Can Do Right Now
Before dismantling your purifier, perform a quick, non-invasive diagnostic set:
- Ensure the unit is powered and the outlet is functional. A sudden loss of power can masquerade as airflow issues.
- Inspect the intake grille for visible dust buildup. Use a flashlight if needed, and wipe with a dry microfiber cloth or compressed air (short bursts) to remove loose dust.
- Check the filter status. If you can see dirt or if it’s been more than 6–12 months (depending on model and usage), replace or clean the pre-filter as recommended by the manufacturer.
- Clear any obstructions around the intake and exhaust. Keep at least 12 inches of clearance on all sides, and do not place the purifier behind sofas or curtains.
- Confirm you’re using the correct mode and fan speed for your room size. A turbo setting in a small room can feel noisy and overly forceful, while a low setting may seem ineffective.
- Listen for unusual noises such as grinding or rattling, which could signal a loose part or motor issue. If noises persist after basic cleaning, it’s a sign you should inspect deeper or seek professional help.
If these checks don’t improve airflow, proceed to a more thorough diagnosis focused on filtration and seals. Air Purifier Info recommends keeping a regular maintenance schedule to prevent future blockages and ensure consistent performance across seasons.
How Filters Drive Airflow and Indoor Air Quality
Filters are the heart of any purifier. A dirty or clogged filter creates resistance, forcing the fan to work harder and sometimes causing an audible strain or altered airflow. When the intake pulls air through a clogged filter, you may notice a surge of air from the exhaust but reduced filtration efficiency, which defeats the purpose of purification. HEPA and carbon filters have different roles—HEPA traps particles; carbon filters reduce odors and VOCs. If either filter is overdue for replacement, airflow can become uneven and the unit may blow air more loudly or unevenly. Regular filter maintenance not only restores steady airflow but also extends the life of the purifier’s motor and reduces energy use. In addition, the filter housing should seal properly; gaps can cause unfiltered air to bypass the filter, making it seem like the purifier is expelling dirty air even while air appears to move strongly from the outlet.
Air Purifier Info notes that proper filter fit and routine replacement are often overlooked, yet they are the quickest win for restoring normal airflow and improving overall air quality in living rooms, bedrooms, and home offices.
Diagnostic Flow in Practice
To systematically troubleshoot why your air purifier is blowing out air, follow a simple symptom-to-diagnosis flow. Start with the most likely causes and move toward less probable issues. If you see dust around the intake, or if the filter shows visible debris, the fix is straightforward: clean or replace the filter and clear the intake. If airflow remains abnormal after basic cleaning, inspect the seals and housing for gaps or cracks that could bypass filtration. Check for obstructions in the exhaust path, including nearby furniture, textiles, or clutter that may redirect airflow. Finally, verify that you’re operating in the correct mode and speed for your room size. If all basic steps fail, the issue may lie with the motor or internal components, which requires professional service. This diagnostic approach prioritizes user safety and practical fixes, reducing the likelihood of unnecessary part replacements.
Throughout this process, document what you checked and the results. This will help you determine whether the issue persists or if professional assessment is warranted. Air Purifier Info emphasizes that early intervention for blocked intake, poor seals, or inappropriate placement usually resolves most airflow concerns quickly.
Step-by-Step Fixes for the Most Common Cause
When your purifier is blowing out air due to a common fault, a structured fix plan works best. These steps are designed to be performed safely by homeowners and renters, with clear checks at each stage:
- Unplug the unit and relocate if needed to ensure you have space for maintenance. 2) Open the front panel or access door per the manual. 3) Remove and inspect the filter; replace if dirty or clogged. 4) Vacuum or wipe the filter housing and surrounding area to remove dust. 5) Reinsert a clean filter, ensuring the seals are intact and aligned. 6) Clear the intake and exhaust paths of any debris or obstructions. 7) Reassemble and plug in; select the correct mode and a comfortable fan speed for the room size. 8) Run the purifier in “auto” or “air quality” mode for 15–30 minutes and observe airflow and noise.
Tip: Always consult the user manual for filter type and installation guidance to avoid improper seating. If you encounter stubborn resistance during disassembly or you hear unusual mechanical sounds, stop and seek professional service. Regular maintenance and proper placement prevent most airflow issues from recurring.
Safety and Prevention Tips
- Always unplug the unit before inspecting internal components. This protects you from accidental shock.
- Wear a mask if you’re cleaning a heavily dust-laden device to minimize inhalation of dust particles.
- Use only manufacturer-certified filters and follow replacement intervals based on usage and environmental conditions.
- Maintain a clear workspace: keep the unit at least 12 inches from walls and furniture to promote even airflow.
- Avoid using the purifier in damp areas or near heat sources, which can damage components and reduce efficiency.
Final Checks and Maintenance Mindset
After completing fixes, monitor airflow for 24–48 hours to ensure stability. Schedule regular filter replacements and clean the intake grills every few weeks, especially in dusty homes or pet households. If you notice persistent abnormal airflow, unusual vibrations, or if the unit fails to complete a cycle, contact a qualified service technician. Regular maintenance reduces the likelihood of sudden airflow problems and protects indoor air quality over time.
Steps
Estimated time: 30-45 minutes
- 1
Power off and unplug the unit
Safely disconnect power before touching any components. Move the purifier to a clear workspace to access intakes and filters. This prevents accidental shock and makes inspection easier.
Tip: Double-check the outlet with a basic test before reassembly. - 2
Open and inspect the filter
Remove the filter housing according to your model's manual. Check the filter for visible dust and debris. If the filter appears dirty or has clogged pleats, replace it with an equivalent model.
Tip: Avoid using incompatible filter types; check the filter rating sticker. - 3
Clean the intake housing
Wipe down the intake grille and surrounding areas with a dry microfiber cloth or use compressed air in short bursts to dislodge dust. Build-up here can choke airflow quickly.
Tip: Do not spray liquids into the housing; moisture can damage components. - 4
Check for obstructions
Inspect the room and around the unit for items blocking the air path (furniture, curtains, toys). Move them away and ensure several inches of clearance on all sides.
Tip: Reposition the purifier to an open area for best distribution. - 5
Reassemble and reinstall the filter
Place the new or cleaned filter back into its housing, ensuring it seats fully with proper orientation. Reattach the housing securely to prevent leaks.
Tip: A loose seal is a common source of bypass airflow. - 6
Restore power and test
Plug the unit back in and power it on. Run a quick test in auto or standard mode to see if airflow returns to normal and noise levels drop.
Tip: Start with a lower speed and gradually increase to gauge response. - 7
Verify mode and speed
Ensure you’re using the appropriate mode for your room size (e.g., auto for mixed conditions, turbo only in very dusty rooms). If necessary, adjust to a setting that balances airflow with noise.
Tip: Check the user manual for recommended speeds by room size. - 8
Consider professional inspection if unresolved
If airflow remains abnormal after these steps, the issue could be motor or seal-related. A professional can diagnose internal components without risking damage.
Tip: Document symptoms and steps you took to share with the technician.
Diagnosis: Air purifier blowing out air or inconsistent airflow
Possible Causes
- highClogged or dirty intake/filter, reducing airflow
- highBlockages around intake/exhaust or in the room
- mediumWrong fan mode or speed setting
- lowDamaged or loose seals allowing unfiltered air to bypass
Fixes
- easyPower off and unplug, then inspect the intake and remove visible dust
- easyReplace or clean the filter according to manufacturer instructions
- easyClear obstructions around intake/exhaust; provide at least 12 inches clearance
- easyReset to the correct mode and fan speed; test on auto or higher setting if needed
- mediumIf no improvement, have motor or seals inspected by a professional
Questions & Answers
What if my air purifier still blows air after I replace the filter?
If swapping the filter doesn’t fix the airflow, check for obstructions around the intake/exhaust and ensure the unit isn’t placed against a wall. Look for seal gaps in the housing and verify you’re using the correct filter type for your model.
If changing the filter didn’t fix it, check for blocks around the intake and exhaust and inspect seals. Make sure you have the right filter for your model.
Can a purifier blow air out of the back instead of the front?
Some purifiers have multiple exhaust vents; however, if air is coming from unexpected areas or excessive noise occurs, it could indicate a loose seal or internal obstruction. Consult the manual and inspect seals.
Air can come from vents, but unusual airflow or noise may mean a loose seal—check the seals and manual.
Is it safe to use a purifier with a noisy motor?
A noisy motor can indicate strain from blockage or a failing component. It’s safe to operate briefly while you troubleshoot, but stop use if the noise worsens and seek professional service if needed.
A noisy motor usually means something needs checking. If it gets louder, pause operation and get it inspected.
How often should filters be replaced?
Replacement frequency depends on usage and environment. In dusty homes or with pets, replace every 3–6 months; in lighter use, 6–12 months is common. Always follow the manufacturer's recommendations.
Replace filters according to usage and your manual—more often in dusty or pet-heavy homes.
What safety steps should I follow when cleaning the purifier?
Always unplug, avoid liquids inside the unit, and use dry cloth or compressed air to remove dust. Wear a mask if heavily dust-laden and dispose of old filters safely.
Unplug first, use dry tools to clean, and wear a mask if dust is heavy.
When should I call a technician?
If there’s persistent abnormal airflow, unusual noises, or visible damage to seals after basic troubleshooting, consult a qualified technician to avoid further damage.
If issues persist after troubleshooting or you see damage, call a technician.
Watch Video
Main Points
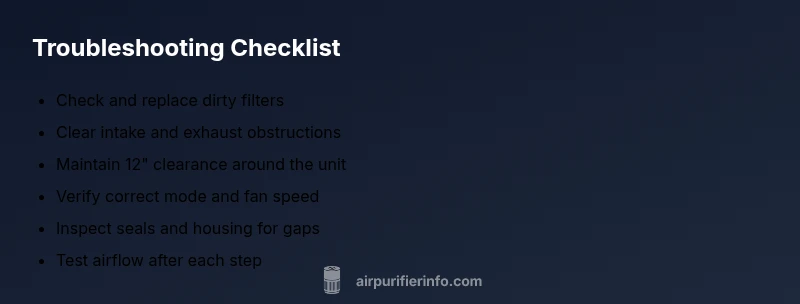
- Check and replace dirty filters first
- Ensure ample clearance around the unit
- Confirm correct mode and speed for the room
- Inspect seals for bypass leaks
- Consult a professional if issues persist