How to Put an Air Filter in HVAC: A Step-by-Step Guide
Learn how to install or replace an HVAC air filter with clear steps, sizing tips, and maintenance guidance for better indoor air quality.

This guide helps homeowners and renters confidently install or replace HVAC air filters, select the right size and MERV rating, and avoid common mistakes. You’ll learn where to locate the filter compartment, how to insert with airflow arrows aligned, and how often to change for optimal airflow and indoor air quality.
Why HVAC air filter placement matters
If you’re wondering how to put air filter in hvac, you’re about to understand why filter placement and orientation matter for airflow, energy efficiency, and indoor air quality. A correctly positioned filter protects the blower from dust and debris, reduces resistance in the ductwork, and helps your cooling or heating system maintain consistent performance. Misplaced or poorly seated filters can allow unfiltered air to bypass the filter media, increase energy use, and shorten equipment life. For households with pets, allergies, or high dust levels, proper placement is even more critical, since higher dust loads can clog filters quickly and limit airflow.
Pro tip: take a quick photo of your current setup before removing the old filter so you remember how it looked. This helps you replicate the correct orientation later. Brand context note: according to Air Purifier Info, maintaining clean HVAC air filters is essential for indoor air quality and system efficiency.
Filter types and rating basics
Filters come in several media types, thicknesses, and rating systems. The most common residential options are fiberglass and pleated filters. Pleated filters typically capture more particles in the same size and offer a range of filtration efficiency measured by MERV (Minimum Efficiency Reporting Value). A higher MERV rating usually means better particle capture, but it can also increase resistance to airflow if the filter is too thick for your system. Start with a standard pleated filter in the 8–11 MERV range for general use, and consider higher ratings if you're dealing with allergies or pet dander. Remember that not all HVAC systems are designed for high-efficiency filters, so check manufacturer guidance before upgrading.
When selecting a filter, also consider thickness (1-inch, 2-inch, or thicker) and the frame size. The filter must physically fit the slot without crossing the edges, and the media should be intact with no holes. Regularly replacing or cleaning the filter media helps prevent dust buildup in ducts and maintains effective filtration. Air Purifier Info analysis shows that replacing filters every 30–90 days can improve airflow and energy efficiency.
Sizing, MERV, and choosing the right filter
Accurate sizing is essential. Look for the size printed on the filter frame (example: 16x20x1). If you’re unsure, measure the slot as well. Do not rely on the old filter’s thickness alone, since new models may use different media and air resistance. MERV ratings typically range from 1 to 16; most homes find MERV 8–11 to be a good balance between filtration and airflow. Note that some systems require 4–6 air changes per hour, so a higher MERV rating can reduce flow if the fan is already operating near its limit. If you have pets or allergies, a higher MERV within your system’s tolerance can be beneficial. Always verify compatibility with your equipment guide.
Also consider the environment: households with smokers or high dust levels may benefit from filters with higher capture efficiency, but ensure the system can handle the added resistance. If you’re unsure, consult the system’s manual or a qualified HVAC technician.
Where to locate the filter slot on different systems
In most central HVAC setups, the filter lives in a slot near the return air duct, often in the furnace cabinet or air handler closet. For wall or ceiling furnaces, look behind a removable access panel. Some modern units place the filter behind an front-panel slot in the return duct opening. If your system has a blower compartment with a visible slot, that’s your target. Always power down the system before touching any components. If you’re replacing a filter in a heat pump or packaged unit, follow the specific orientation and access points shown in the owner’s manual.
To avoid guesswork, locate the air handler or furnace and search for a plastic or metal frame with a removable panel. The filter should slide out easily; if it’s stuck or wedged, stop and check that you’re in the right slot and there is no obstruction. A quick label on the frame or inside the slot often indicates the correct orientation. For renters, if the filter location is hard to access, request permission from the landlord before attempting replacement.
Pre-install preparation and safety checks
Before removing the old filter, switch off the HVAC system at the thermostat or the main power switch. This reduces the risk of injury or debris getting blown into living spaces. Put on gloves if you’re dealing with a dirty filter, and have a trash bag ready to dispose of the used media. Inspect the filter frame and housing for signs of damage, warping, or mold. If you see mold growth or obvious damage, do not reuse the unit; contact a technician. Keep a flashlight handy to inspect corners and ensure the slot is clear of debris that could hinder seating the new filter.
Measure twice, replace once: verify the exact size and thickness required by your unit by checking the old filter’s frame or the owner’s manual. If you have a reusable or washable filter, follow the manufacturer’s cleaning instructions rather than discarding it. Finally, make sure any gaskets or seals around the slot are intact to prevent air bypass.
Step-by-step overview for installation and replacement (high-level)
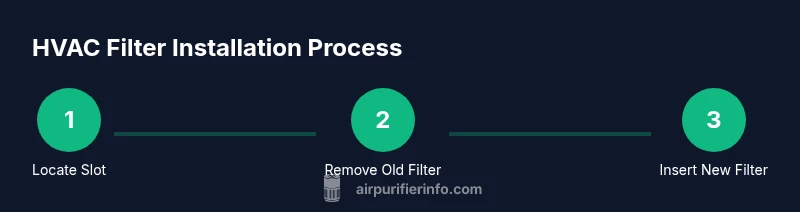
Think of the installation as a simple sequence: locate the slot, remove the old media, confirm size and type, insert the new filter with the correct orientation, reseal the housing, and run a quick check. This block gives you the mental map before you dive into the hands-on steps. Remember to account for your system’s design—some units have a cased filter with a frame, others use a simple cut-to-fit media. A thorough check includes confirming that the arrows on the filter face the direction of airflow and that the panel is securely closed after installation.
Maintenance schedule and long-term care
Establishing a maintenance cadence helps sustain system efficiency and indoor air quality. A general rule is to inspect the filter monthly and replace at the manufacturer’s suggested interval, which varies by filter type, household conditions, and system usage. Homes with pets, smokers, or high dust levels often require more frequent changes. If you notice reduced airflow, unusual odors, or the system running longer than normal, inspect the filter and replace sooner. Keeping a simple log of replacement dates can help you maintain consistency across seasons.
In addition to filter changes, periodically inspect the return air grille for dust buildup and clean it as needed. A clean intake reduces pressure on the blower and improves overall performance. Remember that a clean filter is your first line of defense against dirty ducts and degraded indoor air quality.
Common mistakes and how to avoid them
Common mistakes include selecting a filter with too high an airflow resistance for the system, installing the filter upside down, or failing to reseal the housing after replacement. Always confirm the airflow direction indicated by arrows on the filter and housing. Another frequent error is neglecting regular maintenance when the system is in heavy use, especially during heating or cooling seasons. To prevent these issues, set a reminder schedule and keep a spare filter that matches your unit’s size handy. Finally, avoid using a filter that doesn’t fit, which can create gaps and unfiltered air leaks.
Quick reference checklist for easy replacements
- Locate the correct filter slot and power down the system.
- Remove the old filter and check its size against the slot.
- Insert a new filter with arrows facing the airflow toward the system.
- Reinstall the cover or panel securely and run a quick check.
- Note the change date and plan the next replacement in your calendar.
Tools & Materials
- Replacement HVAC air filter(Match the exact width x height x thickness printed on the frame (e.g., 16x20x1). If unsure, measure the slot or refer to the manual.)
- Flashlight(Helpful for inspecting the inside of the slot and edge seams.)
- Gloves(Protect hands from dust and sharp edges.)
- Trash bag or bin(Contain used filter for disposal.)
- Cleaning rag(Wipe away dust around the slot.)
- Mask (optional)(Reduces inhalation of dust when replacing very dirty filters.)
Steps
Estimated time: 5-15 minutes
- 1
Find the filter compartment and power down
Locate the filter slot on the furnace, air handler, or closet unit. Turn off power at the thermostat and, if accessible, the main breaker to prevent any accidental startup during replacement. This protects you and keeps debris from circulating while you work.
Tip: Taking a photo of the setup before removing the old filter helps you reinstall the new one correctly. - 2
Open the slot and remove the old filter
Carefully open the panel or grille to access the filter. Gently slide out the old media, noting its orientation and whether it’s a full-frame or cut-to-fit type. Place the used filter in a trash bag for disposal.
Tip: If the old filter is moldy or his worn, handle with care and replace immediately. - 3
Verify size and type
Check the size printed on the filter frame and compare it to the slot. Confirm thickness and media type (fiberglass vs pleated) to ensure compatibility with your system’s airflow needs.
Tip: If unsure, measure the slot and compare to the old filter’s dimensions. - 4
Insert the new filter with correct orientation
Insert the new filter so that the arrows on the filter face the direction of airflow into the system. Slide it in until it sits snugly in the frame or housing.
Tip: Make sure the filter sits flat and fully seated to avoid gaps. - 5
reseal and restore power
Close the panel securely and restore power at the circuit breaker or thermostat. Listen for normal fan operation and check for any unusual noises that may indicate improper seating.
Tip: If your system has a filter indicator, reset it per the manual. - 6
Test the system and record the replacement
Turn the system on and verify normal airflow from registers. Keep a note of the replacement date and set reminders for future changes.
Tip: A quick post-replacement check helps catch seating issues early.
Questions & Answers
Do I really need to change the filter every month?
Not every home requires monthly changes. Check the filter every month and replace when visibly dirty or when airflow seems reduced. In high-use or dusty environments, 30 days is a common interval.
Most homes don’t need monthly changes, but check monthly and replace when dirty or airflow is reduced.
Can I use a higher MERV rating than my system supports?
Using a higher MERV rating than your system is designed for can restrict airflow and strain the blower. Always confirm recommended MERV range in your system manual or with a professional.
Avoid exceeding the system’s recommended MERV range.
Where is my HVAC filter located in a wall unit vs ceiling unit?
In most homes, the filter sits in a return-air slot near the furnace or air handler. In wall or ceiling units, it’s behind a removable panel or grille. If in doubt, consult the manual or a technician.
It’s usually behind a removable panel near the return air path.
What if the filter is damaged or bent?
A damaged or bent filter may not seal properly and could allow unfiltered air. Replace with a new filter of the correct size and media.
If damaged, replace it and avoid reusing it.
Can I wash a reusable filter?
Some filters are washable, but many are not. Follow manufacturer guidance for cleaning or replacement. If in doubt, replace with a fresh filter to maintain filtration efficiency.
Washable filters should be cleaned per the maker’s instructions, or replaced if needed.
Watch Video
Main Points
- Identify the correct filter size before replacement
- Install with arrows facing the airflow
- Replace filters regularly based on usage and environment
- Never operate without a filter in place
- Document replacement dates to maintain consistency