How to Install an Air Filter in Your House
A practical, home-friendly guide to installing an air filter. Learn how to choose the right size and type, prepare your unit, perform a safe installation, and maintain filtration for better indoor air quality.

Installing a new air filter in your home is a quick, essential step toward cleaner indoor air. This guide walks you through choosing the right size and type, how to insert the filter correctly, and how to maintain a seal for optimal performance. By following these steps, you’ll improve filtration efficiency and reduce dust, odors, and allergens in living spaces.
Why proper filter installation matters
A correctly installed air filter is the first line of defense against dust, allergens, and odors in your home. When a filter is the wrong size, installed backward, or not sealed properly, filtration efficiency drops and the HVAC or purifier has to work harder. The result can be higher energy costs, louder operation, and reduced indoor air quality. According to Air Purifier Info, proper filter installation is foundational for clean indoor air. Taking a few minutes to verify fit and orientation pays off in comfort and health for families, pets, and visitors. In homes with children, seniors, or pets, the impact of a well-sealed filter is even more noticeable, improving respiratory comfort and reducing irritation from dust and pollen. This guide focuses on universal steps you can apply to most common household units, from central HVAC systems to portable air purifiers, ensuring you get consistent results regardless of brand.
Understand filter sizes and compatibility
Before you buy a replacement, locate and read the unit’s filter specification. Most filters are identified by a size printed on the frame or packaging, and some units use a standard square or rectangular frame. If the current filter is removed for measurement, use a measuring tape to confirm height, width, and depth in inches. Check the unit manual for recommended filter types and compatibility, as not all filters fit every model. The correct orientation matters: most filters have an airflow arrow that should align with the direction the air moves through the system. A filter installed backward or with gaps around the edges reduces efficiency and can allow unfiltered air to bypass filtration. Always ensure a snug, even seal around the entire frame.
Choosing the right filter media and rating
Filters come in several media types, including fiberglass, pleated, and activated carbon options. For general dust and pollen reduction, a pleated filter offers higher surface area and capture efficiency. If odors are a concern, consider a filter with activated carbon to help absorb smells. Most households don’t need the highest possible filtration if it’s not compatible with the unit’s airflow. Always select a filter that matches the unit’s size and airflow requirements so the system isn’t starved for air, which can strain the blower and shorten its life. When in doubt, consult the unit’s manual or the manufacturer’s website for recommended options.
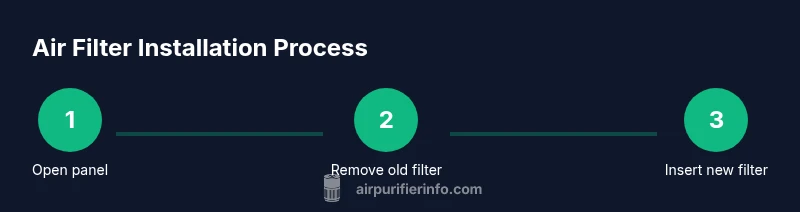
Step-by-step installation overview
Think of installation as a quick sequence: locate the filter compartment, remove the old filter, inspect the gasket, choose the correct replacement, insert the new filter with the airflow arrows pointing in the right direction, reseal the panel, and power the unit back on. This overview helps you anticipate the flow of actions and reduces surprises. If your unit has a door or panel that requires screws, set them aside so they don’t get lost. Some devices have a clamshell design that makes replacement straightforward; others may require a screwdriver. Knowing the general flow helps you stay organized and reduces the chance of mistakes during the actual swap.
Common installation mistakes and how to avoid them
Common errors include using an incorrect filter size, installing the filter backward, or leaving gaps around the edges. A poor seal creates bypass leaks, which defeats the purpose of filtration. Reading the directional arrows on the filter and the housing ensures proper orientation. If you discover the gasket is deformed or cracked, replace it before installing the new filter. Finally, avoid forcing a filter if it doesn’t slide in easily—double-check size and orientation instead of applying pressure, which can damage the housing.
Aftercare: testing and maintenance
After installing, turn the unit back on and listen for unusual noises or air that doesn’t seem to be moving. Check for air leaks around the filter housing and ensure the door or panel closes securely. Plan a regular replacement schedule based on how often you use the device and the environment (pets, smoke, and heavy dust require more frequent changes). Keeping a small calendar or reminder helps maintain consistent filtration and prevents the buildup of contaminants in your living space.
Authority sources
- https://www.epa.gov/indoor-air-quality-iaq
- https://www.cdc.gov/healthyhomes/at-home-air-quality.html
- https://www.osha.gov/indoor-air-quality
Tools & Materials
- Replacement air filter (size determined by unit)(Check the existing filter frame for exact size or refer to the user manual.)
- Screwdriver (if your unit has screws on the access panel)(Philips #2 or appropriate screwdriver as needed by your model.)
- Vacuum with brush attachment(Used to clean dust from the housing before inserting the new filter.)
- Cleaning cloth(Wipe away dust around the opening and seal area.)
- Gloves or disposable gloves(Keeps hands clean and protects you from sharp edges.)
- Tape measure(Useful for confirming edge-to-edge dimensions if you’re unsure of size.)
Steps
Estimated time: 30-45 minutes
- 1
Power down and locate the filter compartment
Turn off the unit and unplug it if possible. Open the access panel to reveal the filter frame. Use a flashlight if needed to clearly see the edges and airflow arrows.
Tip: If screws secure the panel, set them aside in a labeled container so you don’t lose them. - 2
Remove the old filter
Slide the old filter straight out without tilting it. Note the orientation, and inspect the frame for any cracks or residue that might indicate a damaged seal.
Tip: Take a quick photo of the old orientation so you can replicate it with the new filter. - 3
Inspect the housing and gasket
Look for signs of wear on the gasket or frame. Wipe away dust with a dry cloth or vacuum to ensure a clean seal for the new filter.
Tip: Replace a damaged gasket before installing the new filter to prevent leaks. - 4
Choose and prepare the replacement filter
Select a filter that matches the size and meets the unit’s compatibility. Remove packaging and check the direction arrow for correct orientation.
Tip: If you’re unsure, consult the manual or manufacturer’s site for approved options. - 5
Install the new filter
Insert the filter with the airflow arrow pointing in the correct direction. Push until it sits evenly and seals against all edges.
Tip: Take care not to bend the filter frame and ensure no gaps are visible around the edges. - 6
Test and finalize
Close the panel, reconnect power, and run the unit briefly to verify smooth operation. Listen for abnormal noises and check for air leakage before leaving it to run normally.
Tip: If air feels weak, re-check the orientation and seals and reseat if needed.
Questions & Answers
What size filter do I need?
Check your unit’s manual or the edge of the current filter for exact dimensions. If in doubt, remove the old filter and measure height, width, and depth in inches.
Check the unit manual or measure the old filter to confirm the size before buying a replacement.
Can I reuse a disposable filter after cleaning it?
Most disposable filters should not be cleaned. Cleaning can reduce effectiveness and damage the filter material. Replace with a new filter instead.
Disposable filters aren’t meant to be cleaned—replace with a fresh one for best results.
Is it necessary to wear gloves?
Wearing gloves is optional but can protect your hands when handling dusty filters. Avoid touching the dirty side to minimize exposure.
Gloves are optional, but they help keep your hands clean when replacing a dirty filter.
What are signs that the filter needs replacement?
If you notice reduced airflow, more dust around vents, or unusual odors, it’s time to replace the filter.
Look for weaker airflow and visible dirt—those are good cues to change the filter.
Do I need carbon filters for odors?
If odors persist, a carbon-filter option can help. Check your unit’s compatibility before replacing.
Odors may improve with a carbon filter if your system supports it.
What if the new filter doesn’t fit?
Double-check the size and orientation. If it still doesn’t fit, contact the unit’s manufacturer for guidance.
If it won’t fit, don’t force it—verify size and contact support for help.
Watch Video
Main Points
- Choose the correct filter size and orientation
- Ensure a tight seal around the filter housing
- Verify airflow arrows point in the right direction
- Replace filters on a regular schedule based on use and environment