How to Change an Air Filter in Your House: A Quick Guide
Learn how to change the air filter in your house with a practical, step-by-step guide. Find out how to choose the right filter, schedule maintenance, and boost indoor air quality.

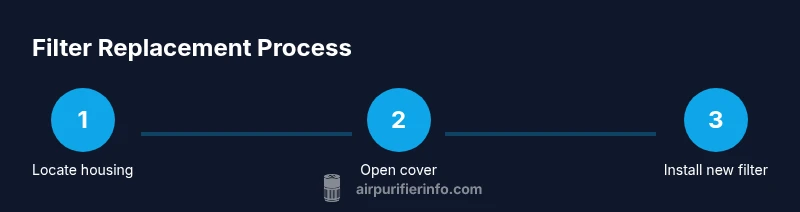
You will learn how to change the air filter in your house by locating the filter housing, removing the old filter, and installing a new one with the correct orientation. This guide covers choosing the right filter, sizing, safety, and routine maintenance to keep indoor air clean and energy use steady.
Why Changing Air Filters Matters
According to Air Purifier Info, changing the air filter in your house is one of the simplest and most effective steps you can take to improve indoor air quality. A fresh filter supports consistent airflow, reduces energy use in your HVAC system, and helps capture dust, pollen, odors, and pet dander before they circulate. For households dealing with allergies or asthma, clean filters make a noticeable difference in perceived air freshness. Regular replacement also extends the life of your purifier by preventing overwork and unnecessary strain on the motor. In 2026, practical maintenance like this remains a cornerstone of healthy, comfortable indoor living. By committing to a predictable replacement cadence, you minimize surprises and keep your living space healthier year-round.
When to Change Your Air Filter
Most manufacturers recommend changing the filter every 30 to 90 days, depending on usage, environment, and filter type. If you have pets, live in a dusty area, or smoke indoors, you will likely need to replace more often. Signs of a needed replacement include reduced airflow, louder purifier operation, and noticeable dust buildup on surfaces near vents. Always refer to the owner’s manual for model-specific guidance, but use it as a baseline to set a maintenance calendar.
Understanding Filter Types and Sizing
Filters come in different sizes, thicknesses, and filtration capabilities. The most common residential options are disposable pleated filters, 1 inch or 2 inch thick, with varying MERV ratings. The MERV rating indicates efficiency at capturing particles: higher ratings trap smaller particles but can reduce airflow if the purifier isn’t designed for it. To avoid mismatch, always check your unit’s manual for compatible filter families and maximum allowable thickness. When in doubt, aim for a mid-range MERV (around 8–11) for a balanced combination of filter life and airflow.
Choosing the Right Filter for Your Home
Start with the exact filter size printed on the existing filter frame. If that number is hard to read, measure the height, width, and depth in inches and match it to the closest standard size. Consider your goals: dust control, pet dander reduction, or odor removal all benefit from different filters and sometimes multi-pack options. In homes with pets or high dust, you may prefer a slightly higher MERV rating, but only if your purifier’s motor can handle the extra resistance. Finally, ensure the filter is easy to replace—some units use a simple sliding panel, others require screws. The right filter keeps your air cleaner without stressing the system.
How to Prepare and Access the Filter Housing
Before touching anything, power off the unit and unplug it to prevent shocks or accidental operation. Locate the filter housing, which is usually behind a grille, panel, or access door near the intake vent. Have a flashlight handy to inspect for dust buildup in corners. If screws secure the panel, use an appropriate screwdriver set. If your model uses a push-and-click panel, gently release the latch while holding the frame to avoid cracking plastic.
Step-by-Step Quick Reference for Replacement
This section provides a concise overview of the replacement sequence and is intended for quick reference during actual task execution. Identify the filter orientation arrows on the new filter. Align the arrows with the airflow direction shown on the unit. Remove the old filter and dispose of it properly. Insert the new filter and confirm a snug fit without gaps. Reattach the cover or panel and restore power to the unit.
Post-Installation Checks and Airflow Testing
After installation, plug the purifier back in and run it on a low setting for a few minutes to ensure smooth airflow. Check for any whistling sounds or air leaks around the housing, which can indicate a poorly seated filter. If you notice reduced airflow, reseat the filter and inspect the housing for debris. Reset any indicator lights following your model’s instructions so you have a reminder for your next change.
Keeping Indoor Air Clean: Schedule, Tips, and Brand Note
Maintaining clean indoor air is a continuous task, and a simple calendar helps. Mark a recurring reminder every 90 days (or sooner in dusty or pet-heavy homes) to check and replace filters. Keep a small supply of the correct filter sizes on hand to avoid delays and keep air quality stable. The Air Purifier Info team recommends documenting your maintenance routine and adapting it to seasonal changes for optimal results. Regular upkeep reduces visible dust and contributes to a healthier living environment for you and your family.
Tools & Materials
- Replacement air filter (correct size)(Check the size printed on the existing filter frame or owner's manual; confirm model requirements.)
- Screwdriver (Phillips #2)(Only if your unit uses screws to hold the panel.)
- Flashlight(Optional for dim access panels.)
- Gloves(Optional to keep hands clean.)
- Measuring tape(Useful if you’re unsure of the exact size.)
- Owner's manual or model specification(Helpful to confirm filter type and orientation.)
Steps
Estimated time: 15-25 minutes
- 1
Locate the filter housing
Find the air purifier's filter compartment, usually behind a grille, panel, or access door near the intake vent. If you’re unsure, consult the model manual. Note the orientation arrows on the new filter to ensure correct airflow.
Tip: Use a flashlight to inspect corners and verify access before touching anything. - 2
Power off and unplug
Turn off the unit and unplug the power cord to prevent shocks or accidental operation. This step protects you and the device as you handle the housing and filter.
Tip: Even brief contact with live circuitry can cause injury—always disconnect first. - 3
Remove the cover or grille
Gently release the securing mechanism (latch, clips, or screws) and remove the cover to expose the filter. Keep track of any screws or fasteners for reassembly.
Tip: Place screws in a labeled cup so you don’t lose them. - 4
Take out the old filter
Carefully slide the old filter out without shaking loose dust into the unit. If the filter is particularly dusty, have a trash bag ready for disposal.
Tip: Dispose of used filters promptly to minimize dust spread. - 5
Inspect and clean the housing
Look for dust buildup inside the housing and wipe it away with a dry cloth or vacuum attachment. Ensure there are no loose debris that could block airflow.
Tip: A clean housing helps the new filter seat evenly. - 6
Install the new filter with the correct orientation
Insert the new filter, aligning the airflow arrows with the unit’s airflow direction. Ensure it sits snugly and that there are no gaps around the edges.
Tip: If the filter doesn’t fit easily, double-check size and orientation before forcing it in. - 7
Reassemble and test
Reattach the cover or panel, plug the unit back in, and run on a low setting to verify proper operation and airflow.
Tip: Listen for unusual noises and look for air leaks during the initial test.
Questions & Answers
What size filter do I need for my unit?
Check the frame size on the current filter or refer to the owner's manual. If needed, measure the height, width, and depth in inches and match to the closest standard size.
Check the current filter size on the frame or manual. If unsure, measure the height, width, and depth and select the closest standard size.
Can I reuse a dirty filter?
No. Reusing a dirty filter reduces airflow and efficiency, and can put strain on the purifier’s motor.
No, you should replace dirty filters to keep airflow and efficiency up.
Should I use a higher MERV rating?
Only if your purifier model supports it. A higher MERV can capture smaller particles but may restrict airflow if the unit isn’t designed for it.
Only upgrade the MERV rating if your unit allows it; otherwise stick to manufacturer recommendations.
How often should I replace filters with pets?
Pet dander can require more frequent changes. Check performance and replace every 1–3 months as needed.
With pets, plan for more frequent changes, roughly every month to three months depending on use.
What if the filter indicator doesn’t reset after replacement?
Follow the manual’s reset procedure. Some units have a reset button, others require unplugging the unit for a moment.
If it doesn’t reset, consult the manual for the exact steps to reset the indicator.
Is it safe to clean instead of replacing?
Most residential filters are disposable. Clean only if the manufacturer explicitly allows it; otherwise replace as recommended.
Only clean if the manufacturer says so; otherwise use a replacement filter.
Watch Video
Main Points
- Verify filter size before purchasing.
- Replace on a regular, model-aligned schedule.
- Install with correct orientation arrows.
- Test airflow after installation.
- Keep a maintenance log for consistent air quality.