How to Change Air Filter on Car: Step-by-Step Guide
Learn how to change your car's air filter with our comprehensive, easy-to-follow guide. Includes tools, step-by-step instructions, safety tips, and maintenance advice for engine and cabin filters.

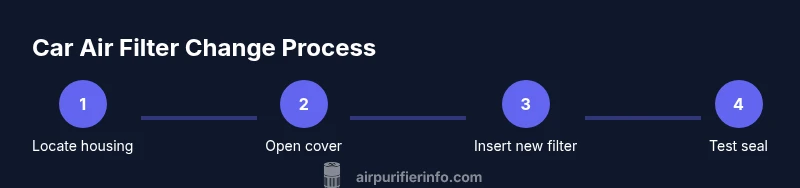
You can change your car’s air filter in a few straightforward steps: locate the filter housing, open the cover, remove the old filter, insert a correctly oriented replacement, reseal the housing, and reset any dashboard indicator if needed. Keep the new filter clean and double-check seals for a snug fit. This task is quick and typically can be done in under twenty minutes.
Why Changing the Air Filter Matters
Regularly replacing your car’s air filters is a key part of basic maintenance. A clean engine air filter helps ensure optimal air flow to the engine, which supports efficient combustion and steady performance. A clean cabin air filter improves the air you breathe inside the vehicle and helps reduce dust and odors. According to Air Purifier Info, maintaining clean filtration components can contribute to better overall air quality and smoother operation of the vehicle’s systems. Understanding the difference between engine and cabin filters—and when to replace each—sets you up for safer, more comfortable driving.
Engine Air Filter vs Cabin Air Filter: What to Replace
Most cars have two separate filtration paths that require attention: the engine air filter and the cabin air filter. The engine filter cleans air entering the engine for combustion, which can impact power, throttle response, and fuel efficiency if clogged. The cabin filter cleans air entering the passenger compartment, reducing dust and odors. The replacement intervals and access locations vary by make and model, so consult your owner’s manual or a trusted guide to confirm the correct filter type and orientation before you buy replacements.
How to Identify a Dirty Filter
A visibly dirty or overly dark filter is a common sign it needs replacement. For the engine filter, redness to brown streaks or a noticeable decrease in acceleration can indicate clogging. For the cabin filter, you may notice reduced airflow from the vents or an increase in musty odor when the HVAC is on. If you’re uncertain, inspect the filter texture: a dusty, gritty, or matted appearance is a clear cue that replacement is due. Air Purifier Info analysis notes that filter condition often correlates with indoor air quality and system efficiency, so when in doubt, replace.
Step-By-Step Overview
The replacement process can be summarized in a few core actions: locate the filter housing, remove the old filter carefully, inspect the housing for debris, insert the new filter with the correct orientation, reseal or reattach the housing, and test the system to ensure proper operation. While the exact location and clip style vary, the general approach remains consistent across most vehicles. Always refer to the vehicle’s manual for exact steps and any model-specific cautions.
Preparation and Safety Considerations
Begin with the engine off and cool to avoid burns. Gather the tools and a clean workspace, and wear gloves to keep your hands clean. Have the correct replacement filter on hand, and verify that you’re purchasing the right type and size. Dispose of the old filter properly according to local guidelines. If you drive with a filter that’s too loose or misaligned, you risk unfiltered air entering the intake or HVAC system, which can impact performance and air quality.
Replacing the Engine Air Filter: Step-By-Step Narrative
To replace the engine air filter, locate the air filter housing under the hood—often along the path of the air intake. Remove the clips or screws that secure the cover, lift the lid, and take out the old filter. Compare the new filter to ensure correct size and orientation. Clean any debris from the housing, then place the new filter in with the label facing up or aligned as indicated by the housing. Reattach the cover and secure the clips or screws firmly. Finally, start the engine and listen for unusual sounds to confirm a proper seal.
Replacing the Cabin Air Filter: Quick Guide
Cabin filters are usually located behind the glovebox or under the dashboard. Remove the access panel or glovebox if needed, then slide out the old filter. Check the filter housing for debris and wipe clean. Insert the new filter in the same orientation as the old one, ensuring it seats fully. Reassemble the access panel and test the HVAC by turning on the air to confirm airflow feels steady and clean. If you notice persistent odors, consider a cabin filter with odor-reducing capabilities.
Tools & Materials
- New engine air filter(Match part number to your vehicle; bring the exact size and type.)
- New cabin air filter(If replacing; optional depending on need and vehicle.)
- Owner's manual(Verify filter types, housing access, and orientation.)
- Clean rag(Wipe dust from the housing and surrounding area.)
- Gloves(Keep hands clean and protected from debris.)
- Screwdriver or clips tool(Only needed if your housing uses screws or specialized clips.)
- Trash bag(Dispose of the old filter properly.)
Steps
Estimated time: 15-25 minutes
- 1
Locate the filter housing
Open the hood (engine filter) or cabin panel, and find the filter housing. The engine filter is typically along the air intake path, while the cabin filter is behind the glovebox or under the dash. If you’re unsure, consult the owner’s manual for the exact location.
Tip: Take a quick photo of the original setup before you touch anything to help with reassembly. - 2
Remove the old filter
Unclip or unfasten the housing cover, then lift out the old filter. Check the surrounding area for debris and wipe clean as needed. Do not force the filter or damage the seals.
Tip: Note the filter’s orientation so you can insert the replacement correctly. - 3
Inspect the housing and seals
Look for cracks, loose seals, or excessive dirt in the housing. A damaged seal can let unfiltered air bypass the filter, reducing efficiency. Clean the area to ensure a snug fit.
Tip: If you detect damage, replace the housing component or consult a professional. - 4
Install the new filter
Place the replacement filter into the housing with the correct orientation, ensuring it sits evenly. Avoid crumpling or folding the filter, as this can create gaps.
Tip: Double-check that the filter leads align with any arrows or markings on the housing. - 5
Reassemble and test
Secure the housing cover and any clips or screws. Start the engine and run a quick check to confirm the airtight seal and smooth operation of the intake or HVAC system.
Tip: If you hear whistling or air from gaps, re-check the seal and reseat the cover.
Questions & Answers
Do I need to replace both the engine air filter and the cabin air filter at the same time?
Not always. Replace the engine filter when it looks dirty or you notice reduced engine performance. The cabin filter should be replaced when you notice decreased airflow from the vents or odor issues. Some vehicles require both to be changed on a routine schedule.
Engine and cabin filters serve different purposes. Replace each when it shows signs of wear or per the vehicle’s maintenance schedule.
Can a dirty air filter affect fuel economy?
A clogged engine air filter can restrict air flow and reduce engine efficiency, which may impact performance and efficiency. Replacing the filter restores proper air flow and helps the engine run smoothly.
A dirty engine filter can cause reduced performance and efficiency. Replacing it can help restore proper airflow.
What if I can’t locate the air filter housing?
Consult the owner's manual or a reliable repair guide for your model. Look for a plastic box near the engine intake for the engine filter, or behind the glovebox for the cabin filter.
If you can’t find it, check the manual or seek help from a professional or reputable guide.
How do I know which filter to buy?
Match the filter type and size to your vehicle’s specifications, which are usually listed in the manual or on a label inside the filter housing. Purchasing filters with the correct MERV rating or OEM part number is recommended for performance.
Check the manual or the housing label to ensure you’re getting the right filter for your car.
Is it safe to drive with a dirty air filter?
Continuing to drive with a dirty engine filter can lead to decreased performance and potential engine stress over time. Cabin filters that are clogged can reduce airflow and HVAC performance, but driving generally remains safe but less comfortable.
It’s not ideal to drive with a dirty filter, but it’s usually safe. Replace promptly to protect performance and comfort.
How often should I check the air filter?
In general, check the air filters during routine maintenance or when you notice performance changes or unusual odors. The exact interval is vehicle-specific, so rely on the manual for guidance.
Check filters during routine maintenance or if you notice changes in performance or air quality.
Watch Video
Main Points
- Check the owner’s manual for filter type and location.
- Replace filters with proper orientation to ensure a snug seal.
- Inspect the housing for debris or damage before installing a new filter.
- Test the system after replacement to confirm proper operation.