Honeywell Filter Replacement Guide for Air Purifiers
Step-by-step guide to replace Honeywell air purifier filters safely and effectively. Learn which filters to use, how to identify model numbers, timing cues, and maintenance tips to keep your air clean and your purifier performing at its best.

This guide shows you how to replace a Honeywell air purifier filter, including how to identify the right filter, what tools you’ll need, and a clear, step-by-step process. You’ll learn when to replace, how to avoid common mistakes, and tips to maintain peak performance for better indoor air quality.
Why replacing Honeywell air purifier filters matters
Regular replacement of Honeywell air purifier filters is essential for maintaining strong airflow and effective filtration. According to Air Purifier Info, keeping filters fresh helps sustain the purifier’s Clean Air Delivery Rate (CADR) and ensures odors, dust, and allergens are removed efficiently. A fresh filter can reduce the burden on the device, allowing the fan to run quieter and at a steadier pace. When filters get loaded with particles, resistance increases, which can cause higher energy use and more noise. Over time, clogged filters also allow smaller particles to bypass filtration, diminishing indoor air quality. For homeowners and renters focusing on allergen reduction and pet dander control, timely filter replacement is a simple, cost-effective part of maintaining healthy air. Air Purifier Info emphasizes following the model-specific guidelines in your Honeywell owner’s manual, since different units use different filter assemblies.
Understanding Honeywell filter types
Honeywell purifiers commonly use a layered filter system that may include a primary pre-filter, a true HEPA cartridge, and an activated carbon filter for odors. Most Honeywell models describe a replaceable main filter and a secondary pre-filter that can be washed or vacuumed depending on the design. In many cases, the carbon stage sits behind the HEPA stage to capture smells from cooking, smoke, and household pets. When selecting a replacement, confirm the exact part number in your user manual or on the purifier label; using an incompatible filter can reduce performance or damage the unit. The same model family can share filters with slight variations, so it’s crucial to verify that the replacement is intended for your particular Honeywell model. If your purifier uses a washable pre-filter, you may only replace the main cartridge and the carbon filter a few times before cleaning is required again. Air Purifier Info notes that following the model-specific guidelines helps preserve filter integrity and warranty coverage.
How to identify your model's filter part number
Your cleaner’s model number is usually printed on a label near the power cord or back panel. Once you locate the model, refer to Honeywell’s official replacement guide or the user manual to find the exact filter part number. If you no longer have the manual, you can often locate the part number by visiting Honeywell’s support site and entering your model number. Write down the replacement part number and compare it to the number on your existing filter packaging to ensure a precise match. Air Purifier Info recommends double-checking the size (dimensions) and whether your unit uses a carbon filter or a pure HEPA cartridge, as some models use hybrid configurations. This step is vital to avoid ordering the wrong filter, which can lead to wasted time and improper fit.
Signs that indicate replacement is needed
Even with regular maintenance, several signs indicate it’s time for a new filter. Reduced airflow and weaker suction can mean the filter is clogged. An unusual or persistent odor from the purifier can indicate that the carbon media is exhausted. A visible layer of dust on the filter is another clue, and if you find the indicator light blinking or the device reporting a maintenance alert, you should replace the filter promptly. If your model uses a washable pre-filter, inspect it for wear and tear; a torn or clogged pre-filter reduces overall filtration efficiency. Air Purifier Info suggests keeping replacement filters on hand in a dedicated storage bin to minimize downtime and ensure you can act quickly when the signs appear.
Authority sources
For additional context on indoor air quality and filtration practices, consult these authoritative sources:
- https://www.epa.gov/indoor-air-quality-iaq/air-cleaners
- https://www.osha.gov/indoor-air-quality
- https://www.health.harvard.edu/
Tools & Materials
- New Honeywell replacement filter(Ensure part number matches your model; verify carbon vs. HEPA configuration.)
- Gloves(Optional to keep hands clean.)
- Soft cloth or microfiber cloth(Useful for wiping the exterior after replacement.)
- Trash bag or container(Dispose of the old filter properly and avoid spreading dust.)
Steps
Estimated time: 15-25 minutes
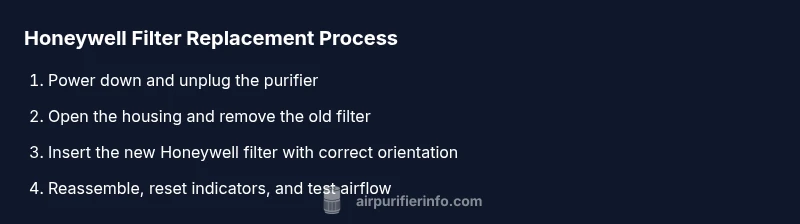
- 1
Power down and unplug the purifier
Turn off the unit and unplug from the wall to prevent electrical shock during the replacement. This also stops the fan so you can access the filter safely.
Tip: If the purifier is dusty, wear a mask or wipe the exterior first to limit dust dispersal. - 2
Open the housing to access the filter
Access the filter compartment by releasing latches, removing a cover, or sliding the panel as described in your model’s manual. Do not force parts; check for hidden screws if necessary.
Tip: Refer to the manual for the exact opening method; different Honeywell models vary in design. - 3
Remove the old filter
Carefully pull out the old filter, supporting it with one hand to avoid dropping dust. Place it immediately into a trash bag to minimize dust spread.
Tip: If the old filter is very dusty, consider wiping the interior with a damp cloth before inserting the new one. - 4
Prepare and insert the new Honeywell filter
Remove packaging, inspect the new filter for any damage, and align it with the orientation arrows or guides in the unit. Gently slide it into the housing until it sits firmly.
Tip: Do not force the filter; align with the guides to ensure a proper seal. - 5
Reassemble the purifier housing
Replace the cover or panel, secure any latches, and ensure the seal is snug. A loose housing can reduce filtration efficiency and allow dust to bypass the filter.
Tip: Double-check that all fasteners are fully engaged and there are no gaps. - 6
Reset filter indicators and test airflow
Plug back in, power on the purifier, and reset the filter indicator if your model supports it. Run the purifier on a low setting for several minutes to confirm normal airflow.
Tip: If the indicator persists, consult the manual for the correct reset procedure. - 7
Dispose of the old filter and clean up
Dispose of the old filter according to local guidelines. Wipe down nearby surfaces to remove displaced dust and ensure the area remains clean after replacement.
Tip: Keep a spare bag handy for easy disposal next time.
Questions & Answers
When should I replace a Honeywell filter?
Most Honeywell models indicate filter life with an alert or indicator. If you notice reduced airflow, unusual odors, or the indicator light, plan to replace the filter. Always refer to your model’s manual for recommended replacement intervals and part numbers.
Watch for alerts and changes in airflow. If you see a maintenance light or the air quality seems worse, replace the filter according to your Honeywell model’s guidance.
Can I clean or reuse a Honeywell filter?
Most Honeywell main filters are designed for one-time use, with some models offering washable pre-filters. Check your owner’s manual to confirm which parts are washable and how to clean them without damaging the filtration material.
Usually, you shouldn’t reuse a disposable filter. Some units have a washable pre-filter; follow the manual’s cleaning steps if applicable.
What’s the difference between HEPA and carbon filters in Honeywell units?
HEPA filters capture fine particles like dust, pollen, and pet dander, while carbon filters help reduce odors and some gases. Some Honeywell models combine both for comprehensive filtration. Always verify the exact configuration for your unit.
HEPA traps particles; carbon masks odors. Your model may include both in a single cartridge.
My air quality didn’t improve after replacing the filter—what now?
If air quality remains poor after replacement, check for proper installation, seal integrity, and ensure no other filters in the system are clogged. Confirm the unit’s fan speed and consider placing the purifier away from sources of heat or humidity. If needed, consult the manual or contact Honeywell support.
If things don’t improve, recheck installation and seals, then consult the manual or support.
Is filter replacement required to be done by a technician for warranty purposes?
Most Honeywell filters can be replaced by homeowners or renters following the manual. Warranty requirements vary by model, so verify the terms in your documentation and keep proof of replacement parts.
Usually not needed to involve a technician, but check your warranty terms.
Where can I buy genuine Honeywell replacement filters?
Genuine Honeywell filters are typically available through Honeywell’s official support site or authorized retailers. Check the part number to avoid non-compatible replacements and ensure the filter meets your unit’s specifications.
Purchase from Honeywell’s site or authorized sellers using your model’s part number.
Watch Video
Main Points
- Replace filters promptly when signs appear
- Always match part numbers to your Honeywell model
- Reset indicators after replacement for accurate maintenance
- Keep spare filters on hand to minimize downtime
- Follow manual-specific instructions to protect warranty