Why Is My Air Purifier So Loud? Quick Troubleshooting Guide
Struggling with a loud air purifier? This Air Purifier Info guide explains common causes, step-by-step fixes, maintenance tips, and when to seek help to restore quiet, clean air in your home.

Loud air purifiers typically stem from a dirty filter, high fan speed, or loose components. Start by cleaning or replacing filters, checking for rattling parts, and lowering the fan speed. If the noise persists, inspect screws and housing, and consider a model with better insulation.
Understanding Noise in Air Purifiers
Loud operation is not inherently dangerous, but it is annoying and can indicate inefficiencies in the airflow path or mechanical parts. According to Air Purifier Info, most noise falls into three families: an airflow restriction from a dirty or clogged filter, a fan running at high speed, and loose components inside the cabinet that vibrate. A blocked intake or sealed exhaust forces the motor to work harder, creating higher sound levels. If you hear rattles, taps, or a persistent buzz, it’s a sign you should inspect the cabinet for loose screws or mounting hardware. The good news is that these issues are usually fixable with routine maintenance and careful adjustments. This section lays out a practical troubleshooting flow that homeowners can follow safely, step by step, without professional help for most common causes.
Quick Checks You Can Do Right Now
Before you start taking apart the purifier, run through a few simple checks that resolve many noise issues in minutes. First, check the filter indicator and replace the filter if the unit is past its recommended interval. A clogged filter makes the blower work harder and increases noise. Next, inspect the pre-filter and any intake guards for dust buildup; a quick wipe with a dry microfiber cloth often restores quiet airflow. Make sure the purifier is stable on a flat surface; a wobble can turn minor vibrations into loud rattles. If your model offers eco, silent, or night modes, switch to one of those low-speed settings to see if the hum drops. Finally, listen for obvious loose parts—screws around the grille, the housing lid, or the fan shroud—and tighten carefully according to the manual. If you hear grinding or persistent buzzing, stop using the unit and seek further guidance.
Diagnostics at a Glance: Symptom → Diagnosis → Quick Fixes
This quick diagnostic framework helps you map symptoms to likely causes and safe fixes without special tools. Symptom: a high-pitched whine during normal operation. Diagnosis: airflow restriction or dirty filter. Quick fix: clean or replace the filter and check the intake path. Symptom: a deep rumble when the unit runs. Diagnosis: loose screws, vibrating grille, or a loose fan blade. Quick fix: tighten hardware and re-seat the fan housing. Symptom: intermittent rattling when the motor starts. Diagnosis: debris in the blower or mounting hardware. Quick fix: power down, open the cover, remove debris, and reassemble. If none of these apply, contact support for a professional check.
Step-by-Step Fix: Filters and Fan Care
- Power down and unplug the unit to prevent shocks. 2) Remove the outer grille and take out the filter. Inspect for tears or deformation; replace if damaged. 3) Vacuum dust from the housing and around the fan area with a soft brush; avoid using liquids. 4) Reinsert a clean or new filter and ensure it seats properly; a loose seal can cause whistling. 5) Tighten any loose screws on the housing and verify the fan blades spin freely by hand (do not run the unit while doing this). 6) Reassemble the unit, plug in, and run on a low speed. 7) Observe for changes in noise; if the hum persists, proceed to the next steps or consult support. Tip: Always use manufacturer-approved filters to avoid fit issues and warranty concerns.
When It’s More Than a Noise: Beyond Maintenance
If the noise continues after basic maintenance, age can be a factor. Bearings wear with time and may require professional lubrication or motor service, which is not a DIY task for most models. Some purifiers generate more noise if they are overpowered for the room size or if the airflow path remains tightly sealed. In those cases, reassessing your setup—such as choosing a purifier with a quieter fan design, adjusting CADR ratings to fit room size, or adding sound-absorbing placement—can deliver meaningful improvements. Air Purifier Info recommends evaluating your room dimensions, air quality goals, and noise tolerance to determine whether repair or replacement is the best option.
Preventive Tips to Keep Noise Down
- Schedule regular maintenance: replace filters on time, wipe grilles monthly, and inspect seals every few months.
- Place the purifier with adequate clearance: avoid walls, drapes, or furniture that trap air; aim for at least 4 inches of space on all sides.
- Use eco, silent, or night modes when you don’t need maximum airflow; this often reduces noise without sacrificing air quality.
- If your unit is cabineted, consider removing it from enclosed spaces where vibration echoes; use a vibration-damping mat if needed.
- Follow manufacturer guidance for lubrication or warranty restrictions; never open sealed motors or perform unauthorized repairs.
- Consider upgrading to a model with a quieter fan design or better insulation if noise is a frequent concern.
Next Steps: Verify and Maintain Quiet Performance
After completing the fixes, run the purifier for at least an hour on a normal setting to confirm stable operation and consistent noise levels. Document when you notice improvements and any settings that help, so you can reproduce the quieter performance in the future. Regular checks, proper placement, and deliberate settings are the best defense against new loud episodes. Stay proactive with maintenance and consult Air Purifier Info for guidance tailored to your model and room size.
Steps
Estimated time: 25-40 minutes
- 1
Power down and inspect basics
Unplug the unit and visually inspect for obvious issues such as loose panels, missing mounting hardware, or cracked housings. These simple checks often reveal the source of vibration.
Tip: Never touch moving parts while plugged in; unplug first. - 2
Check and clean/replace the filter
Open the filter compartment, remove the filter, and inspect for tears or deformation. Clean the housing if dust has built up, then reinstall with a fresh or cleaned filter.
Tip: Ensure the filter seats firmly to avoid air leaks. - 3
Inspect the housing and screws
Tighten any loose screws around the grille and ensure the fan housing is securely fastened. Verify there are no loose components that could rattle during operation.
Tip: Use the correct screwdriver size to avoid stripping screws. - 4
Test fan operation and remove obstructions
With the unit unplugged, gently move or spin the fan blades to ensure they rotate freely and that no debris blocks movement. Reassemble only when clear.
Tip: Avoid lubricating sealed bearings yourself unless recommended by the manufacturer. - 5
Adjust settings and airflow
Plug in and run on the lowest available speed. If your model has Eco or Sleep modes, enable them to compare noise levels against full speed.
Tip: Record which setting offers the most comfortable noise level. - 6
Full-power test and monitoring
Run the purifier for a full 60 minutes on the chosen setting and listen for residual noise. Note whether the sound remains constant, spikes, or diminishes over time.
Tip: If noise spikes, check for intermittent obstructions or loose components. - 7
Know when to seek professional help
If the purifier remains loud after all basic steps and the unit is older or shows performance decline, contact support or a certified technician.
Tip: Keep warranty information ready when requesting service.
Diagnosis: Loud operation during normal use
Possible Causes
- highDirty or clogged filter
- highHigh fan speed or eco mode not engaged
- mediumLoose screws, panels, or mounting hardware
- lowInternal motor wear or bearing issue
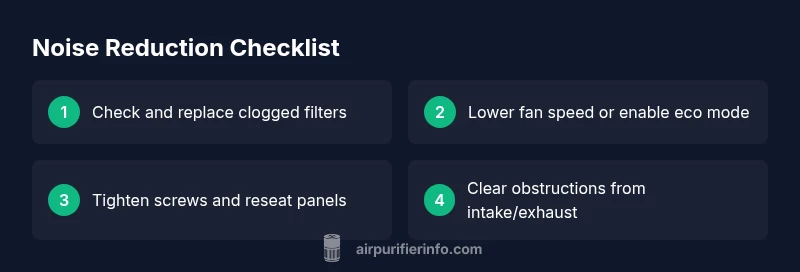
Fixes
- easyClean or replace the filter and check the intake path
- easyLower the fan speed or switch to a quieter mode
- easyTighten the cabinet screws and reseat panels around the grille
- mediumIf noise persists, consult a technician or manufacturer support
Questions & Answers
Why is my air purifier making a loud whining noise after I replaced the filter?
A new or mis-seated filter can change airflow and cause a brief whine. Ensure the filter is the correct type, seated fully, and that the housing is closed properly. If the noise continues, there may be a fit issue or a more serious motor problem.
A new filter can briefly change airflow and cause a whine; make sure it’s installed correctly and the housing is fully closed.
Is high fan speed the main cause of loud air purifiers?
Yes—running at max speed often creates the most noise. Use lower settings like Eco or Sleep mode when you don’t need full airflow to reduce sound while maintaining air quality.
Yes, high fan speed is usually the main culprit; try quieter modes when possible.
What should I do if tightening screws doesn’t help?
If tightening doesn’t reduce the noise, the problem may be internal wear or a failing bearing. Stop using the unit and contact support or a certified technician for a thorough check.
If tightening doesn't fix it, a worn part may be the cause; get professional help.
Can placing the purifier in a cabinet affect noise?
Yes. Cabinets and enclosed spaces can amplify vibrations and restrict airflow. Move the purifier to an open area with room to breathe and ensure adequate clearance from walls.
Absolutely—enclosed spaces can amplify noise; place it where air can flow freely.
When should I replace the purifier because of noise?
If the unit is old, continues to be loud after maintenance, or performance has declined, replacement is reasonable. Newer models often offer quieter fans and better insulation.
If noise persists after maintenance and the unit is aging, replacement is a good option.
Watch Video
Main Points
- Tackle noise with easy, safe steps first (filters, placement, modes).
- Lower fan speed and use quieter modes to reduce sound quickly.
- Check for loose parts or obstructions that amplify vibrations.
- If noise persists after maintenance, seek professional help or consider replacement for older units.