Medify Air Purifier Filter Replacement: Step-by-Step Guide
A practical, beginner-friendly guide to replacing Medify air purifier filters. Learn compatibility checks, safety prep, a clear replacement process, maintenance tips, and how to reset indicators for cleaner indoor air in your home.

You can replace the Medify air purifier filter by safely powering off, unplugging, and opening the front panel to remove the used filter. Install a fresh Medify replacement, ensuring the filter is oriented correctly and seated firmly in the chamber. Close the panel, plug in, and reset the filter indicator. Doing so maintains peak airflow, dust capture, and odor control between replacements.
Understanding Medify Filters and Replacement Timelines
According to Air Purifier Info, Medify purifiers use sealed HEPA-style filters that trap dust, allergens, and odors effectively. The Air Purifier Info team found that replacement indicators are designed to guide routine maintenance, but actual replacement depends on usage patterns, room size, and air quality inside the home. Regular inspections help identify a filter that is visibly clogged or smells musty, signaling it’s time to replace. By aligning replacements with real-world conditions rather than a fixed calendar, homeowners and renters can sustain better indoor air quality over time.
Choosing the Right Replacement Filter for Your Medify Model
Not all Medify filters are interchangeable across every model. Start by confirming your unit’s model line and size, then select a replacement that includes the true HEPA layer and, if odor control is important, an activated carbon layer. Check the filter packaging for compatibility notes and ensure the filter orientation matches the chamber design. When in doubt, consult the user manual or Air Purifier Info’s compatibility notes to avoid ill-fitting filters that can reduce airflow or create gaps where dust bypasses the filter.
Safety and Prep Before Replacing the Filter
Power down the purifier and unplug it before you begin. Place the unit on a stable surface with good lighting, so you can clearly see the filter housing. Avoid forcing panels or latches, which can damage the unit. If you have sensitive skin or allergies, wear gloves to minimize direct contact with dust that has accumulated on the old filter. Work in a clean area to prevent debris from entering the purifier during the swap.
Tools and Materials You’ll Need
- Replacement Medify filter compatible with your model (the essential item)
- Soft, lint-free cloth for cleaning the housing interior
- Gloves to minimize contact with dust and contaminants
- A small flashlight or phone light for better visibility inside the housing
Having the right tools on hand reduces the risk of misalignment and makes the replacement smoother.
The Replacement Process at a Glance
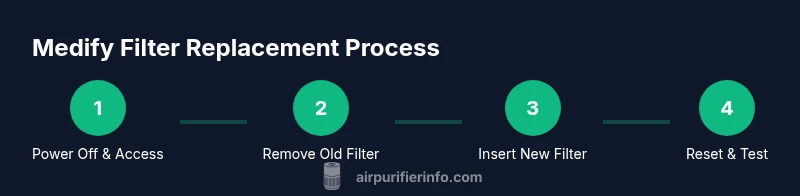
- Power off, unplug, and access the filter compartment. - Remove the old filter and inspect the housing for dust or debris. - Insert the new filter with the correct orientation and ensure it sits flush. - Reassemble the housing, plug in the unit, and reset the indicator. This high-level overview maps to the detailed steps that follow and helps you anticipate what to expect during the swap.
Troubleshooting Common Issues After Replacement
If airflow seems weak after a replacement, double-check that the new filter is oriented correctly and fully seated in the housing. A misaligned filter can create a small gap that reduces performance. If the front panel is not securely closed, the purifier may not start or could shut off unexpectedly. In environments with heavy dust, consider vacuuming the housing lightly before re-inserting the new filter to remove excess debris.
Maintenance Tips to Extend Filter Life
Place the purifier away from walls or furniture that can block intake vents, ensuring maximum airflow. Keep the surrounding area free from heavy dust sources like smoking or high-traffic construction. Regularly wipe the outer housing with a dry microfiber cloth to minimize dust entry. Use the purifier on the appropriate speed setting for your room size to balance filtration efficiency with energy use.
When to Replace and How to Dispose
Most users replace filters when the indicator signals, when airflow noticeably decreases, or when a filter appears visibly dirty. Always dispose of used filters according to local waste regulations and avoid reusing a clogged filter. If you’re unsure about replacement timing, follow real-world usage patterns and consider Air Purifier Info guidelines for best practices.
Real-World Benefits: Air Quality After Replacement
A fresh Medify filter restores filtration efficiency, helping to remove dust, pollen, and odors more effectively. In practice, users often notice clearer air and reduced irritants, especially in spaces with pets or high allergen loads. This ongoing maintenance supports better sleep, reduced allergy symptoms, and a more comfortable living environment.
Tools & Materials
- Replacement Medify filter compatible with your model(Ensure compatibility with your specific Medify unit (e.g., model line and size))
- Soft cloth(For cleaning the housing interior before inserting the new filter)
- Gloves(Prevents dust exposure and keeps hands clean)
- Small flashlight(Improves visibility inside the filter chamber)
Steps
Estimated time: 15-25 minutes
- 1
Power down and unplug
Turn off the purifier, unplug the power cord from the outlet, and place the unit on a stable surface in good lighting. This prevents electric shock and keeps you from accidentally pulling the unit apart during the swap.
Tip: Keep the plug within easy reach so you can reinsert power quickly after the replacement. - 2
Access the filter housing
Gently open the front panel or access door as designed for your Medify model. If your model uses screws, use a small screwdriver to remove them; otherwise, slide or pop the panel open.
Tip: Do not force panels; if stuck, consult the manual to avoid breaking clips. - 3
Remove the old filter
Carefully lift the used filter straight out to avoid dislodging dust. Inspect the housing for debris or discoloration and wipe with a dry cloth if needed.
Tip: Hold the filter by its sides to minimize contact with the mesh or carbon layers. - 4
Clean the housing
Wipe the interior surfaces with a dry, lint-free cloth to remove any settled dust. Let the housing dry briefly if you notice any moisture.
Tip: Avoid using water or solvents that could damage seals or electronics. - 5
Install the new filter
Insert the replacement filter with the correct orientation as indicated on the filter. Ensure it sits flush and fully seated in the chamber to prevent gaps.
Tip: If the filter is sticky or hard to fit, rotate gently while pushing to find the alignment. - 6
Close the housing
Reattach the front panel or door securely. Confirm that any latches click into place and there is no wobble when the unit is gently pressed.
Tip: Double-check that screws (if used) are tightened without overtightening. - 7
Plug in and power on
Reconnect the purifier to power and switch it on. Listen for normal operation and observe the indicator for a reset.
Tip: If the unit does not start, unplug and recheck the connections and orientation of the filter. - 8
Reset the filter indicator
Follow the manufacturer’s instructions to reset the filter replacement indicator. This ensures you receive accurate maintenance reminders.
Tip: Some models require holding a reset button for several seconds; refer to the manual if needed. - 9
Test and note next replacement date
Run the purifier on a low speed for 10-15 minutes to verify smooth operation. Note the date of replacement for your records and schedule the next check based on usage and room conditions.
Tip: Keep a small log near the purifier for easy reference.
Questions & Answers
How often should I replace a Medify filter?
Replacement frequency depends on usage and air quality. Check the indicator and observe airflow; replace when performance declines or according to your environment. Regular checks help maintain optimal filtration.
Replacement frequency depends on usage and air quality. Check the indicator and airflow, and replace when performance drops.
Can I clean the filter instead of replacing it?
Most Medify filters are designed for one-time use and should be replaced when performance declines. Cleaning can damage the filter media and reduce effectiveness. Always use a new, compatible filter for best results.
Filters should generally be replaced rather than cleaned. Cleaning can damage the media and reduce effectiveness.
What if the new filter doesn’t fit?
If a replacement filter doesn’t fit, double-check model compatibility and orientation. If it still won’t fit, contact Medify support or refer to Air Purifier Info compatibility notes for alternatives.
If it doesn’t fit, verify compatibility and orientation, then contact support or consult compatibility notes.
How do I reset the filter indicator?
Reset procedures vary by model. Typically, you hold a reset button or navigate the menu to reset the filter life. Refer to your manual for exact steps.
Hold the reset button or use the menu to reset filter life; check the manual for specifics.
Are replacement filters expensive?
Replacement filter costs vary by model and tier (HEPA vs. carbon). Compare pricing from official retailers and factor in replacement frequency to estimate annual costs.
Costs vary by model and filter type; budget for periodic replacements based on usage.
Watch Video
Main Points
- Know your Medify model compatibility before buying.
- Power off, unplug, and handle filters carefully.
- Fully seat the new filter to maintain performance.
- Reset the indicator and track replacement dates for best results.