Levoit Filter Cleaning: A Step-by-Step Guide
Learn how to clean Levoit filters to extend life, maintain efficiency, and improve indoor air quality. This educational guide covers safety, steps, maintenance, and when to replace filters.

You can extend your Levoit purifier’s life and keep air fresh by cleaning the pre-filter and housing, inspecting the main filter, and reassembling correctly. This quick answer outlines safety steps, when to clean, what to use, and how to reinsert filters without damaging the unit.
Why Regular Levoit Filter Cleaning Matters
Maintaining clean filters is essential for optimizing airflow, preserving filtration efficiency, and reducing indoor irritants like dust, pet dander, and odors. According to Air Purifier Info, a well-maintained LEVOIT purifier will perform more consistently, draw less power, and deliver fresher air over time. In many models, the pre-filter collects the bulk of dust and can be cleaned or vacuumed, while the main filter often needs replacement rather than washing. Regular cleaning reduces the frequency of pricey replacements and helps you gauge when a full replacement is due. This section explains the why behind the cleaning steps and sets expectations for results.
Understanding Levoit Filter Types and Cleaning Limits
Levoit purifiers typically use a combination of a washable pre-filter, a replaceable main HEPA filter, and sometimes a carbon filter. The pre-filter is designed to capture larger dust particles and is often the only part that can be cleaned without replacing the entire unit. The main HEPA and carbon filters generally require replacement when dirty, damaged, or past their rated life. Always consult the user manual for model-specific guidance, but the general rule is: clean/maintain the pre-filter, inspect the main filter, and replace when necessary. This prevents airflow resistance and maintains odor control.
Tip: Never submerge the main filter in water or apply any solvent to it; moisture can degrade filtration material and void warranties. Air Purifier Info recommends using mild cleaning for the housing and pre-filter only.
When to Clean: Signs Your Levoit Filter Needs Attention
Several signs indicate it’s time to inspect and clean your Levoit purifier’s components. Visible dust buildup around the intake vents, a noticeable decrease in airflow, louder operation, or unusual odors from the unit suggest the pre-filter is dirty or the main filter is approaching end-of-life. If the unit’s indicator shows a dirty filter alert (where available), treat it as a cue to inspect. Remember, cleaning is not a substitute for a worn-out main filter; replacing it when needed is essential for maintaining performance and indoor air quality.
Prepare Your Cleaning Station and Tools
Before starting, gather your cleaning supplies to minimize back-and-forth. A clean, dry workspace helps prevent cross-contamination of dust. Have a soft brush, microfiber cloth, and a small vacuum with a brush attachment handy. If you’ll rinse a washable pre-filter, use cool water and mild soap; avoid hot water and harsh cleaners. Keep a replacement filter handy in case the main filter cannot be saved. Air Purifier Info emphasizes safety: unplug the unit, power down indicators, and keep liquids away from electrical components.
Step-by-Step: Remove, Inspect, and Clean the Filter Assembly
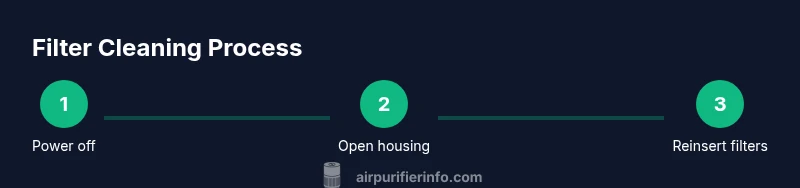
- Power off and unplug the purifier. 2) Open the front or back panel according to your model’s manual to access the filter housing. 3) Remove the old filter carefully, noting its orientation for reinstallation. 4) Inspect the pre-filter and main filter for dust, mold, rips, or excessive wear. If the pre-filter is washable, you can rinse it gently with cool water; do not submerge the main filter. 5) Clean the housing with a microfiber cloth, removing dust and grime. 6) Allow components to air dry completely before reassembly. 7) Reinsert the filters in the correct orientation, reseal the housing, and power the unit on for a quick test run.
Drying and Reassembly: Getting It Right
After cleaning, let all components air dry fully to prevent mold growth and moisture damage. Reassemble the purifier following the correct orientation marks. If you chose to replace the main filter, ensure the new filter is compatible with your LEVOIT model and sits snugly in place. A proper seal improves efficiency and reduces leakage around the edges. Once reassembled, run the purifier on a low setting for 5–10 minutes to confirm airflow is steady and there are no unusual noises.
Post-Cleaning Maintenance and Replacement Schedule
Establish a maintenance cadence that matches your environment. Dusty homes, households with pets, or high-traffic living spaces will require more frequent checks. Use the purifier’s indicator (if available) to time filter changes and inspections. Keep a log of cleaning dates and filter replacements so you know when to plan for replacements and avoid surprises. Air Purifier Info recommends aligning cleaning with your seasonal cleaning cycle for convenience and to maintain consistent air quality.
Common Mistakes to Avoid with Levoit Filters
Avoid soaking or washing the main HEPA filter, which can compromise filtration media. Never use hot water or aggressive cleaners on any filter components. Don’t force-fit a filter or ignore orientation marks—incorrect installation reduces efficiency and could trigger sensor warnings. Never skip drying; damp filters can harbor mold and reduce performance. Finally, don’t neglect replacement schedules; a dirty or damaged main filter loses filtration efficacy and can increase energy use.
Troubleshooting Quick Checks After Cleaning
If airflow remains reduced after cleaning, confirm all parts are dry and seated correctly. Check that the panel is firmly closed and that any seals haven’t shifted during reassembly. If odors persist, verify that the carbon filter is still serviceable; some units require immediate replacement. If noise or vibration continues after reassembly, recheck the filter orientation and housing fit. In persistent cases, refer to the model’s official guide or contact support.
Tools & Materials
- Soft brush(Gently remove dust from surfaces; avoid abrasion)
- Microfiber cloth(For drying and wiping the housing; lint-free)
- Small vacuum with brush attachment(Optional for stubborn dust around the filter area)
- Cool water(Only for washable pre-filter; never submerge main filter)
- Mild soap (optional)(Use sparingly on pre-filter if allowed by model)
- Replacement filters(Keep on hand for quick replacements when the main filter is worn)
Steps
Estimated time: 20-30 minutes
- 1
Power off and unplug
Ensure the purifier is completely powered down and unplugged to prevent electric shock. This also protects sensitive electronics during disassembly.
Tip: Double-check the power switch and unplug from the wall outlet before touching any internal parts. - 2
Access filter housing
Open the front/back panel per your model’s manual to access the filter housing. Do not force panels if they resist; consult the manual to avoid damage.
Tip: Take a photo of the pre-disassembly state to guide reassembly. - 3
Remove the filter
Carefully lift the filter from its slot, noting orientation arrows or notches for correct reinstallation. Handle gently to avoid tearing the filter media.
Tip: Place the filter on a clean surface to inspect without spreading dust. - 4
Inspect filters
Check the pre-filter for dust buildup and the main filter for heavy soiling or damage. If the pre-filter is washable, set aside the washing plan; if not, prepare for replacement.
Tip: If you see mold or tears, replacement is recommended. - 5
Clean the pre-filter and housing
Gently brush away dust from the pre-filter and wipe the housing with a microfiber cloth. Do not saturate the pre-filter unless the manual specifies it is washable.
Tip: Use a light touch to avoid injuring the filter media. - 6
Handle the main filter
Do not immerse the main filter in water. If replacement is needed, detach and replace with an OEM or compatible filter. If the filter is salvageable, follow the manual’s washing guidance.
Tip: Never expose the main filter to moisture; moisture degrades performance. - 7
Drying and return to housing
Allow all components to air dry completely before reassembly. Refrain from using heat sources; dried in a well-ventilated area.
Tip: Ensure there is no dampness before insertion to prevent mold growth. - 8
Reinstall filters correctly
Insert the main filter with its correct orientation, then reinstall the pre-filter. Re-close the housing as instructed by the manual and confirm a snug fit.
Tip: Look for alignment arrows or grooves that indicate proper orientation. - 9
Reset indicators and test
Power the unit back on and reset any filter-change indicator if applicable. Run the purifier briefly to confirm smooth operation and airflow.
Tip: Listen for unusual noises that might indicate improper seating. - 10
Documentation and scheduling
Record the cleaning date and filter status in your maintenance log. Plan the next inspection based on usage and environmental conditions.
Tip: Keep a reminder in your calendar to check at the same interval next season. - 11
Consider replacement timelines
Main filters typically require replacement on a schedule determined by model and environment; rely on performance and manufacturer guidance rather than a fixed rule.
Tip: If in doubt, replace rather than risk reduced filtration efficiency.
Questions & Answers
How often should I clean Levoit filters?
Frequency depends on usage and environment. Inspect monthly and clean the pre-filter when dusty; replace the main filter as recommended by the model’s guidelines.
Check your purifier monthly and clean the pre-filter when dusty; replace the main filter as recommended by your model's guidelines.
Can I wash the HEPA filter?
Most LEVOIT HEPA filters should not be washed. Washing can damage filtration material and reduce effectiveness. Use replacement filters as needed.
Most Levoit HEPA filters should not be washed. Replace them when needed to maintain performance.
What should I do if the purifier smells after cleaning?
If odors persist, ensure the carbon filter is not exhausted and that all components are dry. Consider replacing the carbon filter if odor remains.
If odors persist, check the carbon filter and ensure everything is dry; replace the carbon filter if needed.
How do I reset the filter life indicator after cleaning?
Refer to your model’s manual for exact steps. Typically, you press and hold a reset button or combo on the control panel after replacing or cleaning filters.
Reset steps vary by model, but usually involve holding a reset button after replacing or cleaning filters.
Can I clean the housing with water?
Wipe the exterior and interior housing with a damp microfiber cloth. Avoid soaking the housing or letting liquids contact electrical components.
Wipe the housing with a damp cloth, never soak or let liquids reach the electronics.
When should I replace the main filter?
Main filter replacement depends on model, usage, and environment. If airflow is restricted or odor is persistent after cleaning, replacement is advised.
Replace the main filter when airflow is restricted or odors persist after cleaning.
Watch Video
Main Points
- Clean pre-filters regularly to maintain airflow.
- Do not soak or wash the main filter; replace when dirty.
- Ensure complete drying before reassembly to prevent mold.
- Keep a maintenance log for predictable filter changes.
- Always follow your model’s manual for orientation and safety.