Is Changing Air Filter Hard? A Practical How-To Guide
Learn why changing an air filter isn’t hard and how to do it quickly. This Air Purifier Info guide covers sizing, types, safety, and a simple step-by-step process to improve indoor air quality.

Is changing air filter hard? Not if you treat it as a simple maintenance task that most homeowners can do in under 15 minutes. Identify the correct filter size and MERV rating, gather a couple of tools, and perform 4 clear steps. With minimal effort, you can complete the replacement, avoid common mistakes, and improve indoor air quality right away.
Is Changing Air Filter Hard? A Practical Perspective
Is changing air filter hard? Not if you treat it as a simple maintenance task that most homeowners can do in under 15 minutes. The key is to approach it methodically: verify the correct size and MERV rating, assemble a couple of basic tools, and follow a simple sequence. If you start by locating the filter, pulling out the old one, and snapping in the new one with the correct orientation, you're well on your way.
According to Air Purifier Info, a common source of confusion is using the wrong size or omitting the airflow arrows printed on the filter frame. Taking a minute to confirm the model number and the filter label saves you time and prevents waste. With a little planning, this quick task becomes a routine part of home maintenance that improves indoor air quality and HVAC efficiency.
How to Choose the Right Air Filter
Choosing the right air filter starts with size and rating. Use the filter size printed on the old filter or inside the housing. For most homes, a pleated filter with a MERV rating between 8 and 13 provides a good balance of filtration and airflow. Activated carbon filters help with odors, while HEPA-rated options are available for rooms with higher IAQ needs. Air Purifier Info analysis shows that misreading the filter label or ignoring orientation arrows is the most common reason replacements feel hard. Always consult your appliance manual or the filter packaging to confirm compatibility. If you rent, check with your landlord for model-specific requirements.
Locate, Access, and Inspect the Filter
In many systems, the filter sits behind a front grille or inside a dedicated housing unit. Start by turning off and unplugging the device to avoid any surprise startup. Use a flashlight if needed to see inside the compartment. Remove the access panel fully and slide out the old filter, noting its orientation arrows. Inspect the housing for dust or debris and wipe with a dry cloth if necessary. This quick inspection helps you avoid reintroducing dirt when the new filter goes in.
A Quick, High-Level Replacement Workflow
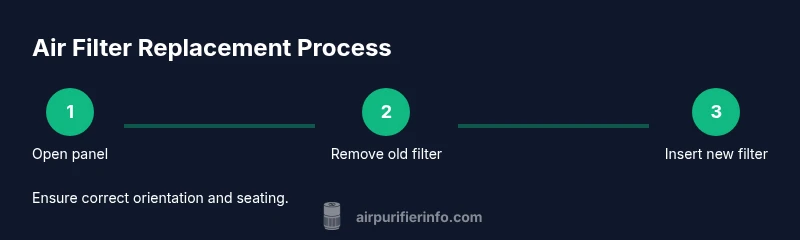
Here's the gist of a safe replacement workflow: verify the filter size, remove the old filter, insert the new one with the correct orientation, reseal the housing, and power the unit back on. The exact steps vary by model, but the sequence is universal. If your unit has screws, keep them in a labeled container so you don’t lose them.
Common Mistakes to Avoid
Common missteps include using the wrong filter size, installing the filter backward, or forgetting to reseal the housing. Running the system with a missing or poorly seated filter reduces filtration efficiency, can cause higher energy use, and may trigger warnings. Don’t skip the orientation arrows or ignore the manufacturer’s recommended MERV rating.
Maintenance, IAQ, and Future-Proofing
To keep indoor air quality high, replace filters on a regular schedule based on environmental conditions (pollen, pets, smoke) and usage. In high-traffic households or during allergy seasons, more frequent changes are advisable. Consider capturing the date of replacement in a notebook or app reminder. Regular maintenance also helps your HVAC system run smoothly and may extend its life.
Tools & Materials
- Replacement air filter (correct size/model)(Check the label on your current filter or your appliance manual to ensure the right size and MERV rating.)
- Screwdriver (flathead or Phillips, if access panel is screwed)(Only if your unit uses screws; many filters pull out without tools.)
- Nitrile gloves(Helps keep hands clean and minimizes skin contact with dust.)
- Flashlight(Better visibility inside the housing.)
- Trash bag or bucket(To contain the old filter for disposal.)
- Instruction manual (model-specific)(Have it handy to confirm model-specific steps.)
- Notebook or marker(Record filter type and replacement date.)
Steps
Estimated time: 10-15 minutes
- 1
Power down and prep
Turn off the appliance, unplug it, and clear the area around the access panel. Put on gloves if you prefer. Locate the filter access panel in the user manual or on the unit, and remove any screws if required before opening.
Tip: Keep screws in a labeled dish so you don’t lose them. - 2
Remove the old filter
Open the panel fully and gently pull the old filter straight out. Be prepared for a bit of dust. Check the orientation arrows on the filter to note the correct airflow direction for the new filter.
Tip: Take a quick photo of the old filter orientation for reference. - 3
Inspect and clean the housing
Look inside the housing for visible dust or debris and wipe with a dry cloth or brush. Avoid using water near electrical components. Let any moisture evaporate before inserting the new filter.
Tip: A dry housing reduces the chance of dust mixing with the new filter. - 4
Insert the new filter
Unpack the new filter and align its arrows with the housing. Slide it in firmly until it sits evenly and seals around the edges.
Tip: Make sure there are no gaps around the filter edges. - 5
Reassemble and test
Close the access panel, reattach screws if you removed them, plug the unit in, and power it on. Observe airflow and listen for unusual noises; address any issues before normal operation.
Tip: Reset any indicator light or timer if your unit has one.
Questions & Answers
Is changing air filter hard for beginners?
Not typically. It’s a simple maintenance task when you follow a short, clear routine. The biggest hurdle is getting the right size and orientation. Once you know those two items, the process is quick and straightforward.
No, it’s usually easy—just verify size and orientation, then replace and test.
How often should I change my air filter?
It depends on usage and environment. Check monthly in high pollen or pet-prone homes and replace when the filter looks dirty or airflow seems reduced.
Check the filter monthly and replace when you notice reduced airflow or visible dirt.
Can I clean and reuse a disposable filter?
Disposable filters are not designed to be washed and reused. Some reusable filters exist and require specific cleaning and drying steps per the manufacturer.
Generally, disposable filters should be replaced; reusable ones have separate care instructions.
What if the filter doesn’t fit my unit?
Double-check the exact model and size from the manual or labeling. If it doesn’t fit, obtain the correct size from the manufacturer or landlord for compatibility.
If it doesn’t fit, verify the model and size and get the right filter.
Are washable filters worth it?
Washable filters can save money over time but require proper drying and careful maintenance. They’re not suitable for every system, so check your manual.
They can be cost-effective if your system supports them, but read the guide first.
Do I need safety gear during replacement?
Gloves are optional but helpful to keep hands clean. A mask is rarely needed for routine replacements.
Gloves aren’t required, but they can help if you’re sensitive to dust.
Watch Video
Main Points
- Verify filter size and model before purchase.
- Align orientation arrows when inserting the new filter.
- Replace filters on a schedule based on usage and environment.
- Always power down and unplug before maintenance.