How to Put Air Filter In: A Complete How-To Guide
Learn how to install or replace an air filter in HVAC units and room purifiers. This guide covers sizing, orientation, tools, step-by-step instructions, common mistakes, and maintenance to improve indoor air quality.

To install or replace an air filter, locate the filter compartment on your unit, verify the correct filter size and MERV rating, and insert the filter with the airflow arrows pointing in the direction of airflow. This guide covers HVAC and purifier installations, common mistakes, and safety steps to ensure optimal indoor air quality.
What counts as an air filter and where you put it
When you ask how to put air filter in your system, the answer depends on whether you’re working with an HVAC furnace filter or a room air purifier. In both cases, the filter sits inside a housing that channels air through the filter media before it returns to the living space. The placement orientation matters: most filters have arrows that indicate the direction of airflow. For HVAC systems, arrows point toward the furnace or blower; for purifiers, arrows point toward the exhaust side. The exact location varies by model, but common places include the return duct opening, the top panel, or a side panel access door. The goal is to ensure all circulating air passes through the filter, capturing dust, dander, and odors. According to Air Purifier Info, proper placement is the single most important step to achieving effective filtration and improved IAQ.
Choosing the right filter: size, MERV rating, and compatibility
Your first step is to confirm the exact filter size (length × width × thickness) and the MERV rating recommended by the device manufacturer. MERV ratings range typically from 1 to 16 for residential use; higher numbers capture smaller particles but may impose more airflow resistance. For most homes with standard HVAC systems, a MERV 8–13 offers a balance of filtration and airflow. Room purifiers often specify a specific filter type (HEPA or HEPA-type) and a cadence for replacement. Always verify compatibility: some units require pleated filters, while others use flat panel designs or non-directional spun media. Check the unit’s manual or the sticker inside the cover to confirm model, size, and orientation. Air Purifier Info analysis shows that using an incorrect size or wrong orientation is one of the most common installation mistakes, leading to bypass leaks and reduced air quality.
Tools and safety you’ll need
Before you begin, gather the essential tools and safety steps. Unplug the unit to prevent electrical shock, then locate the filter housing. Have a soft brush or microfiber cloth ready to wipe away dust around the opening. Depending on your model, you may need a screwdriver to remove a panel or screws. Keep a spare replacement filter on hand to swap in immediately, and a small trash bag for the old filter. If you wear gloves, use nitrile or latex gloves to keep your hands clean and dry. This preparatory step helps reduce dirt transfer and makes the installation smoother.
How to locate and prepare the filter housing
Different units place the filter in different spots. Common locations include a front panel that slides out, a back access panel, or a top lid. Refer to the user manual or model sticker for the exact location. Once opened, assess the housing for any damage, cracks, or missing seals. If you notice gaps around the frame, replace the housing seal before inserting the new filter. Cleaning the interior with a soft brush ensures better airflow and longer filter life. If your unit has a door or latch, verify it closes securely after reinstalling the filter.
Verify seating and check airflow after installation
With the new filter seated, reassemble the housing and restore power. Air should begin to flow through the unit immediately; you can feel airflow at the vents or listen for the quiet hum of the motor. If you notice weak airflow, double-check that the filter is oriented correctly and fully seated, with the arrows pointing toward airflow. Some units have an indicator light or a digital readout; reset or update it if required by the model. A proper seal prevents bypass air and improves filtration efficiency.
Common mistakes and how to avoid them
Common errors include installing a filter backward, using the wrong size, or not fully seating the filter, which allows unfiltered air to bypass the media. Another frequent issue is not replacing the filter when the unit’s performance declines or the indicator suggests replacement. Always verify compatibility with the model’s recommended size and rating. If your unit is dusty or older, consider replacing seals or gaskets to prevent air leaks. Regular inspection helps you catch issues before they affect indoor air quality.
Maintenance and replacement cadence
Filters should be inspected monthly and replaced according to the manufacturer’s schedule, which is typically every 3–6 months for residential HVAC and more frequently for high-use areas or pets. In homes with smokers or strong odors, replacement may be needed sooner. Document the installation date on the filter itself or in a home maintenance log to keep track. If you use a purifier with a HEPA filter, replacement intervals may vary by usage and air quality; always follow the product’s guidance to maintain optimal performance.
AUTHORITY SOURCES
- EPA: Indoor Air Quality (https://www.epa.gov/indoor-air-quality)
- CDC: Healthy Homes and Indoor Air Quality (https://www.cdc.gov/healthyplaces/healthyhome/indoor-air-quality.html)
- OSHA: Indoor Air Quality (https://www.osha.gov/indoor-air-quality)
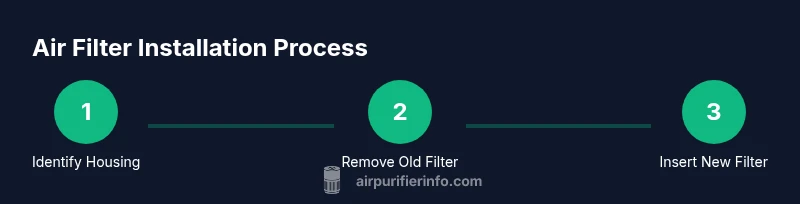
Quick-start checklist for faster installs
- Power off and locate the filter housing
- Confirm correct filter size and orientation before removal
- Remove old filter carefully and note orientation
- Insert new filter fully with arrows toward airflow
- Re-seat housing and restore power; run unit to verify airflow
- Log replacement date for future maintenance
Tools & Materials
- Replacement air filter (correct size and type)(Match model and orientation; check the label)
- Screwdriver (if required)(Phillips or flathead depending on model)
- Soft brush or microfiber cloth(Clean around the housing before resealing)
- Gloves(Optional for clean handling)
- Flashlight(Useful in dark filter compartments)
Steps
Estimated time: 10-20 minutes
- 1
Power off and locate the filter compartment
Power off the unit and locate the filter housing. If your model has a door or panel, carefully open it using the manual's guidance. Confirm you are accessing the correct filter area before proceeding.
Tip: Refer to the user manual for model-specific access points. - 2
Remove the old filter
Gently slide or lift out the old filter. Note its orientation and any seals around the frame. Place the old filter in a bag to contain dust and dispose of it according to local guidelines.
Tip: Take a quick photo of the orientation for reinstalling the new filter. - 3
Check orientation arrows on the new filter
Examine the new filter for airflow arrows. These arrows indicate the direction of air movement through the system. Make sure the arrows will point toward the blower or exhaust, per your device.
Tip: If the arrows are hard to see, invert the filter and compare to the old one to confirm direction. - 4
Insert the new filter fully into the housing
Slide the new filter into the opening until it sits flat and secured. Ensure edges are aligned with the frame and there are no gaps around the perimeter.
Tip: Avoid forcing the filter; if it doesn’t fit, recheck size and orientation. - 5
Re-seal the housing and reconnect power
Close the housing door or panel and engage any latches. Restore power and ensure the unit starts without unusual noises or vibrations.
Tip: If there is a door switch, ensure it engages correctly. - 6
Run a quick airflow test and reset indicators
Check for immediate airflow at the outlet vents. If your unit has a filter replacement indicator, reset it according to the manual. Monitor for a few minutes to confirm stable operation.
Tip: Record the installation date to track future replacements.
Questions & Answers
How often should I replace an air filter in a purifier or HVAC?
Replacement frequency depends on usage, environment, and the filter type. Most residential HVAC filters are recommended every 3–6 months, while purifiers with HEPA filters may require more frequent changes in high-traffic areas. Always follow the manufacturer's guidance and inspect monthly.
Most filters need replacement every few months, but check your manual and inspect monthly to decide if an earlier change is needed.
Can I use a higher MERV rating than recommended?
Using a higher MERV filter can improve particle capture but may reduce airflow and strain the system. If you notice reduced airflow or noise, switch to the recommended range and consult the manual or a technician.
Higher MERV filters can improve filtration but may slow airflow; if you notice issues, use the recommended rating.
Is it safe to clean a disposable filter?
Disposable filters are not designed to be cleaned. Cleaning can damage the media and compromise filtration. Replace with a new filter instead.
Don't clean disposable filters; replace them for proper filtration.
What if the filter doesn’t fit or sits loose?
Double-check the model’s exact size, type, and orientation. If it still won’t sit properly, you may have the wrong replacement part or damaged housing. Contact the manufacturer or a technician.
If it won’t fit, verify size and orientation, and consult support if needed.
Do filters affect energy usage?
Filtration can influence airflow resistance and energy consumption. Higher-efficiency filters may require a bit more fan power, but the impact is usually modest in residential systems.
Better filters can slightly affect energy use due to airflow resistance, but the impact is typically small.
Should I reset any indicators after replacing the filter?
Yes. If your unit has a filter-change indicator, reset it after installation to ensure you receive accurate maintenance reminders.
Reset the indicator after installing the new filter so you know when it's time to replace again.
Watch Video
Main Points
- Power off before opening the housing to prevent shocks
- Verify filter size and orientation before installation
- Ensure the filter is fully seated to avoid bypass
- Reset replacement indicators if applicable
- Maintain a regular replacement cadence for best IAQ