How to Make an Air Purifier with a Fan: A Step-by-Step DIY Guide
Learn how to convert a simple household fan into a functional air purifier using common filters and safe materials. This Air Purifier Info guide covers design, safety, testing, and maintenance for improved indoor air quality.

Learn how to repurpose a standard household fan into a simple air purifier using a filter, frame, and careful sealing. This DIY approach can reduce dust and odors in small rooms if built with safety in mind. According to Air Purifier Info, plan for proper airflow, secure mounting, and safe power use. This guide walks you through the steps and safety checks.
Why this DIY air purifier with a fan can improve indoor air quality
If you are dealing with dust, odors, pet dander, or pollen, a fan plus a filter can capture some airborne particles before air recirculates. This DIY approach is not a substitute for a certified HEPA purifier, but in small rooms and budget-conscious scenarios it can provide a noticeable improvement while you plan a longer term solution. The Air Purifier Info team emphasizes that success depends on three elements: a tight seal, a filter that fits well, and safe operation. Start by estimating your room size, pollutant types, and the airflow you need so you can select a filter and housing that match those needs. When used correctly, a fan based purifier can reduce visible dust and improve comfort between professional cleanings.
Safety first: understanding limitations and safety steps
DIY purifiers present fewer risks than high voltage devices, but there are important safety practices. Never run a homemade purifier near water sources or in damp areas. Ensure the fan is unplugged while assembling, and inspect plugs and cords for wear before powering on. Keep children and pets away during assembly, and use basic PPE such as gloves and eye protection when cutting or sealing materials. Finally, never modify the fan motor housing in ways that obstruct cooling vents.
Filtration options and housing design
The filtration choice drives performance more than the fan alone. A pleated filter with a reasonable MERV rating or a compact HEPA-like filter will capture fine particles better than a bare screen. If a HEPA filter is unavailable, layering a pre-filter with a secondary barrier can improve capture while keeping costs down. The housing design should minimize bypass air by sealing joints with tape or foam strips and by routing air through the filter path rather than around it. A simple cardboard or plastic frame suffices for a proof-of-concept, but ensure the frame remains rigid and safe around the fan blades.
Sourcing parts and assembly basics
Begin with a stable, unobstructed base for the fan and a compatible filter size. Measure the frame opening and compare to the filter dimensions. Cut or assemble a frame that holds the filter firmly without crushing it. Attach the filter to the intake side and secure with tape or clips so air passes through the filter as it exits toward the room. Keep power cords neat and away from moving parts to prevent entanglement.
Testing and initial optimization
Power the device in a dry, non-damp area and observe the airflow. A visible stream of air indicates the fan is moving and the filter is not blocked. If airflow is weak, check filter seating and seals; if it is too loud, adjust the mounting or filter type. A simple dust test—placing a light layer of dust near the intake and watching how quickly it moves toward the filter—can help you gauge effectiveness. Expect modest improvements in small rooms rather than large open spaces.
Maintenance and long-term operation
Inspect the filter regularly and replace it according to manufacturer suggestions or when you notice reduced airflow. Clean the housing exterior with a dry cloth to avoid introducing moisture inside. Do not wash the filter unless the instructions explicitly permit it, as moisture can damage filtering media. If you must reuse a filter, check for signs of wear, delamination, or reduced filtration efficiency prior to reinstallation.
Real-world use cases: apartments, homes with pets, and allergies
In apartments, a compact DIY purifier can help reduce dust and odors in living rooms or bedrooms where space is limited. Homes with pets benefit from filters designed to trap pet dander and fur. For allergy sufferers, pair the DIY unit with regular cleaning and ventilation strategies to maximize air quality, while keeping expectations realistic about the purifier's capacity compared with commercial units.
Resources and credible sources for further reading
For broad guidance on indoor air quality and safe air cleaning practices, refer to established authorities such as the EPA and NIH family of resources. While a DIY purifier is useful, it is part of a broader approach to air quality that includes ventilation, regular cleaning, and monitoring, as outlined by Air Purifier Info in this guide and by your local health authorities.
Tools & Materials
- Box fan or table fan(Choose a stable base and adequate airflow; oscillating models are less ideal for DIY purifiers)
- Filter material (pleated or sheet)(Should fit the chosen housing; consider HEPA-like options if available)
- Housing/frame (cardboard, plastic, or 3D printed)(Rigid frame that holds the filter securely without compressing it)
- Sealant or gasket material((Foam gasket or tape) to seal gaps between filter and housing)
- Duct tape or mounting clips(Secure joints and keep filter firmly in place)
- Scissors/utility knife, ruler, marker(For precise cutting and accurate filter sizing)
- PPE: gloves and eye protection(Wear during cutting and sealing to prevent injuries)
- Optional: basic airflow indicator(Helpful for quick checks of airflow changes)
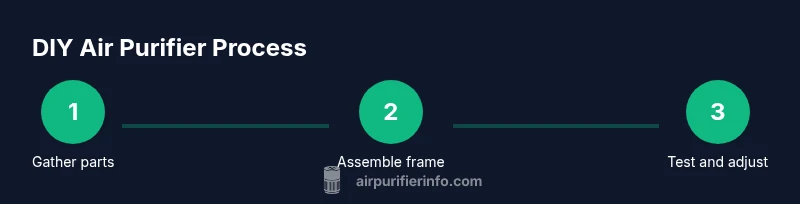
Steps
Estimated time: 45-90 minutes
- 1
Gather components and plan airflow
Collect all parts and map the airflow path. Decide intake and exhaust directions, ensure the filter fits the frame, and set realistic expectations for room size and noise. This planning minimizes revisions during assembly.
Tip: Double-check filter dimensions against the frame opening. - 2
Prepare the housing and frame
Create or adapt a rigid frame that can hold the filter squarely. Smooth any rough edges and design channels that guide air through the filter path. A stable housing prevents vibrations and reduces bypass.
Tip: Use a sturdy frame to prevent air bypass and filter bowing. - 3
Install the filter securely
Insert the filter so that air passes through it on the intake side. Seal the edges with foam or tape to minimize bypass around the filter. Confirm the filter sits flat and does not bow or warp under the fan pressure.
Tip: Avoid crushing the filter; a properly seated filter maintains airflow. - 4
Mount the fan and seal the assembly
Attach the fan to the housing with screws or clips. Seal all joints with tape or gasket to prevent leaks. Ensure there is ample clearance between moving blades and housing material to avoid contact.
Tip: Check clearances and secure fasteners to reduce vibration. - 5
Create safe intake/outlet pathways
Provide unobstructed airflow routes and avoid sharp bends that could impede performance. Use simple channels that guide air through the filter and toward the room, while keeping cords away from moving parts.
Tip: Keep cords away from the fan blades and heat sources. - 6
Power up and perform a basic test
Plug in the device in a dry area and observe airflow and noise. If airflow is weak, recheck filter seating and seals; if loud, adjust mounting or filter type. Do a quick dust test to validate improvement.
Tip: Start on low speed to verify safe operation before increasing airflow. - 7
Fine-tune for noise and performance
If needed, adjust filter density, frame tightness, and mounting to balance filtration with acceptable noise. Replace filters as needed and document changes for future builds.
Tip: Keep a simple log of changes and outcomes for future reference.
Questions & Answers
Can a DIY air purifier with a fan be as effective as a commercial unit?
A DIY unit can reduce dust and odors in small rooms but it typically does not match the performance of a certified HEPA purifier in terms of particle removal efficiency. Use it as a supplementary device and manage expectations.
A DIY purifier can help a small space, but it won't perform like a professional HEPA unit.
What filters work best for a DIY purifier?
Pleated filters with a high surface area, or HEPA-like filters, offer better particle capture than simple screens. Ensure the filter fits your housing and is compatible with your fan's airflow.
Pleated or HEPA-like filters work best if they fit properly.
Is it safe to run a DIY purifier around children and pets?
Ensure the device is out of reach of curious hands, avoid heat and sharp edges, and supervise initial operation. Do not leave powered devices unattended for long periods.
Yes, but keep it out of reach and supervise initially.
How loud will this DIY purifier be?
Noise depends on fan size and filter density. Choose a lower speed or a larger frame to reduce noise, and mount the unit to minimize vibration.
Expect moderate noise at higher speeds; you can reduce it by adjusting speed and mounting.
How do I know if the purifier is working effectively?
Look for steady airflow, minimal bypass air, and a reduction in visible dust when the unit is running. Replace worn filters to maintain performance.
Steady airflow and reduced dust indicate it's working; replace filters as needed.
Watch Video
Main Points
- Plan airflow and seal joints for effective filtration
- Use safe housing and proper power connections
- Test and adjust to balance noise and performance
- Regularly replace filters to maintain air quality