How to Know If Your Air Purifier Is Working: A Step-by-Step Guide
Learn practical, evidence-based methods to confirm your air purifier is functioning. From power indicators and filter checks to in-room tests and maintenance, follow this step-by-step guide to improve indoor air quality with confidence.

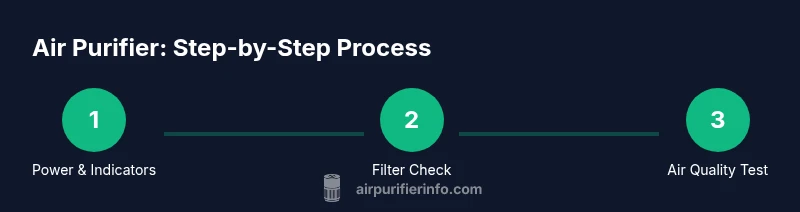
To know if your air purifier is working, start with basics: verify power and indicator lights, inspect the filter and seals, and confirm airflow from the outlet. Then perform a simple in-room test in a closed space, note changes in dust or odors, and listen for consistent fan noise. If indicators fail, service or replace components.
How an air purifier moves air and why it matters
Air purifiers draw in room air, pass it through a filter, and release cleaner air back into the space. The rate of air movement (CFM), the filter efficiency (HEPA), and the unit's CADR rating determine how quickly particles are reduced. Understanding these basics helps you interpret what you observe when testing your purifier and whether it is truly working as intended.
Inspect the filter and seals for performance
A clogged or mis-seated filter dramatically reduces effectiveness. Remove the filter according to the manual, inspect for dust buildup, and replace if dirty or discolored. Also check seals around the housing and ensure there are no gaps. A compromised seal lets unfiltered air bypass the filter, making it seem like the purifier is underperforming.
Reading indicators: CADR, ACH, and sensors
Look for the CADR (clean air delivery rate) rating in the manual; it indicates how much clean air the unit delivers per hour for different particle sizes. If your purifier has an air-quality sensor, observe how it responds to changes in dust and odors. Some models display ACH (air changes per hour) or offer a mobile app with performance data.
Practical in-home tests to verify operation
Perform simple tests in a controlled setting: use a closed room, run the purifier on a mid-to-high setting for 15–20 minutes, and observe changes in visible dust or odors. If you have a consumer PM2.5 monitor, record readings before and after the test. Document your observations to judge effectiveness.
Common causes of underperformance and fixes
Common culprits include a dirty or improperly seated filter, blocked intake vents, gaps in the housing, running at too low a fan speed, or using the purifier in a space that's too large. Fixes include replacing the filter, reseating it correctly, repositioning the unit, and clearing obstructions around the intake and outlet.
Maintenance and when to replace components
Regular maintenance helps ensure continued performance. Clean or replace pre-filters as recommended, replace the main filter when you notice reduced airflow or increased odors, and inspect the motor and seals for wear. Always follow the manufacturer’s guidelines for replacement intervals and adjust based on usage, pets, and living conditions.
Authority sources
- EPA: https://www.epa.gov/indoor-air-quality-iaq/air-cleaners
- NIEHS: https://www.niehs.nih.gov/health/topics/agents/air-purifiers/index.cfm
- Harvard Health: https://www.health.harvard.edu/staying-healthy/air-purifiers-do-they-work
Tools & Materials
- Purifier user manual(For model-specific indicators, airflow directions, and service notes)
- Replacement filter (if due for replacement)(Have a spare handy if the test uses a current filter)
- Consumer air-quality monitor or PM2.5 sensor(Helps quantify changes during tests)
- Incense stick or smoke source (optional)(Use in a well-ventilated area and avoid inhaling fumes)
- Timer or clock(Accurate measurement of test duration)
- Notebook or app for notes(Record observations like scent, dust visibility, and readings)
Steps
Estimated time: 30-45 minutes
- 1
Power on and verify indicators
Turn the purifier on and confirm that all status lights or the display are active. If no indicators appear, check the outlet, ensure the switch isn’t off, and consult the manual for troubleshooting.
Tip: If your unit has a power-saving mode, disable it during testing to ensure consistent readings. - 2
Check and seat the filter correctly
Open the housing, remove the current filter, inspect for dust buildup, and reinstall with the seal aligned. A incorrectly seated filter can restrict airflow and skew results.
Tip: Record the filter’s condition before reinstallation; replace if any tears or discoloration are evident. - 3
Inspect intake and outlet for obstructions
Make sure nothing blocks the intake vents or the exhaust outlet. Move furniture away from the unit if needed and verify the cabinet seals are intact.
Tip: Maintain at least 6 inches clearance around the unit to prevent reduced airflow. - 4
Run a controlled airflow test
In a closed room, run the purifier on a mid-to-high setting for 15–20 minutes and observe changes in dust visibility or odors. If you have a PM2.5 sensor, record readings before and after.
Tip: Use a consistent room size and avoid introducing new particulates during the test. - 5
Evaluate indicators and data
Compare any CADR or sensor readings to the unit’s stated specifications. If the apparent performance is significantly lower, note potential reasons such as filter age or incorrect room size.
Tip: Document discrepancies and plan maintenance or replacement accordingly. - 6
Document results and plan maintenance
Write down your observations, including times, settings, and readings. Use this record to decide when to replace filters or perform a professional check.
Tip: Keep a simple log for ongoing air quality improvement.
Questions & Answers
What should I do first to check if my air purifier is working?
Start with power indicators and the filter's condition. If those look good, proceed to a controlled test in a closed room.
First check the power light and filter condition, then run a quick test.
Can I test without any special equipment?
Yes. Use visual indicators and a simple room test. A consumer PM2.5 monitor can give quantitative data if available.
You can test with basic indicators; a PM2.5 monitor helps, if you have one.
How often should I replace filters to maintain performance?
Follow the manufacturer’s guidelines and replace sooner if you notice reduced airflow or strong odors, especially with pets or high dust.
Replacement timing depends on usage and conditions.
Why is there no noticeable improvement after testing?
Possible reasons include an aging filter, incorrect room size, placement, or blocked vents. Recheck filters and placement before calling service.
It could be the filter or setup; recheck basics first.
Are there hazards using incense or smoke to test?
Smoke tests can help visualize airflow, but perform them safely in a well-ventilated area and avoid inhaling fumes; use safer alternatives if possible.
Smoke tests work, but be careful and use safer methods if you can.
How do CADR and ACH relate to my room?
CADR measures how much clean air the purifier delivers per hour; ACH shows how many air changes occur per hour in your space. Choose a unit that matches your room size.
CADR tells you cleaning power; ACH relates to room air turnover.
Watch Video
Main Points
- Verify power and indicators before testing
- Inspect and seat filters for accurate results
- Use CADR/ACH data to gauge performance
- Conduct a controlled room test and compare readings
- Follow maintenance guidelines to sustain efficiency