How to Clean a Honeywell Air Purifier: A Step-by-Step Guide
Learn how to clean a Honeywell air purifier safely with our step-by-step guide. Discover best practices for exterior care, filter maintenance, and when to replace filters to keep indoor air clean.

To clean a Honeywell air purifier, unplug the unit, remove the grille and filters, wipe the housing, wash the washable pre-filter if present, and replace the main filter as needed. Allow components to dry completely before reassembling. This routine preserves airflow and air quality while extending filter life.
Why Regular Cleaning Improves Indoor Air Quality
Regular cleaning of your Honeywell air purifier is essential for maintaining optimal air quality, efficient operation, and longer filter life. According to Air Purifier Info, understanding how to clean honeywell air purifier helps homeowners and renters keep dust, pollen, and pet dander from circulating in living spaces. Keeping the housing and sensors clean also reduces the chance of false readings and unnecessary filter replacements. In this guide, you’ll learn how to clean honeywell air purifier effectively, with practical tips you can apply today. A clean purifier contributes to lower particle counts and steadier performance across seasons.
Model-Specific Cleaning Considerations
Honeywell offers several purifier lines with different filter configurations and access panels. While the general approach is similar, always confirm steps in the user manual for your specific model. In most cases, the pre-filter is washable while the main filter is not, and some models include a dust sensor that benefits from gentle cleaning. Avoid aggressive cleaners that could degrade plastics or coatings, and never attempt to wash HEPA media unless explicitly permitted by the manufacturer.
Safety First: Prep and Power Down
Before you touch the purifier, unplug it from the wall outlet and wait for any moving parts to stop. Place the unit on a stable surface away from water, and remove nearby items that could snag the grille. If your purifier has a separate power switch, turn it off before detaching components to prevent shorts or shocks.
Exterior Cleaning: Housing, Grilles, and Sensors
Use a soft microfiber cloth lightly dampened with water or a mild soap solution to wipe the exterior. Do not spray liquids directly into the intake or exhaust openings. Clean the front grille with a brush and check the sensors for dust buildup, gently brushing as needed. Dry all surfaces thoroughly before touching internal parts.
Cleaning or Replacing the Filters
Access the filters by removing the front panel. The pre-filter can usually be washed in warm water with mild soap, then air-dried completely. The main filter or HEPA cartridge should not be washed; instead, tap to remove loose dust and replace when the indicator shows. Always use manufacturer-approved replacements to maintain performance and warranty coverage.
Cleaning Internal Components and Sensors
Gently vacuum inside using a brush attachment to loosen dust from inner baffles and housings. Use a dry microfiber cloth to wipe exposed electronics surfaces, avoiding moisture. If your model has a dust sensor, wipe its surface but do not introduce liquids that could damage the sensor or circuit board.
Reassembly and Test Run
Reinstall the main filter and front grille, ensuring a snug fit. Reconnect power, set the purifier to a low fan speed, and listen for unusual noises. Observe the indicator lights for proper operation and run the purifier for a few minutes to ensure there are no abnormal odors or airflow issues.
Maintenance Schedule and Troubleshooting
Plan a quick exterior wipe monthly and a deeper interior inspection every 3–6 months. Track filter life and replace according to the model’s guidance or indicator signals. If airflow drops, odors persist, or you hear new sounds, stop and recheck filter seating and seals; consult the manual or Air Purifier Info for guidance.
Tools & Materials
- Soft microfiber cloth(For wipedowns; use lint-free cloth)
- Non-abrasive soft brush(For grille and sensor vents)
- Vacuum with brush attachment(Loosen dust from internal areas)
- Mild soap and water(Spot-clean exterior only)
- Replacement pre-filter (optional)(Keep on hand if yours is washable and worn)
- Owner’s manual(Model-specific instructions and filter types)
- Isopropyl alcohol (70%) or cotton swabs(For stubborn grime on sensors; sparingly)
Steps
Estimated time: 25-40 minutes
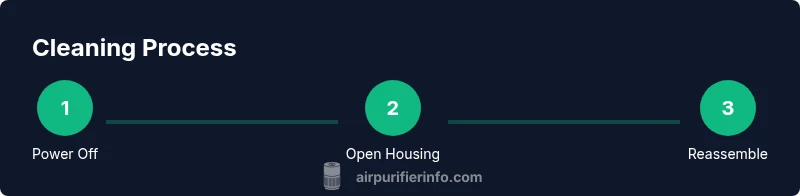
- 1
Power Off and Unplug
Confirm the unit is powered down, then unplug from the wall outlet. Wait a moment for any moving parts to stop completely. This prevents electrical shock and protects the internal electronics while you clean.
Tip: Keep the cord away from water and put the purifier on a stable surface before starting. - 2
Open the Housing and Access Filters
Gently remove the front grille or access panel according to your model’s design. If screws are present, use a screwdriver to loosen them. Expose the pre-filter and main filter so you can inspect each one.
Tip: Place screws in a labeled container so you don’t lose them. - 3
Inspect and Remove the Main Filter
Carefully pull out the main filter or cartridge and inspect for deeply embedded dirt or odors. If the media is heavily soiled or shows signs of wear, plan to replace rather than wash. Refrain from washing HEPA media unless the manual specifically allows it.
Tip: Handle the filter by its edges to avoid damaging the media. - 4
Clean or Replace the Pre-Filter
Pre-filters are typically washable. Rinse with cool or lukewarm water and a small amount of mild soap if permitted, then air-dry completely before reinstallation. If the pre-filter is not washable, vacuum it gently to remove surface dust.
Tip: Never reinstall a damp pre-filter; moisture encourages mold growth. - 5
Clean Exterior and Internal Surfaces
Wipe the outer housing and grille with a microfiber cloth dampened with a mild soap solution. Vacuum interior areas with a brush attachment to dislodge dust, taking care around any electronic components. Avoid liquids near the motor or sensors.
Tip: If dust accumulates on sensors, use a dry cloth or soft brush to clean—water can cause damage. - 6
Reassemble and Check Function
Reinstall the filters securely, replace the grille or panel, and reconnect power. Run the purifier on a low setting for a few minutes to verify airflow and listen for abnormal noises. Check indicator lights for normal status.
Tip: If you notice reduced airflow, reseat the filters and seals before testing again. - 7
Reset Indicators and Document Maintenance
If your model has a maintenance or filter-life indicator, reset it according to the manual after completing cleaning or a filter replacement. Record the date to track future cleaning and replacement cycles.
Tip: Keep a simple maintenance log to simplify future cleanings.
Questions & Answers
Do I need to unplug the purifier before cleaning?
Yes. Always unplug the purifier before you start cleaning to prevent electrical shock and protect internal components. If the unit has a power switch, switch it off and wait a moment for any moving parts to stop.
Always unplug the purifier before cleaning to stay safe and protect the electronics.
Can I wash the HEPA filter?
Most Honeywell models with HEPA filters require replacement rather than washing. Check your manual for model-specific guidance; washing the HEPA media can damage its filtration capabilities and warranty.
Usually you should not wash the HEPA filter; replace it as directed by your manual.
How often should I clean my Honeywell purifier?
A quick exterior wipe monthly keeps dust from building up. A deeper interior check every 3–6 months helps ensure filters and sensors stay accurate and effective.
Clean the exterior monthly and inspect interior components every few months.
When should I replace the main filter?
Replace the main filter when the indicator signals or if you notice persistent odor or reduced airflow. Manufacturer guidelines vary by model, so follow your manual.
Replace the filter when the indicator shows, or if airflow drops noticeably.
Are there any cleaners to avoid?
Avoid harsh solvents, bleach, or abrasive cleaners on plastic housings. Mild soap and water are typically safe for exterior surfaces, but never apply liquids near electronic parts.
Stick to mild soap and water for the exterior and avoid solvents near electronics.
What if I smell something after cleaning?
If odors persist after cleaning, it likely indicates the main filter needs replacement or there is residue on the grille. Recheck seals and consider replacing the filter according to the manual.
Persistent odors usually mean it’s time to replace the main filter or recheck the seals.
Watch Video
Main Points
- Unplug before cleaning to prevent shocks.
- Washable pre-filters require complete drying before use.
- Avoid soaking or washing the main HEPA filter; replace when needed.
- Reassemble securely and test airflow after maintenance.