Freaire Air Purifier Filter Replacement: Step-by-Step Guide
Comprehensive how-to on freaire air purifier filter replacement, selecting the right filter, resetting indicators, and maintaining indoor air quality for homes with dust, odors, and pets.

Learn how to perform the freaire air purifier filter replacement safely and effectively. This quick guide covers when to replace, how to choose the right filter, and how to reset indicators for uninterrupted clean air. Following these steps helps maintain optimal airflow, energy efficiency, and indoor air quality, even in homes with pets or high dust. The guide also highlights model-specific nuances and safety precautions.
Why filter replacement matters for freaire air purifiers
Filtration is the core function of any freaire air purifier. The replacement filter traps dust, dander, pollen, and odors, transforming polluted air into something cleaner. Over time, filters load with particles, causing reduced airflow and decreased purification efficiency. According to Air Purifier Info, maintaining an up-to-date filter is essential for consistent performance and energy efficiency. This is especially important in homes with pets, smokers, or high dust levels, where filters clog more quickly. Understanding how often to replace depends on usage patterns, room size, and filter type, but a practical rule is to monitor the purifier's indicators or the manufacturer's recommendations. When you replace filters on schedule, you protect against allergen buildup and ensure the device draws air at the rated cadence. For freaire models, always verify compatibility and orientation, as an incorrectly installed filter can block airflow or degrade filtration. By treating filter replacement as a regular maintenance task, you extend device life and sustain indoor air quality over time.
How to identify when to replace the filter
Most freaire units include a simple visual or electronic indicator to signal replacement. In practice, you’ll notice a gradual decline in airflow, a weaker clean-air scent, or a more noticeable dust bloom in the room after minutes of operation. Air Purifier Info notes that the replacement interval depends heavily on usage patterns and air quality, so use indicators as your primary guide rather than a calendar date alone. If you notice more frequent trips of the indicator or lingering odors after a cleaning cycle, it’s time to inspect the filter and chamber. Keep in mind that a filter that is physically damaged, bent, or discolored should be replaced immediately to prevent bypass leakage and to maintain filtration efficiency.
Differences between filter types and choosing the right one
Filters come in several configurations, and selecting the right one matters for both performance and maintenance. True HEPA-like filters capture fine particulates, while activated carbon layers target odors and VOCs. Hybrid filters combine these capabilities, offering a balanced approach for homes with cooking smells, pets, or tobacco smoke. Pre-filters extend the life of the main filter by catching larger debris first. When shopping for freaire, verify compatibility with your model, confirm the correct filter orientation, and ensure the filter media is rated for the room size you’re purifying. If you’re unsure, consult the manufacturer’s guide or an independent reviewer from Air Purifier Info to identify which replacement filter best matches your air quality needs.
Safe handling and storage of used filters
Used filters can contain concentrated dust and allergens, so handle them with care. Always wear gloves if you have sensitive skin or allergies, and place the old filter in a sealed bag before disposal. Do not reuse a spent filter; even small tears can allow bypass leakage. When possible, gently tap or shake the filter outside to remove loose dust, then seal it to prevent contamination. If you’re replacing frequently, consider labeling the new filter with installation date to track replacement cadence over time.
How to reset indicators after replacement
Reset procedures vary by model, so refer to the freaire instruction manual or Air Purifier Info’s summarized guidance. In many units, you’ll press and hold a dedicated reset button for several seconds, or use the companion app to trigger a replacement reset. Ensure the new filter is correctly seated and the housing is fully sealed before performing the reset. After resetting, run the purifier for a few minutes to confirm that airflow has returned to normal levels and that the indicator is clear.
Maximizing filter life with maintenance and environment controls
Good maintenance habits extend filter life and keep air clean. Regularly vacuum or wipe the exterior and the filter housing to remove accumulated dust. Place your purifier away from sources of strong heat or humidity, which can degrade filter media faster. If your home has pets or windows are often open, you may see more rapid filter soiling; in these cases, inspect the filter more frequently and rotate pre-filters to avoid premature replacement wear.
Tools & Materials
- Replacement filter compatible with your freaire model(Check the model number on the purifier or in the manual to ensure compatibility.)
- Soft microfiber cloth(For wiping the housing and removing dust before replacing the filter.)
- Gloves(Optional to protect hands from dust and allergens.)
- Screwdriver (if required by model)(Some housings use screws; have a Phillips head handy.)
- Trash bag(Seal old filter in a bag before disposal to contain dust.)
- Owner's manual or model-specific guide(Helpful for orientation and reset steps if you don’t have the app handy.)
- Mild cleaning spray (optional)(Use sparingly on plastic surfaces; avoid electrical components.)
Steps
Estimated time: Total time: 8-15 minutes
- 1
Power off and unplug
Switch off the purifier and unplug it from the wall outlet. This removes the risk of shock and prevents accidental startup while you work. If your model has a on/off switch, turn it off before unplugging.
Tip: Always unplug before you touch any internal parts. - 2
Access the filter compartment
Open the housing lid or side panel according to your model’s design. Some freaire units use a simple latch, while others may require a small screwdriver to remove screws. Have the replacement ready so you can swap quickly.
Tip: Use the finger tabs or latches—don’t pry with tools that could damage the housing. - 3
Remove the used filter
Carefully slide out the old filter, noting its orientation for the new filter. Set the old filter aside for disposal. Inspect the housing for obvious dust buildup or damage and wipe as needed.
Tip: Handle the filter gently to avoid releasing a cloud of dust. - 4
Clean the chamber
Wipe the interior of the filter chamber with a dry microfiber cloth. Do not use water on electrical components. Check for any debris lodged around the gasket or seals.
Tip: A clean chamber helps the new filter seal properly and improves efficiency. - 5
Insert the new filter
Install the new filter with the correct orientation. Make sure it sits flat and fully seated against the gasket. Reinstall any screws or latches to secure the housing.
Tip: Do not force the filter; if it doesn’t align, remove and reinsert gently. - 6
Reassemble and reset the indicators
Close the housing, plug the unit back in, and perform the reset procedure described in your manual or app. Wait a minute or two, then verify that the unit powers on and airflow is normal.
Tip: Hold the reset button for several seconds or use the app, as required by your model. - 7
Test operation
Run the purifier and observe for normal fan behavior and steady airflow from the vents. Listen for unusual noises that could indicate a mis-seated filter or obstruction.
Tip: If airflow remains weak, recheck the filter orientation and seals.
Questions & Answers
How often should I replace the freaire air purifier filter?
Replacement timing depends on usage, air quality, and filter type. Use the unit’s indicator or the manual as your primary guide rather than a fixed date.
Check the indicator or manual to determine when to replace the filter.
Can I wash or reuse the filter?
Most freaire replacement filters are not designed to be washed or reused. Washing can damage the media and reduce filtration efficiency; replace with a new filter instead.
Filters usually aren’t washable; replace with a new one for best performance.
Are third-party filters safe to use?
Use only filters recommended by freaire or compatible third-party options from reputable brands. Incompatible filters can reduce performance or damage the unit.
Stick to recommended or compatible filters to avoid issues.
What are the signs of a clogged filter besides low airflow?
Noticeable odor persistence, muffled fan sound, or reduced purification of the air can indicate a clogged filter.
Watch for odor, weak airflow, or unusual noises as signs you may need a replacement.
How do I reset the replacement indicator after installing a new filter?
Reset procedures vary by model. Use the reset button or app as directed in your manual to clear the replacement reminder.
Use the reset button or app to clear the reminder after replacement.
Watch Video
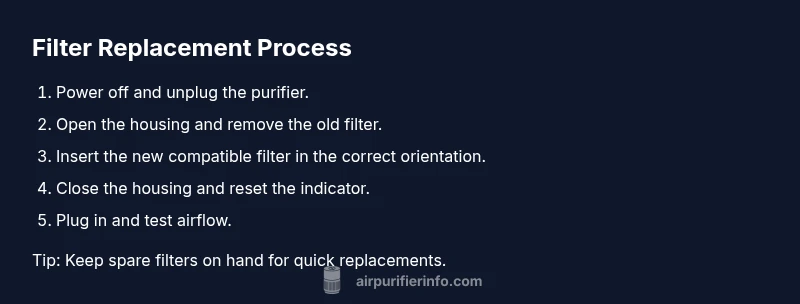
Main Points
- Identify compatible filters for your freaire model.
- Use indicators or manual guidance to time replacements.
- Install the filter correctly to avoid airflow issues.
- Reset indicators after replacement and test airflow.
- Practice safe handling and disposal of used filters.