Air Purifier for Schools: A Step-by-Step Guide
Learn how to select, deploy, and maintain air purifiers in classrooms to improve indoor air quality, reduce allergens, and protect student health with a practical, evidence-based approach.

By the end of this guide, you will know how to select, place, and maintain air purifiers for classrooms to improve indoor air quality. You’ll learn how to size units to room size, reduce dust and odors, and integrate maintenance into school routines. According to Air Purifier Info, choosing ozone-free HEPA models with clear placement plans delivers reliable IAQ improvements.
Why air purifiers matter in schools
According to Air Purifier Info, improving indoor air quality (IAQ) in classrooms can support student concentration, reduce irritants that trigger allergies, and help limit the spread of airborne contaminants. In many schools, dust, pollen, pet dander, and volatile organic compounds accumulate in occupied spaces, impacting attention and overall comfort. IAQ programs that include portable purifiers, better ventilation, and regular filter maintenance have the potential to enhance learning environments without disrupting daily routines. Air Purifier Info analysis shows that well-chosen, ozone-free HEPA purifiers paired with a simple maintenance plan deliver the most reliable IAQ gains in classrooms while keeping energy use reasonable.
How air purifiers work in classrooms
Air purifiers use a combination of filtration and air processing to reduce contaminants in the breathing zone. True HEPA filters capture most particles including dust, pollen, and some smaller aerosols. Activated carbon or other adsorbents remove odors and certain VOCs, while some models include sensors to adjust fan speed based on reported air quality. In a classroom, portable purifiers can be moved between spaces or positioned to optimize airflow. The goal is to create pockets of cleaner air that mix with the room air, reducing the concentration of irritants students may encounter during the school day.
Classroom sizing and mapping basics
To ensure effective air cleaning in a classroom, start by estimating the room size in cubic feet and then align purifier capacity with that volume. A straightforward approach is to measure length, width, and height, multiply these values to obtain volume, and compare it to manufacturers guidance on clean air delivery rate. When possible, select units that offer adjustable fan speeds and real time air quality readouts. This approach minimizes overkill while ensuring adequate air exchanges during occupancy. The goal is consistent air turnover that reduces stagnant zones near walls, desks, and corners.
Features to look for in school purifiers
In school settings, prioritize models with true HEPA filtration (preferably H13 or higher), ozone-free operation, and low noise modes suitable for classrooms. Look for units with easy filter replacement, clear display of air quality, and safe, child-friendly design. A purifier should have a reasonable footprint for placement on desks or low shelves, and offer multiple speed settings to adapt to different activities. Energy efficiency and simple maintenance scheduling are also important for sustained use over a full school year.
Placement, installation, and daily use
Place purifiers where airflow is unobstructed and occupants can benefit from the circulated air. Avoid placing units directly against walls or behind furniture that blocks intake or exhaust. In classrooms, consider placing a purifier near the center of the room or where students spend the most time, such as beside the teacher’s desk or near high-traffic zones. Establish a simple daily routine for turning units on at the start of the day, running at a comfortable noise level, and logging any anomalies. Routine checks help sustain performance.
Maintenance and lifecycle management
Maintenance is essential for sustained performance. Check filters on schedule, usually monthly or per manufacturer guidance, and replace them when intake flow drops or air quality sensors indicate poor performance. Keep a simple log for each purifier, noting purchase date, replacement dates, and any repairs. Clean exterior surfaces periodically to remove dust. Consider a district wide maintenance calendar to ensure consistency, especially during busy school periods such as flu season and back to school activities.
Budgeting and procurement considerations
Budget planning should consider purchase price, ongoing filter replacement, energy use, and potential maintenance contracts. Purifier costs vary by capacity and features, typically spanning a broad range. When evaluating bids, include total cost of ownership over the school year and across multiple classrooms. Favor models that are widely supported, have available replacement filters, and come with clear maintenance guidance. A phased rollout helps manage budgets and staff training while allowing monitoring of IAQ improvements over time.
Implementation plan: rollout in a school district
Begin with a pilot in a few classrooms to validate room sizing, placement, and maintenance workflows. Use data from the pilot to refine the rollout plan, adjust budgets, and train staff. Expand to additional classrooms gradually, ensuring inventory management and staff support scale with deployment. Include clear communication with parents and staff about IAQ goals, the roles of purifiers, and how progress will be measured. A methodical plan reduces disruption and builds confidence in the program.
Tools & Materials
- Measuring tape(For room dimensions and ensuring purifier footprint fits available space)
- Notebook or tablet(Log measurements, placements, maintenance dates, and decisions)
- Step stool or small ladder(Optional for outlet access or ceiling-mounted considerations)
- Screwdriver set(If any purifier mounting or wall adapters are involved)
- Safety gloves(Basic protection during filter changes or handling dusty units)
- Power extension cord or power strip(Only if outlets are not nearby; avoid overloading circuits)
- Portable air quality monitor (optional)(Helps validate improvements during the pilot phase)
Steps
Estimated time: 2-3 hours per classroom (planning to deployment)
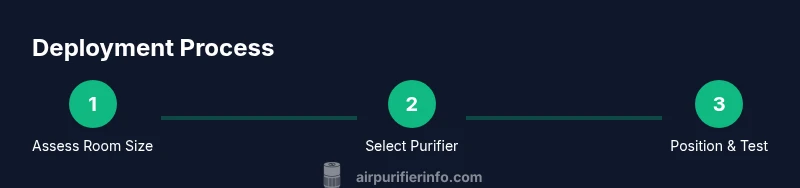
- 1
Measure the room and estimate needs
Record length, width, and height to calculate volume. Use the manufacturer guidance to select a purifier with adequate capacity. The goal is a unit with enough airflow to refresh the room air during occupancy.
Tip: Use a simple floor plan or lay out masking tape on the floor to visualize airflow paths. - 2
Choose purifier type and filtration
Decide between portable free-standing units and centralized systems if the district budget allows. Prioritize true HEPA filtration with activated carbon for odors and VOCs, and ensure ozone-free operation.
Tip: Prefer models with replaceable filters and real-time air quality indicators. - 3
Position purifiers for effective airflow
Place units where air can circulate freely, avoiding corners and heavy obstructions. Position to minimize direct drafts toward student seating, while still circulating air across occupied zones.
Tip: Test a couple of locations and monitor changes in room air quality after the first hour. - 4
Power and safety setup
Plug units into stable outlets and avoid daisy-chain setups. Ensure cords do not create trip hazards and keep devices away from water sources or desks with electrics.
Tip: Use a dedicated outlet if possible to avoid overloading circuits during class changes. - 5
Run a test and validate
Turn on purifiers in a low-power mode and observe noise levels and air quality readings. Note any unexpected vibrations or odors and adjust placement if needed.
Tip: Allow the system to run for at least 30 minutes and compare against baseline air quality readings. - 6
Establish maintenance cadence
Set a schedule for filter checks, replacements, and exterior cleaning. Maintain logs that track maintenance dates, filter brands, and replacement intervals.
Tip: Assign a staff member or rotate duties to share responsibility and avoid gaps. - 7
Scale after the pilot
Use pilot results to refine placement, required unit counts, and budget for the remaining classrooms. Prepare procurement and training plans for the next phase.
Tip: Document lessons learned to streamline future deployments.
Questions & Answers
Do air purifiers in classrooms remove viruses from the air?
Air purifiers reduce airborne particles including some pathogens but cannot guarantee complete removal of viruses. Use purifiers as part of a broader IAQ strategy that includes ventilation, filtration, and hygiene practices.
They reduce airborne particles, but they are not a standalone virus elimination solution.
How many air purifiers should each classroom have?
The number depends on room size and purifier capacity. Use a room volume to guide the total CADR and aim for continuous air turnover during occupancy without creating excess noise.
It varies by room size; measure the space and follow manufacturer guidance.
Are school purifiers safe for children?
Choose models that are ozone-free and built with child-friendly housings. Low noise operation and automatic shutoff features enhance safety during classes.
They can be safe when ozone-free and properly maintained.
Will purifiers cause harmful ozone or other emissions?
Select devices specifically labeled ozone-free. Most modern purifiers use filtration alone and do not emit ozone when functioning properly.
Ozone-free models avoid ozone emissions entirely.
How often should filters be replaced in school purifiers?
Follow manufacturer guidelines, typically several months to a year depending on use and air quality levels. Establish a maintenance log to track changes.
Check and replace filters per schedule to maintain performance.
Can air purifiers replace proper ventilation in schools?
Purifiers complement ventilation but do not replace it. They should be part of a broader IAQ strategy that includes adequate outdoor air exchange.
They help but do not replace ventilation.
Is there a preferred filter type for classrooms with pets?
HEPA filters and carbon filtration are effective for pet dander and odors. Ensure filters are rated for the room conditions and that maintenance keeps the system efficient.
HEPA plus carbon filters work well for pet environments.
Should schools consult with a specialist before buying purifiers?
Yes. A facility manager or IAQ consultant can help size units, plan placement, and develop a maintenance schedule aligned with district goals.
Consult a specialist to tailor the rollout.
Watch Video
Main Points
- Define room size and match purifier capacity
- Choose ozone-free HEPA units with carbon for odors
- Place purifiers for unobstructed airflow and kid safety
- Establish a simple maintenance log and routine
- Begin with a pilot before district-wide rollout