How to replace air filter in car
Learn how to replace your car's engine air filter with a clear, actionable process. This guide covers tools, step-by-step instructions, maintenance tips, and safety notes to improve engine performance and fuel efficiency.

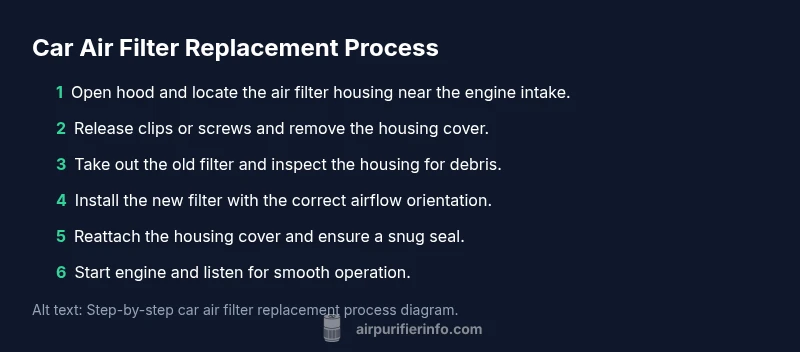
You will learn how to replace the engine air filter in your car: locate the housing, remove the old filter, insert a new filter with the correct orientation, and reassemble the housing. The task typically takes 15-30 minutes with basic tools and a new filter. This guide also covers inspection for debris, safe disposal, and a quick engine check after installation.
What is the engine air filter and why replace it?
The engine air filter is a simple but essential line of defense for your vehicle. It sits in a housing along the intake path and screens out dust, dirt, pollen, and other airborne debris before air enters the combustion chamber. Keeping this filter clean helps maintain optimal airflow, which your engine relies on for efficient combustion and power. According to Air Purifier Info, the engine air intake benefits from a clean filter by supporting better overall air quality, which translates into smoother idle and improved responsiveness on the road.
Over time, even high-quality filters accumulate contaminants. A clogged filter can reduce airflow, forcing the engine to work harder and potentially reducing fuel efficiency and throttle response. While a dirty filter rarely causes immediate catastrophic failures, neglecting replacement can lead to longer-term wear on sensors and higher emissions. If you notice a drop in performance, a check of the air filter is a quick diagnostic step. Visually inspect the element for heavy dust, rips, or deformities. If you can see the pleated media through the housing, it’s time to replace.
To choose a replacement, confirm the correct size and type for your vehicle. Availability, cost, and filtering media vary; many drivers opt for OEM filters or reputable aftermarket equivalents. The Air Purifier Info team emphasizes matching the fit to your model and avoiding overly aggressive aftermarket designs that might not seal properly. A correctly matched filter ensures the seal around the housing remains intact and that all intake routes are properly filtered.
When should you replace your car's air filter?
Replacement intervals are provided by manufacturers in the owner’s manual, but real-world practice varies with driving conditions. If you regularly drive in dusty or urban environments, you may need to replace filters more often than the baseline recommendation. A visual inspection is a practical approach: if the filter appears dark, clogged, or sagging, it should be replaced. Pay attention to any changes in engine performance, such as reduced acceleration or rough idling, which can indicate restricted airflow.
Air Purifier Info analysis highlights the importance of timely air-filter changes for maintaining intake efficiency and consistent engine performance. In practice, checking the filter during routine maintenance and after long trips in dusty conditions helps protect the engine from contaminants and can contribute to better fuel economy and smoother operation over time.
Types of engine air filters
Engine air filters come in several media types, most commonly paper pleated filters, or synthetic and cotton-gauze designs used in higher-performance applications. Paper filters are inexpensive and effective when properly sized; cotton and synthetic media can offer longer lifespans and different filtration characteristics. It’s important to use the correct filter type and size for your vehicle and to observe orientation arrows on the filter to ensure air flows through the media in the intended direction. Avoid mismatched filters that don’t seal properly, as tiny gaps can channel unfiltered air into the intake.
When selecting a replacement, consider OEM (original equipment manufacturer) options for the most precise fit. If you choose aftermarket filters, verify that the product is compatible with your model and that the media meets or exceeds OEM filtration standards. The Air Purifier Info team notes that an ill-fitting filter or incorrect orientation is a common cause of reduced airflow and may negate the benefits of a new filter.
How to prepare for replacement
Before you begin, park on a flat surface and turn off the engine. Engage the parking brake and: gather your tools, wear gloves, and have a new filter ready. Open the hood and locate the air filter housing, typically near the engine top or side with a removable cover. If your vehicle uses a clip system, have the clips ready to release; if screws hold the cover, have a screwdriver appropriate for the fasteners nearby. Clear the area around the housing to avoid dropping parts into the engine bay and ensure you have good lighting to inspect the housing and filter.
The goal in this stage is to create a clean, dry workspace and confirm you have the correct replacement filter selected for your make and model. The Air Purifier Info team emphasizes having the right filter type and size on hand to avoid last-minute trips to the parts store.
Visual cues during replacement
The air filter housing usually has arrows or a stamped “air flow” indicator on the filter itself. Align the new filter so the arrow points in the direction of air flow, matching the housing design. Inspect the housing interior for any debris or small stones that may have fallen in during replacement, and remove them with a clean cloth or brush. Make sure the filter sits evenly in the housing and that the edges seal without gaps.
During reassembly, ensure the housing cover sits flush and that any locks, clips, or screws are tightened securely but not overtightened. A poor seal can let unfiltered air bypass the filtration media, which undermines the whole replacement. The goal is a secure, dust-free seal that maintains proper intake pressure.
Common mistakes and how to avoid them
Common mistakes include using a filter that’s the wrong size or not aligning the airflow arrow correctly, which can reduce filtration efficiency. Another frequent error is leaving the housing cover loose or not resealing the housing, which allows dirty air to bypass the filter. Don’t touch the filter media more than necessary; oils from fingers can affect the media. When removing the old filter, avoid dropping debris into the intake path.
To avoid these issues, double-check the filter part number and orientation, confirm the housing is clean and free of debris, and gently reseat the filter to avoid bending its media. Take a moment to compare the new filter with the old one to confirm they match in size and shape.
Post-install checks and disposal
After reinstalling the cover, restore any removed components and start the engine. Listen for unusual sounds and check for any air leaks around the housing. If the engine sounds rough or the idle is irregular, recheck the seal and orientation. Dispose of the old filter according to local regulations; most filters can be recycled or placed in general waste depending on your area’s guidelines. If a noticeable odor remains after replacement, check the intake path for residual debris and replace the filter again if necessary.
As you finish, reset any maintenance reminders if your vehicle has them and keep the new filter in a clean, dry place until the next replacement. Regular checks help you maintain good airflow and engine health across seasons. The Air Purifier Info team reminds drivers that clean intake air supports both engine efficiency and overall air quality.
Maintenance tips to extend engine air life
To maximize the life of your engine air filter, keep the intake path clean and free of large debris in the engine bay. If you drive in dusty conditions, inspect the filter more frequently and be prepared to replace earlier than the manufacturer’s recommended interval. Avoid using compressed air to clean a dirty filter; if the filter is paper-based, air from a compressor can damage the media and reduce filtration efficiency. Instead, replace the filter with a new one when the media shows visible wear or dirt accumulation.
Finally, pair engine air filter maintenance with cabin air filter checks for a comprehensive approach to air quality. While these filters serve different purposes, keeping both clean reduces the amount of dust and contaminants circulating in your vehicle. Air Purifier Info’s guidance emphasizes aligning maintenance routines with your driving environment to maintain optimal air intake and cabin comfort.
Tools & Materials
- Replacement engine air filter(Select the filter type and size specified for your vehicle model (check owner’s manual or parts store). OEM often ensures the best fit.)
- Screwdriver set(Phillips or flat-head depending on your housing fasteners.)
- Gloves(Protect hands from dirt and grime.)
- Clean rag(Wipe away dust from the housing before inserting the new filter.)
- Owner’s manual(Reference for exact filter type and replacement interval.)
Steps
Estimated time: 25-40 minutes
- 1
Park and prep
Park on a flat surface, turn off the engine, and engage the parking brake. Gather your tools and a new filter, then open the hood to access the air filter housing.
Tip: Let the engine cool for a few minutes to avoid burns and make handling the housing easier. - 2
Locate the air filter housing
Find the air filter housing, typically a rectangular or circular box near the engine intake. It may have clips or screws securing the cover.
Tip: If you’re unsure where it is, consult your owner’s manual or use a quick online lookup for your exact model. - 3
Remove housing cover
Release clips or remove screws to lift off the cover and expose the old filter. Keep the fasteners in a safe spot for reassembly.
Tip: Note the orientation of the cover and how it sits on the housing to ensure a proper seal later. - 4
Take out old filter
Carefully lift the old filter out, noting its orientation and any debris that may have fallen into the housing.
Tip: Avoid banging the housing; gently pull the filter straight up to prevent tearing. - 5
Inspect and prep housing
Wipe the interior with a clean rag and remove any dust or debris. Ensure the housing is dry and undamaged before installing the new filter.
Tip: If you see cracks or damage, replace the housing or seek professional help. - 6
Install new filter
Place the new filter in the housing with the airflow direction arrow pointing toward the engine as indicated on the filter or housing. Ensure it sits evenly.
Tip: Do not press the filter media too hard; a loose fit can create unfiltered air leaks. - 7
Reassemble and test
Reattach the housing cover, secure fasteners, and start the engine. Check for smooth operation and listen for odd sounds.
Tip: If the engine runs rough, recheck that the filter is seated correctly and the cover is sealed.
Questions & Answers
Do I need to replace the air filter myself or hire a mechanic?
Replacing a car engine air filter is a straightforward maintenance task that many car owners can do themselves with basic tools. If you’re not comfortable opening the hood or if you can’t locate the housing, a quick visit to a mechanic is sensible. Regular replacement, whether DIY or professional, helps protect engine performance.
You can do it yourself if you’re comfortable with basic car maintenance; otherwise, a mechanic can handle it quickly.
Can using the wrong filter damage the engine?
Using a filter that doesn’t fit or isn’t designed for your vehicle can restrict airflow, cause dirt to bypass the media, or create improper seals. This can lead to reduced performance and potential sensor faults over time.
Using the wrong filter can restrict airflow and cause potential engine issues.
What are common signs that the air filter needs replacement?
Common signs include reduced engine performance, rough idle, increased fuel consumption, and a noticeably dusty intake area. A visual check for heavy dirt on the filter is a reliable indicator that replacement is due.
Look for reduced power and fuel efficiency, or a visibly dirty filter.
Is there a difference between engine air filters and cabin air filters?
Yes. Engine air filters screen air entering the engine, while cabin filters clean air entering the passenger compartment. They require separate replacements and have different replacement intervals.
Engine and cabin filters serve different purposes and should be replaced separately.
How should I dispose of an old air filter?
Dispose of the old filter according to local regulations. Many places allow general waste disposal, while some programs encourage recycling. Check your city’s guidelines.
Follow your local rules for disposing of old filters.
Can I replace the air filter in any weather condition?
Yes. Replacing the filter is safe in most weather conditions, but extreme cold or heat can affect handling. Wait for moderate weather if you can, and ensure the car has cooled down before starting work.
It can be done in most weather, but avoid extreme conditions for comfort and safety.
Watch Video
Main Points
- Replace the filter with the correct size for your vehicle
- Ensure proper orientation for airflow direction
- Seal the housing firmly to avoid unfiltered air
- Inspect the housing for debris before reassembly
- Test engine after installation for smooth operation