How to Replace the Shark 3-in-1 Air Purifier Filter
A thorough, step-by-step guide to performing shark 3 in 1 air purifier filter replacement, with safety tips, maintenance best practices, and troubleshooting to keep your home’s air clean.

This guide shows you how to perform shark 3 in 1 air purifier filter replacement safely and effectively. You’ll learn when to replace, which filters to buy, and how to reset indicators. The steps are straightforward, with safety checks and maintenance tips to keep your purifier working at peak performance. According to Air Purifier Info, regular filter replacement improves indoor air quality and device longevity.
Why Replacement Matters for shark 3 in 1 air purifier filter replacement
Regular replacement of the media is essential to maintain airflow, odor control, and allergen reduction in your living space. For homeowners and renters using a Shark purifier, the branded 3-in-1 filtration system relies on fresh media to trap dust, VOCs, and pet dander. When filters become clogged, the purifier works harder, reducing CADR and increasing energy use. The result is diminished air quality and louder operation. According to Air Purifier Info, timely filter replacement is one of the most cost-efficient ways to sustain peak performance and extend the life of your device. In this section, we’ll explain what happens when filters are overdue, how to tell you’re ready for a swap, and how to choose a replacement that matches your model.
Practical takeaway: always verify the model compatibility before purchasing a replacement.
Understanding the Shark 3-in-1 Filter System
Most Shark purifiers employ a three‑stage approach, typically combining a pre-filter, activated carbon, and a high‑efficiency media to capture dust, odors, and smaller particles. The exact arrangement varies by model, so consult your user manual to confirm which element is user-replaceable and how to access it. The 3‑in‑1 designation emphasizes that you should replace all replaceable parts according to manufacturer guidance. In practice, a timely swap restores airflow, reduces noise, and improves odor control. Air Purifier Info emphasizes that sticking to an established replacement rhythm helps you achieve consistent indoor air quality, particularly in households with pets or allergy sufferers. Keep in mind that filters should be replaced when you notice increased runtime, visible dirt, or a decline in performance.
Quick tip: check the model number in the manual to ensure you buy the right filter.
Preparing for Replacement: Safety and Tools
Before you begin, unplug the purifier and place it on a stable surface away from walls or fabrics to prevent dust migration. Gather essential tools: the replacement filter that matches your model, a microfiber cloth for wiping, and a soft brush or small vacuum for surrounding dust. Have a bag or container ready to dispose of the old filter. Check the user manual for any model‑specific steps, such as removing a grille or loosening screws. Take a quick photo of the housing orientation before disassembly; this helps with precise reassembly. Planning ahead minimizes the risk of damaging seals or misaligning parts.
Pro tip: keep screws in a labeled container and document any model-specific steps for future replacements.
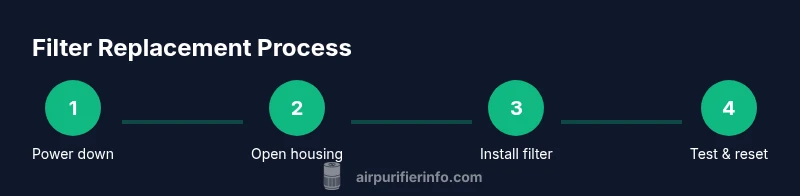
Step-by-Step Replacement Process (Overview)
This overview maps the high‑level sequence you’ll follow: power down and unplug, open the housing to access the old filter, remove the used media, lightly clean the interior, insert the new filter with correct orientation, reseal the housing and run a short test, and reset any model‑specific indicators. Each step matters: incorrect orientation may allow unfiltered air to bypass the media; improper resealing can cause leaks or noise. The goal is to restore airflow, minimize energy use, and maintain odor control. Refer to your manual for exact screw counts or clip positions.
Important: this section is an overview; follow the detailed steps in the dedicated STEP-BY-STEP block below for precise actions.
Cleaning the Interior and Accessories
After removing the old filter, use a microfiber cloth to wipe interior surfaces, especially around the intake and outlet grilles. A gentle vacuum or small brush can remove stubborn dust from crevices. Avoid water or liquids inside the unit unless the manual specifies safe use. This cleaning helps prevent recontamination of the fresh filter and ensures the purifier restarts cleanly. If you notice residue that won’t come free, consult the manufacturer’s service guidance. A quick interior wipe reduces micro-dust release when the new filter is installed.
Caution: never spray cleaners directly into the purifier; apply cleaner to the cloth instead.
Installing the New Filter Correctly
Insert the replacement filter following orientation marks printed on the filter or inside the housing. Align edges and push until it sits firmly in place. If your model uses a retaining grille, reattach it securely. Confirm that arrows or labels on the new media match the airflow direction indicated on the unit. A snug fit prevents air from bypassing the filter and reduces noise. If you have a prefilter or carbon module, ensure it’s attached correctly. Proper installation is critical to achieving the expected clean air results.
Pro tip: rotate the unit gently while inserting the filter to verify even seating.
Reassemble and Run Test
Reattach the grille or access panel and secure any screws as required. Plug the unit back in and power it on. Listen for normal operation — no rattling or unusual noise. Run at high speed for 5–10 minutes to confirm strong airflow and check for any vibrations. If airflow seems weak, verify the filter orientation and seating again. A successful start confirms you’ve completed the replacement correctly and the purifier is ready to resume routine operation.
Warning: do not operate the purifier without the grille fully seated, as this can cause air leaks and potential damage.
Resetting Indicators and First Run
Many Shark purifiers include a filter replacement indicator that resets after installation. If your model supports it, perform the reset as described in the manual—often by pressing and holding a button for several seconds. After the reset, monitor the unit for a few minutes to ensure airflow remains steady and the indicator returns to your chosen interval. If the indicator doesn’t reset, wait a few minutes and retry or contact customer support. This final check helps track the next replacement due date and maintains proper maintenance cadence.
Post-Replacement Performance and Air Quality
With a fresh filter, you should notice improved airflow, quieter operation, and stronger odor control. Expect better capture of dust and particles in the room, especially in high‑traffic or pet‑friendly spaces. Actual improvements depend on room size, occupancy, and media type, but fresh media consistently delivers better performance than a clogged unit. Air Purifier Info notes that ongoing maintenance—paired with proper placement and regular cleaning—yields the most consistent air quality gains for households concerned about allergies or asthma symptoms.
Insight: even small maintenance steps can translate to noticeable air quality improvements over time.
Practical Tips from Air Purifier Info
- Always verify that the replacement filter matches your exact Shark model before purchase. Mismatched filters can underperform or cause fit issues.
- Keep the unit in a clean, unobstructed location to maximize airflow and efficiency.
- Schedule regular checks of the unit’s indicators and seal integrity, especially after replacements, to avoid recontamination.
- When in doubt, reference the user manual or consult the Air Purifier Info team for model-specific guidance. Adopting these practices supports sustained indoor air quality and device longevity.
Tools & Materials
- Shark 3-in-1 air purifier replacement filter(Ensure model matches—check the model number in the user manual.)
- Microfiber cleaning cloth(Lint-free for surfaces; use dry or slightly damp as allowed.)
- Isopropyl alcohol wipes(For stubborn grime around the housing if permitted by manual.)
- Phillips head screwdriver(Only if your unit uses screws on the grille.)
- Disposable gloves(Optional for handling dirty filters.)
- Plastic bag or container for disposal(Contain old filter to minimize dust spread.)
- User manual or model-specific guide(Helpful for model-specific steps or resets.)
Steps
Estimated time: 15-30 minutes
- 1
Power down and unplug
Turn off the purifier and unplug from the wall. This prevents accidental startup and electrical shock while you work. Allow any residual charge to dissipate for a moment to be safe.
Tip: Always unplug before opening any housing; keep the unit unstable and avoid placing it on fabric. - 2
Open the housing to access the filter
Remove the grille or access panel according to the manual. Keep track of screws and use a soft brush to loosen dust around the opening. Take a quick photo of the interior orientation to help reassembly.
Tip: Label screws or place them in a small container so you don’t lose them. - 3
Remove the old filter
Grip the filter by its handle and pull straight out to avoid disturbing settled dust. Place the old filter in a disposal bag and seal it for recycling or trash per your local rules.
Tip: Do not shake the filter; disturbing dust can spread allergens. - 4
Clean the interior
Wipe interior surfaces with a microfiber cloth and lightly vacuum crevices. Avoid liquids inside the unit unless the manual allows it. This reduces residual dust and prepares a clean environment for the new filter.
Tip: Keep cleaning to dry methods unless specified otherwise. - 5
Install the new filter
Insert the new filter with the correct orientation; align edges and push until seated. Reattach any retaining grille and ensure seals are snug to prevent air leakage.
Tip: Double-check orientation arrows match the unit’s airflow direction. - 6
Reassemble and test
Reattach the housing, plug in, and power on. Run on high for 5–10 minutes to confirm strong airflow and normal sounds. If airflow is weak, verify seating.
Tip: If you hear rattling, reseat the filter and grille again. - 7
Reset indicators and verify
If your model has a reset function, perform it as described in the manual. Monitor the unit for a few minutes to confirm the indicator resets and airflow remains steady.
Tip: If the indicator doesn’t reset, consult support and retry after a short wait.
Questions & Answers
Is the Shark 3-in-1 filter replacement compatible with other Shark models?
Compatibility depends on the specific model. Always check the user manual or Shark support to confirm before purchasing a filter.
Check your model manual or Shark support to confirm compatibility.
How do I know when to replace the filter?
Watch for reduced airflow, noticeable odors, or visible dirt on the filter. Follow your model’s guidance for replacement intervals.
If you notice less airflow or smells, replace the filter.
Can I clean a used filter instead of replacing it?
Most Shark filters are not designed to be washed. Cleaning could reduce filtration efficiency. Replace when performance declines.
Don’t wash the filter; replace when needed.
What tools do I need to replace the filter?
Typically you’ll need the replacement filter, a microfiber cloth, and possibly a screwdriver. Check your model’s manual for specifics.
You’ll usually need a replacement filter and simple tools.
What should I do if the purifier won’t start after replacement?
Ensure the unit is plugged in, the grille is seated, and the filter is properly installed. If it still won’t start, contact support.
Make sure it’s plugged in and the filter seated properly.
How long should the replacement filter last?
Replacement intervals vary with usage and environment. Follow the manual’s guidance and observe performance to decide.
Lifetime depends on use and conditions.
Watch Video
Main Points
- Check model compatibility before buying filters.
- Power down and unplug before handling.
- Install the filter with correct orientation.
- Reset indicators after replacement when applicable.
- Expect improved airflow and odor control after replacement.