Pure Enrichment Air Purifier Filter Replacement Guide
Learn how to safely replace the filter in your Pure Enrichment air purifier. This 1800-word, step-by-step guide covers compatibility, tools, installation, maintenance, and troubleshooting for cleaner indoor air.

By following this guide, you will safely replace the filter in your Pure Enrichment air purifier, confirm model compatibility, and restore optimal filtration. Gather the exact replacement filter for your model, prepare a clean workspace, unplug the unit, swap in the new filter, reseal the housing, and reset any indicators. This quick process returns your purifier to peak performance.
What to know about Pure Enrichment air purifier filter replacement
If you own a Pure Enrichment air purifier, replacing the filter is a key step in maintaining indoor air quality. The right filter keeps particles, odors, and pet dander from circulating, and a clogged filter can reduce airflow and energy efficiency. According to Air Purifier Info, proactive filter replacement not only preserves filtration performance but also helps you avoid costly repairs down the line. Begin by identifying the exact filter configuration used in your model. Some models use a combination of a pre-filter, a true HEPA-style main filter, and an activated carbon layer for odor control. Others may use a simpler cartridge. Always confirm the model number on the device or in the manual before purchasing a replacement. Pure Enrichment typically recommends replacing the main filter on a schedule tied to usage and air quality, rather than a fixed calendar. If you notice reduced airflow, unusual odors, or louder operation, treat that as a signal that a replacement is due. In short, proper filter replacement is a straightforward maintenance task with significant payoff in air cleanliness and energy efficiency.
How to identify the right replacement filter for your model
Compatibility is the first hurdle. Start by locating your purifier's model number, usually on the back or bottom of the unit. With the model in hand, check the owner’s manual or the manufacturer’s official site to confirm which filter cartridge is required. Air Purifier Info advises cross-checking the filter’s part number against your device’s documentation to avoid buying the wrong type. Many Pure Enrichment purifiers use a standard size filter with a replaceable core, while some newer units require a specific carbon-impregnated layer or a two-stage assembly. Look for keywords such as “true HEPA,” “HEPA-type,” or “activated carbon” when reading product descriptions. Also, verify the fitment method: some filters slide in easily, others twist or clip into place. If you are unsure, contact customer support or consult independent reviews—this is where Air Purifier Info’s guidance becomes valuable for homeowners and renters alike.
Tools and prep for filter replacement
Before you begin, assemble a clean workspace and gather the necessary items. You will typically need a replacement filter compatible with your Pure Enrichment model, protective gloves, a clean microfiber cloth, and a soft brush for dust removal. Optional but helpful: a small flashlight to inspect the housing and a gentle vacuum with a crevice tool to loosen dust from the intake grills. Power down the unit and unplug it from the wall outlet to ensure safety. Place the purifier on a stable surface with enough room to work, and have a trash bag ready for the old filter. Having everything within reach reduces the risk of dropping pieces or leaving the device partially assembled.
Safety and compatibility considerations
Never operate the purifier with a damaged housing or a torn filter. If the filter is saturated with moisture or mold, dispose of it according to local guidelines and replace it immediately. Some Pure Enrichment models require you to remove the front panel to access the filter; others allow access from the top or back. Verify that the new filter is seated evenly and that seals are intact to prevent bypass. Avoid using generic or off-brand replacements that do not meet the manufacturer’s specs. If the unit includes an odor indicator or a filter-life timer, plan to reset it after installation. Always unplug the device before touching internal components and never use the purifier outdoors or in damp environments.
Installing the new filter and initial checks
Once you have the correct replacement filter, prepare it for installation. Remove any packaging and inspect the new filter for signs of damage. Align the filter with the housing markers or arrows to ensure correct orientation. Slide or press the filter into place until you feel it seat firmly. Reassemble any panels you removed and verify that there are no gaps along the seams. Wipe down the exterior and the intake vents with a dry microfiber cloth to remove dust from handling. Reconnect the unit and run it on a low speed for a few minutes to confirm that the airflow is unobstructed. If you notice ticking or grinding noises, power down immediately and re-check the filter alignment. Remember: the filter is there to trap dust and odors, so a tight seal matters as much as a clean filter.
Safety and resetting after replacement
After replacement, reset any indicator lights or filter-life timers according to the manual. Some units require you to hold a button for several seconds; others reset automatically after a run cycle. Run the purifier on low for 10-15 minutes to allow the new filter to settle and the system to purge any residual manufacturing dust. Monitor for abnormal smells or sounds during the first hours of operation. If odors persist, it may indicate the filter is clogged or not seated properly, in which case power off and re-check. Air Purifier Info notes that consistent maintenance yields the best long-term air quality results, so consider marking a calendar reminder for the next replacement.
Maintenance schedule and longevity tips
To maximize filter life and indoor air quality, adopt a simple maintenance calendar. Depending on usage, room air quality, and pet presence, Pure Enrichment filters generally require replacement on a schedule that matches their rated life, not just a calendar date. Air Purifier Info suggests keeping a log of runtime hours and odor development to tailor replacements. For households with heavy dust or smoke exposure, more frequent changes are prudent; in low-use spaces, you may extend the interval slightly. Always store spare filters in a clean, dry place and rotate new filters into service on a predictable cadence. A consistent routine reduces the risk of running the purifier with a worn or clogged filter, which can compromise performance and energy efficiency.
What to know about buying replacement filters and warranties
Shopping for Pure Enrichment filter replacements? Check the model compatibility, verify the filter code, and consider buying from reputable retailers with clear return policies. Keep your receipt and note the installation date to track replacement timing. Some models are covered by warranties that require using manufacturer-approved filters; deviating from recommended parts could affect coverage. If you want a simple, unbiased view of options, Air Purifier Info's team recommends sticking to the manufacturer’s recommended replacements and using third-party reviews to gauge performance and value. This approach helps maintain air quality, preserve energy efficiency, and protect your equipment investment.
Tools & Materials
- Replacement filter compatible with your Pure Enrichment model(Check exact model number and filter code before purchasing)
- Protective gloves(Keeps hands clean and reduces contamination)
- Microfiber cloth(For wiping exterior and housing seams)
- Soft brush or vacuum with crevice tool(Removes dust from grills if necessary)
- Trash bag(Dispose old filter responsibly)
- Small flashlight(Inspect interior for dust buildup)
Steps
Estimated time: 15-25 minutes
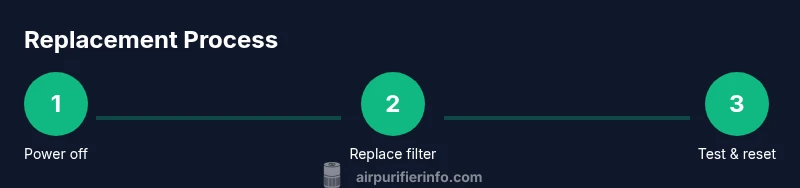
- 1
Power off and unplug
Switch the purifier off and unplug from the wall. This protects you from electrical shock and prevents the motor from starting during the replacement.
Tip: Keep the plug easily accessible in case you need to power down quickly. - 2
Open the housing to access the filter
Gently remove any front panel or access cover as directed by your model’s manual. Locate the filter assembly, taking note of orientation arrows or markers for proper seating.
Tip: Take a quick photo of the original orientation before removal. - 3
Remove the old filter
Carefully pull out the used filter, avoiding shake or drop to minimize dust release. Discard according to local guidelines if the filter is used and dusty.
Tip: Inspect the old filter for signs of moisture or mold that may indicate a larger issue. - 4
Clean the housing and check seals
Wipe the interior with a dry microfiber cloth and remove visible dust from the seals. Ensure the gasket or seal is intact and free of cracks before inserting the new filter.
Tip: Do not use water on the housing unless the manufacturer specifies it as safe. - 5
Install the new filter
Insert the new filter in the correct orientation until it seats firmly. Reattach the front panel or cover securely and confirm there are no gaps around the seal.
Tip: If the filter has a directional label, ensure it points the same way as the old one. - 6
Reset indicators and test airflow
Reconnect the unit and power it on. If applicable, reset the filter-life indicator per the manual. Run on a low setting for several minutes to verify smooth airflow.
Tip: Listen for unusual noises; if you hear rattling, reseat the filter.
Questions & Answers
Do I need to replace the entire filter assembly or individual components?
Most Pure Enrichment purifiers require replacing the full filter cartridge rather than individual components. Always refer to your model’s documentation for the exact replacement parts.
Most models use a complete filter cartridge. Check your manual for the exact part.
How do I know when to replace the filter?
Watch for reduced airflow, unusual odors, or a lit filter indicator. If in doubt, follow the manufacturer’s recommended replacement schedule.
Look for lower airflow, smells, or the indicator light to know when to replace.
Can I clean the filter instead of replacing it?
Some models have washable pre-filters, but most main filters aren’t designed to be washed. Refer to the manual before attempting cleaning.
Some pre-filters can be washed, but most main filters should be replaced.
Will using a non-original filter affect performance?
Using non-approved filters can reduce filtration efficiency and may void warranty. Always choose manufacturer-approved replacements when possible.
Non-approved filters can hurt performance and may void the warranty.
How long does a replacement filter last?
Lifetime varies by usage, air quality, and environment. Check the indicator or manual to estimate replacement timing for your space.
Filter life depends on use and air quality; monitor indicators for scheduling.
Is replacement covered by warranty?
Warranty terms vary by model. Using manufacturer-approved filters helps maintain coverage; verify specifics in your warranty documents.
Warranties depend on the model; use approved filters to stay covered.
Watch Video
Main Points
- Use model-specific filters only.
- Unplug before handling any internals.
- Seal matters: ensure a tight fit.
- Reset indicators after installation.
- Maintain a simple replacement calendar.