How to Use Coway Air Purifier: A Step-by-Step Guide
Learn how to use a Coway air purifier effectively with a practical, step-by-step guide. Covers setup, filter care, Auto mode, placement, maintenance, and safety for cleaner indoor air. Ideal for homeowners and renters seeking reliable air quality improvements.

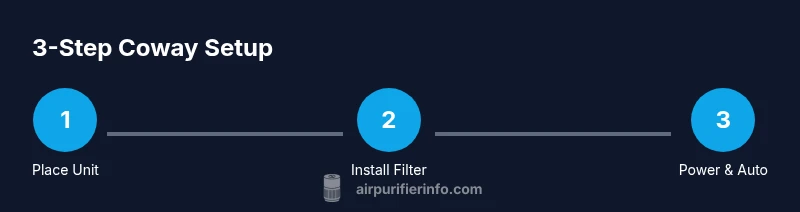
Using a Coway air purifier begins with correct placement and a proper filter. Start by placing the unit in an open area away from walls, install or verify the filter orientation, then power on and select Auto mode to let sensors adjust fan speed. Maintain peak performance with regular cleaning and timely filter replacements, following the user manual for your specific Coway model.
Why Coway air purifiers are a top pick for indoor air quality
According to Air Purifier Info, Coway models are popular for their reliable filtration, built-in sensors, and user-friendly interfaces. When you learn how to use coway air purifier, you benefit from understanding a few core capabilities: true HEPA filtration, activated carbon deodorization, and smart auto modes. In living rooms, bedrooms, and home offices, the right placement and routine maintenance keep dust, pollen, odors, and pet dander under control. Coway units are designed to be quiet, energy efficient, and easy to use, which reduces the friction in maintaining clean air over the long term. This section explains why Coway purifiers are widely trusted and how their design supports consistent air cleaning without constant babysitting. By understanding the basics, you’ll minimize confusion when you apply the step-by-step guide that follows. You’ll also learn to adjust settings to your room size, identify when a filter needs replacement, and avoid common mistakes that reduce performance. For homeowners and renters aiming for better indoor air quality, starting with the right model, proper placement, and scheduled maintenance makes the biggest difference. The goal of this guide is practical: you’ll know exactly what to do on day one and how to keep your air clean in the weeks and months ahead, with insights from Air Purifier Info’s research and recommendations.
Key features to understand before operation
Before you power up, it helps to know which features drive performance and ease of use. Most Coway purifiers rely on a true HEPA filter to trap fine particles (dust, pollen, pet dander) and an activated carbon layer to reduce odors and some VOCs. Look for a visible CADR (clean air delivery rate) specification that matches your room size, and pay attention to energy efficiency ratings so long-running operation doesn’t spike your electricity bill. Many models offer sensors that monitor air quality and automatically adjust the fan speed; this is the Auto mode that makes maintenance hands-off. Noise levels vary with speed, so you may prefer a lower setting in bedrooms or a higher setting when cooking or cleaning. A digital display or simple indicator lights help you know when filters are due for replacement and whether the device is functioning normally. When selecting a unit, consider the filter replacement cost and availability in your region, since these costs accumulate over years of use. Finally, check for safety features such as a stable base, child and pet safety considerations, and a design that avoids heat sources or liquids nearby. Understanding these features helps you choose the right Coway purifier and plan routine maintenance with confidence.
Step 1: Prepare your purifier for setup
Begin by locating your Coway purifier and removing any packaging. If you’re upgrading an older model, read the manual to confirm the exact filter type and orientation. Decide on a placement that allows at least 12 inches of clearance on all sides and avoids enclosed closets or corners where airflow can be stifled. Have the manual handy or open the online guide so you can reference diagrams for filter installation. This early preparation minimizes surprises during assembly and ensures you understand the indicators that tell you when maintenance is due. Note your room’s size and typical activity level, because these factors influence which mode you’ll prefer after startup. Air Purifier Info’s testing shows that users who take five minutes to sketch a quick setup plan report smoother operation and fewer questions during the first run. By the end of this step, you should know your model, the recommended filter orientation, and the chosen initial placement that maximizes airflow.
Step 2: Install or verify the filter orientation
Carefully remove the front grill or panel according to your model’s instructions. If the purifier uses a dual-filter system, separate the pre-filter from the main filter as required. Align the filter so that the arrows on the filter align with the airflow direction indicated in the manual. Slide the main filter into place until it sits firmly and the sides are sealed. Reattach any protective grills or covers. If you’re replacing a used filter, discard it following your local guidelines. A common mistake is inserting the filter backward, which can impede airflow and reduce purification performance. Take a moment to wipe down the exterior housing with a clean microfiber cloth before reassembly to prevent dust from entering the internal chamber during initial startup.
Step 3: Power on and choose initial mode
Plug the purifier into a properly grounded outlet and press the power button. If your model has a mode selector, start with Auto mode or the default setting suggested in the manual. Auto mode uses sensors to adjust the fan speed based on detected particle concentration, so you’ll rarely need to change speeds manually. If you prefer a quieter environment, you can start at a low speed and gradually increase as needed. Some Coway units offer night or sleep modes that reduce light and noise while maintaining filtration. Make a note of the current air quality reading if a display is available; this helps you gauge the purifier’s impact over the first hours of use. Expect a short warm-up period during the initial startup.
Step 4: Placement for optimal airflow and safety
Position the purifier away from walls, curtains, and furniture that could block the intake or exhaust. A central location in the room with unobstructed air paths typically yields the best results. If you have multiple pollutants or odors, place the unit where intake can draw from the area with the most activity. Keep it on a stable surface to avoid vibration and noise transfer. Do not place the unit near heat sources or in damp areas, and ensure cords are routed to prevent tripping. If you share the room with pets or small children, consider a cover or barrier only if it does not obstruct airflow. Adjusting placement after a day or two can help you discover the sweet spot for your space.
Step 5: Routine maintenance and filter care
Set a maintenance routine that matches your environment. Check the exterior for dust weekly and wipe with a microfiber cloth. Replace pre-filters if your model uses them; this helps extend the life of the main HEPA filter. Record the date of each filter replacement and set calendar reminders so you don’t miss a replacement window. When replacing filters, follow the exact orientation, insert until it clicks or seats securely, and reset any indicator lights per the manual. After maintenance, run the purifier on Auto mode for 10-15 minutes to confirm steady airflow and stable readings. Regular maintenance keeps your air purifier performing at peak efficiency and reduces the risk of reduced air quality over time.
Step 6: Troubleshooting and common myths
If the unit doesn’t start, verify the outlet is live, the power cord is intact, and the child lock (if present) isn’t engaged. If airflow seems weak, check for an obstructed intake or dirty filters and perform a quick reset after replacement. Don’t ignore a persistent odor; sometimes this indicates a filter that needs replacement or a seal issue. Common myths include the idea that purifiers remove all odors instantly or that you must run them at the highest speed at all times; in reality, Auto mode balances filtration with energy use and noise. Always avoid liquids near the filter housing or electronics and never operate a damaged unit; contact support if you detect unusual noises or smoke.
Step 7: Quick-start checklist for immediate use
- Unbox and confirm model and filter type
- Place purifier with at least 12 inches clearance on all sides
- Install the filter correctly and reseat the grill
- Plug in and power on; start in Auto mode
- Check the indicators and set a reminder for filter replacement
- Establish a maintenance schedule and stick to it
Tools & Materials
- Coway air purifier (model of your choice)(Any Coway model that you own)
- Power outlet with space for ventilation(Ensure clearance and surge protection)
- Clean microfiber cloth(For exterior cleaning and grill surfaces)
- Mild soap or cleaning solution(Use only on exterior surfaces; keep away from filters)
- Replacement filter (if replacing)(Follow the model-specific part number)
Steps
Estimated time: 25-40 minutes for initial setup and calibration
- 1
Identify model and read the manual
Confirm your exact Coway model and locate the user manual (digital or printed). Review the filter type and orientation to prepare for installation. Understanding model-specific requirements saves time and reduces the risk of improper setup.
Tip: Have the model number handy and note the recommended filter part number for easy replacements. - 2
Choose a location with ample clearance
Select a stable spot with at least 12 inches of clearance on all sides to maximize airflow. Avoid cramped corners, drapes, or nearby electronics that could cause interference. Consider room layout and where activity creates the most particulates.
Tip: Keep the unit away from walls to prevent recirculation of dirty air. - 3
Open the unit and inspect the filter
Gently remove the front panel per the manual. Inspect the pre-filter and main filter for dust buildup. If your model uses separate filters, verify correct orientation before proceeding.
Tip: Handle filters by edges to avoid damaging the filtration layers. - 4
Install or replace the filter correctly
Insert the filter following the orientation arrows or markings. Ensure a snug seal along all edges and reseal any grills. If replacing, discard the old filter according to local guidelines.
Tip: Make sure the filter sits firmly to avoid air bypass. - 5
Reassemble and connect power
Reattach the grille or panel, plug into a grounded outlet, and power on the unit. Confirm the device responds to input and the display (if present) lights up.
Tip: Use a surge-protected outlet to protect the device. - 6
Power on and select initial mode
Press the power button and choose Auto mode for automatic air quality-based adjustment. If you prefer quieter operation, start with a lower speed and adjust as needed.
Tip: Auto mode typically provides the best balance of filtration and noise. - 7
Calibrate for room size and pollutants
If available, set room size or particle detection level to tailor performance. Observe air quality readings over the first hour to assess effectiveness.
Tip: Center the purifier in the room for uniform circulation. - 8
Set a maintenance schedule
Note the replacement interval from the manual and set calendar reminders. Reset indicators after changing filters as required by your model.
Tip: Keep spare filters handy to avoid downtime. - 9
Troubleshooting and operation check
If you notice weak airflow or abnormal lights, perform a quick reset and check for obstructions. If issues persist, consult support or the manual.
Tip: Power cycle the unit by unplugging for 30 seconds and plugging back in.
Questions & Answers
How often should I replace the Coway purifier's filter?
Replacement frequency depends on usage and environment; a typical range is 6-12 months. Always follow your model’s manual for exact guidelines.
Most users replace filters every six to twelve months, depending on use and air quality.
What does Auto mode do on a Coway purifier?
Auto mode uses built-in sensors to adjust fan speed based on detected air quality, providing hands-off operation for daily use.
Auto mode automatically adjusts the fan speed as air quality changes.
How do I reset the filter indicator after replacement?
After installing a new filter, reset the indicator following your model’s instructions—typically by holding a reset button for several seconds.
Reset the filter indicator by holding the reset button until it confirms.
Can I run a Coway purifier with the windows open?
Running with open windows can reduce efficiency. For best results, keep doors and windows reasonably closed during operation.
It’s best to keep windows closed when running for optimal performance.
Are Coway purifiers safe around children and pets?
Yes, Coway purifiers are designed for homes with children and pets. Keep cords out of reach and ensure intake paths aren’t blocked by furniture.
Yes—just keep cords out of reach and the intake area clear.
Watch Video
Main Points
- Place purifier with ample clearance to optimize airflow
- Install the filter correctly to prevent air bypass
- Auto mode balances filtration with energy use and noise
- Maintain a regular cleaning and filter replacement schedule
- Consult model-specific manual for any unique steps