How to Tell if an Air Filter Needs Replacing: A Practical Guide
Learn how to tell if air filter needs replacing with a clear, step-by-step approach. Identify signs, test performance, and maintain clean indoor air quality.

To tell if your air filter needs replacing, follow these steps: 1) check color and debris—if the filter looks gray or clogged, replace it. 2) feel for airflow—reduced airflow means clogging. 3) listen for strain—unusual motor noise suggests it’s hard to pull air. 4) consult the purifier’s replacement schedule in the manual and adjust to usage. 5) reseal and run a quick test after replacement.
Why Replacing Air Filters Matters
If you’re asking how to tell if air filter needs replacing, you’re asking the right question. According to Air Purifier Info, clean filters are essential for effective particle capture, energy efficiency, and maintaining healthy indoor air. A worn or clogged filter makes the purifier work harder, reduces its ability to trap dust, pollen, odors, and pet dander, and can shorten the device’s life. Regular checks help protect your family’s health and keep air quality high. By recognizing the signs early, homeowners and renters can avoid wasted energy and avoid unnecessary maintenance costs. This guide explains practical, real‑world indicators and how to act on them without guesswork.
Visual Cues: What to Look For
The most obvious signal is visual: a filter that has turned gray or dark, covered in dust, lint, or pet hair is a prime candidate for replacement. Look at both sides of the frame; sometimes dust packs along the edges where air leaks can occur. If the material appears swollen, crumpled, torn, or bent, replacement is warranted. For pleated filters, a uniform color across the surface is normal; localized stains or clumps indicate heavy loading in certain zones. Also inspect the housing seal; if the gasket is cracked or bent, it may allow unfiltered air to bypass the filter even when it seems new. In short, a clean, bright filter with a tight seal is a healthy sign; anything else is a cue to replace.
Performance Cues: Airflow, Noise, and Efficiency
Performance clues go beyond looks. Reduced airflow is a reliable indicator that a filter is becoming restrictive. If the purifier runs longer to achieve the same air quality, or if you notice a louder or strained motor, switch the filter and retest. Unusual odors when the purifier is running can also signal a clogged filter or a need for replacement, especially for units with activated carbon. If you have a smart purifier, some models provide an on‑screen alert or an app notification when the filter life is near its end. In all cases, rely on a combination of airflow, noise, and odors to guide replacement decisions.
Filter Types and Replacement Cadence
Different filter types have distinct loading patterns. HEPA and pleated filters generally capture small particles and may load visibly faster in dusty environments. Activated carbon filters excel at odors but can become saturated without visible changes. The key is to read your model’s guidelines, because some purifiers are designed to run with filters longer than others. Air Purifier Info’s analysis shows that environmental factors—like pet dander, smoke exposure, or heavy dust—can shorten a filter’s usable life. When in doubt, err on the side of a proactive replacement to maintain peak performance.
Testing Without Tools: Quick Home Checks
If you don’t have a meter or tool, you can still assess filter conditions with simple tests. Remove the purifier’s front panel (following safety instructions), wipe the surrounding housing with a damp cloth to remove dust, and inspect the filter visually. A filter that is visibly loaded with dust or has a noticeable change in color should be replaced. Reassemble the unit, turn it on, and observe immediate improvements in airflow and noise. Keeping a simple replacement log helps you track timing based on actual use rather than guesswork.
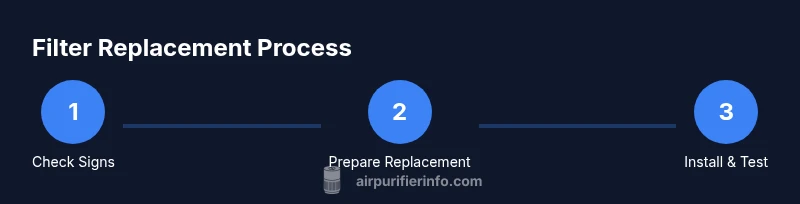
How to Replace the Filter: A Practical Overview
Replacing a filter is usually straightforward, but steps vary by model. In most cases you’ll unplug the purifier, open the housing, remove the old filter, insert the new one with the correct orientation, reseal the housing, and reset any indicator. Always consult the manual for your model’s specific steps and required seal checks. After replacement, run the purifier for a few minutes and check for even airflow. This overview is meant to prepare you; the STEP-BY-STEP section provides a model‑specific sequence.
Common Mistakes and How to Avoid Them
Common pitfalls include installing the filter backward, failing to reseal the housing, using a non‑matching filter size, or attempting to wash a disposable HEPA filter. Washable filters require different care than disposable ones and may not be suitable for every purifier. Always confirm compatibility before purchasing, and never operate the unit with a damaged seal. Regularly cleaning the outer housing helps maintain performance and makes it easier to spot when a filter is loading up.
Practical Habits to Extend Filter Life
Develop a simple routine to check filters every few weeks, especially during high‑pollution seasons or pet‑heavy months. Keep spare filters on hand so you can replace quickly without downtime. Document the date of each replacement to build a personalized cadence that matches your environment and usage. These habits help you avoid guesswork and keep your air clean with minimal effort.
What to Do Next: Create Your Replacement Plan
Now that you know how to tell if air filter needs replacing, set up a plan that fits your home. Identify the correct filter type for your purifier, check the manual for orientation and seal guidelines, and keep replacement supplies accessible. If you use a smart purifier, enable alerts so you’re notified when a filter is nearing the end of its life. The goal is consistent performance and continuous clean air in your living spaces.
Tools & Materials
- Replacement air filter (correct size and model)(Verify model number and filter type before purchasing; avoid generic sizes.)
- Soft cloth or microfiber cloth(Use for wiping the housing and removing surface dust.)
- Screwdriver (if required by unit)(Philips or flat-head depending on the model; some units are tool-free.)
- Gloves(Keeps hands clean during replacement.)
- Mask (optional)(Useful if you’re sensitive to dust or have a heavy dust environment.)
- Owner’s manual(Helpful for model-specific orientation and seal checks.)
Steps
Estimated time: about 20 minutes
- 1
Power down and locate the filter housing
Unplug the purifier and identify the access panel or filter compartment. Read the manual to understand the correct opening method and to locate the filter direction arrows. This step is essential to avoid electrical hazards and ensure you remove the correct component.
Tip: If the purifier sits on a dusty surface, gently wipe the exterior before opening to minimize loose dust inside. - 2
Remove the old filter
Open the housing, carefully slide out the old filter without forcing it, and place it in a bag or trash can. Inspect the frame for cracks or warping. If you see damage, stop and replace with the correct part and recheck the sealing surface.
Tip: Take a quick photo of the old filter’s orientation to ensure correct replacement orientation. - 3
Inspect the housing and gasket
Wipe the housing, gasket, and seals with a dry or slightly damp cloth. Look for cracks, gaps, or missing gasket material that could allow unfiltered air to bypass the new filter.
Tip: If the gasket is damaged, replace it or consult the manual before proceeding. - 4
Install the new filter
Insert the new filter with the correct orientation, aligning arrows or markings. Ensure it sits snugly and that any locking clips or latches fit firmly. Do not force the filter into place.
Tip: Double-check that the filter edges are sealed against the housing to prevent leaks. - 5
Reset indicators and test
Replace the housing cover, plug the unit back in, and reset any filter life indicator per the manual. Run the purifier on a short cycle to confirm clean airflow and listen for unusual sounds.
Tip: Note the date of replacement in a log to track future cadence and avoid unnecessary replacements.
Questions & Answers
How often should I replace air filters in my purifier?
Replacement frequency depends on usage and environment. Signs like reduced airflow, visible loading, or odors indicate it’s time for a new filter. Following the purifier’s guidelines and your own observations helps you maintain optimal performance.
Typically, replace when you notice reduced airflow or visible buildup; follow your purifier’s guidelines and your environment.
Can I wash a disposable HEPA filter?
Most disposable HEPA filters should not be washed. Washing can damage the filter media and reduce effectiveness. Always check the manufacturer’s instructions before attempting cleaning, and replace if in doubt.
Don’t wash most disposable HEPA filters; replace them instead, unless the manual says otherwise.
Does a higher price mean a better filter?
Price can reflect build quality, filtration media, and longevity, but it’s not the only determinant. Check compatibility with your purifier, the type of filtration, and user reviews to determine value.
More expensive doesn’t always mean better for your unit—check compatibility and size first.
How can I tell which filter type I have?
Consult the purifier’s model number and manual. Common types include HEPA, pleated for general particulates, and activated carbon for odors. Correct identification ensures you buy the right replacement.
Look up the model in the manual to confirm if you have HEPA, pleated, or carbon filters.
What if airflow remains poor after replacement?
Check for obstructions in the intake or exhaust, a damaged housing gasket, or an incorrectly seated filter. If issues persist, consult the manual or contact support for model‑specific guidance.
If airflow stays poor after replacing, inspect seals and housing for leaks and recheck installation.
Watch Video
Main Points
- Identify clear visual and performance signs of a loaded filter
- Use model‑specific guidance to orient and seal properly
- Replace filters promptly to maintain clean air and efficiency
- Document replacements to build a practical cadence