How to Remove Filter from Oreck XL Air Purifier
Learn how to safely remove the filter from your Oreck XL air purifier. This step-by-step guide covers prep, access, removal, replacement, and post-install checks to preserve airflow and indoor air quality.

Learn how to remove the filter from your Oreck XL air purifier safely and effectively. This quick guide covers locating the filter, preparing the unit, removing the old filter without damage, and basic precautions to prevent static or dust leakage. Follow these steps to ensure optimal airflow and filter lifespan.
Understanding the Oreck XL filter system
The Oreck XL line uses a replaceable filter assembly designed to trap dust, pet dander, and odors while keeping airflow steady. Although model variations exist, the general principle is the same: a removable filter sits inside a sealed housing that must be opened carefully to access the filtration media. Before you begin, confirm your exact model number and have a compatible replacement filter ready. Proper removal and installation help maintain filtration efficiency and prevent unfiltered air from bypassing the media. According to Air Purifier Info, consistent maintenance of the filter path supports steady air quality readings and reduces the risk of dust buildup inside the case. Treat this as a routine maintenance task, not a one-off repair, to preserve performance over time.
Safety and prep before removing the filter
Safety comes first. Unplug the unit and allow any hot components to cool. Put on a lightweight mask and gloves if you’re sensitive to dust, and work in a clean area to minimize debris getting into the housing. Keep a soft cloth handy to wipe away dust as you remove the panel. If you have furniture nearby, protect surfaces with a microfiber cloth. Make sure the purifier is on a stable surface to prevent slips during the process. This prep minimizes dust dispersal and protects both you and the device during filter removal.
Locating the access panel and removing the old filter
Most Oreck XL models hide the filter behind a front or top access panel secured with screws, latches, or clips. Use the appropriate tool (likely a Philips screwdriver) to loosen any screws and gently lift the panel. Once the housing is accessible, carefully slide the old filter straight out, avoiding any jagged edges that could tear the media. Hold the filter over a trash receptacle to minimize dust escape and avoid shaking or compressing the media, which can damage the seal. If you encounter resistance, check for extra fasteners or a secondary latch that may be present on certain trims.
Cleaning, inspecting, and preparing a replacement filter
With the old filter removed, inspect the housing for visible dust, hair, or debris. Use a soft cloth to wipe the interior and seals; avoid abrasive cleaners that could degrade gasket material. Before installing the new filter, confirm its orientation by locating the arrow indicator or tab and ensure it seats evenly inside the chamber. If you notice any cracks or damaged seals, replace the housing seal or consult the manual before proceeding. A clean, dry environment inside the purifier supports better filtration and longer filter life.
Installing the new filter: orientation and seating
Insert the new filter with the correct orientation facing in the direction of airflow (matching any arrows on the filter or housing). Gently slide the filter until it seats flush against the back of the chamber and the edges align with the housing seals. Close the access panel and secure any screws or latches you removed earlier. Do a quick visual check to ensure there are no gaps between the filter and housing, as gaps can bypass filtration. If your model uses a secondary gasket, verify it sits evenly and isn’t twisted or pinched.
Post-install checks and reset indicators
Plug the unit back in and power it on to verify proper operation. Listen for abnormal noises that could indicate a misaligned filter or loose panel. Check for indicator lights or digital readouts that confirm the filter is recognized. If your purifier has a filter-change alert, reset it according to the manual. Finally, give the unit a short cycle to confirm airflow is normal and that you don’t smell any off odors, which could signal an installation issue or a need for a new filter.
Tools & Materials
- Replacement filter compatible with Oreck XL air purifier(Verify compatibility with your exact model (e.g., Oreck XL, XL-2, etc.).)
- Phillips-head screwdriver(Used to remove any screws securing the access panel.)
- Soft microfiber cloth(For wiping dust from the interior housing after filter removal.)
- Gloves and protective mask(Helpful if you are dust-sensitive or cleaning a dusty unit.)
- Small trash bag or container(Contain old filter and debris during disposal.)
- Owner’s manual or model-specific guide(Consult for model-specific steps or variations.)
Steps
Estimated time: 8-12 minutes
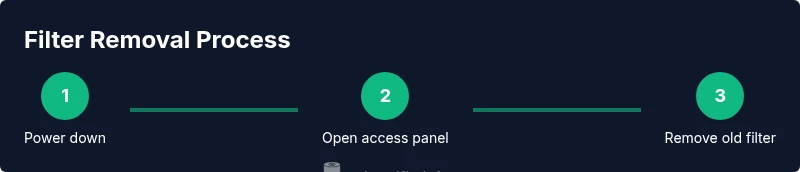
- 1
Power down and unplug
Ensure the purifier is completely turned off and unplugged. This prevents accidental electrical shock and avoids moving parts while you work. If the unit feels warm, allow it to cool for a few minutes before touching the case.
Tip: If accessible, place the purifier on a dry, stable surface to avoid slips during the removal. - 2
Access the filter compartment
Locate and remove the front or top access panel using the screwdriver if screws secure it. For models with clips, gently unhook them without forcing the panel. Expose the filter housing to reveal the old filter.
Tip: Support the panel as you detach it to prevent bending the frame or damaging seals. - 3
Remove the old filter
Grip the filter fully and pull it straight out, avoiding wiggling that could tear the media. Keep the filter level to prevent dust from dropping into the housing. Place the old filter into a trash bag for disposal.
Tip: Keep the removed filter over a receptacle to minimize dust spread. - 4
Inspect and clean the housing
Use a soft cloth to wipe the interior, especially the seals and edges where dust can accumulate. Check for damage to the gasket or housing that might affect sealing after installation.
Tip: Do not use harsh cleaners that could degrade the gasket material. - 5
Prepare and orient the new filter
Unpack the new filter and verify the correct orientation. Align arrows or tabs with the housing guidance and ensure the filter sits flat against the back wall without gaps.
Tip: If the filter has a pleated texture, avoid bending or creasing the media during insertion. - 6
Install the new filter and reseal
Slide the new filter into place until it is fully seated. Reattach the access panel and secure any screws or clips. Ensure the panel closes with no gaps around the edges.
Tip: Double-check that all fasteners are snug but not overtightened to avoid warping the panel. - 7
Test the purifier
Plug the unit in and power it on. Listen for normal operation and verify airflow is consistent. If your unit has a filter-change indicator, reset it following the manual.
Tip: Run the purifier briefly in a quiet room to confirm steady operation and air movement.
Questions & Answers
Do I need to unplug the purifier before removing the filter?
Yes. Unplugging ensures your safety and prevents unintentional operation while you work. Always start any maintenance with the power disconnected.
Yes, always unplug it first to stay safe while removing the filter.
Can I wash or reuse the main filter?
Most main filters should not be washed. Washing can damage the filtration media and reduce effectiveness. Replace with an approved filter instead.
No, avoid washing the main filter. Use a replacement that’s compatible with your model.
How do I know which replacement filter to buy?
Check your exact model number on the unit and purchase a replacement filter specified for that model. If in doubt, consult the manual or contact the manufacturer.
Confirm the model number and use the manufacturer-recommended replacement.
What if the purifier doesn’t run after replacement?
Recheck that the panel is fully seated and fasteners are secure. Ensure the unit is plugged in and any indicator lights reset after installation. If problems persist, consult the manual or support.
Make sure the panel is sealed, the unit is plugged in, and indicators are reset.
How should I dispose of an old filter?
Place the used filter in a bag or container to minimize dust dispersion. Dispose of it according to local waste guidelines or manufacturer recommendations.
Contain the old filter in a bag and follow local disposal guidelines.
How often should I replace the filter?
Replacement should follow the manufacturer’s recommendation and depend on usage and air quality. If you notice reduced airflow or odors, consider replacing sooner.
Follow the manufacturer’s guidance and watch for signs like reduced airflow.
Watch Video
Main Points
- Unplug before starting maintenance.
- Use the correct replacement filter for your model.
- Ensure proper orientation and a snug seal.
- Test airflow after installation to confirm proper function.