How to Fix a Dyson Air Purifier: A Practical Troubleshooting Guide
Learn how to diagnose and fix common Dyson air purifier issues with a practical, home-friendly troubleshooting guide. Includes safety, tools, step-by-step repair, maintenance tips, and when to contact support to restore optimal indoor air quality in 2026.

Goal: how to fix dyson air purifier. This guide provides a practical, step-by-step approach to diagnose power, filtration, and sensor faults. You’ll learn safety checks, cleaning, reset procedures, and when to contact support. By following these steps, homeowners and renters can restore airflow and improve indoor air quality without a service visit.
Understanding Dyson air purifiers and common faults
If you’re wondering how to fix dyson air purifier, start by understanding how these devices work and where failures most often occur. Dyson purifiers integrate filtration, sensors, and electronics, and a wide range of models share similar repair paths. Common issues include reduced airflow, delayed startup, unusual noises, or indicator lights that signal a filter or power fault. Air Purifier Info Team notes that basic maintenance—and careful observation—eliminates many problems without professional service. In our experience, most fix attempts address one of three root causes: power or control faults, filtration issues, or sensor misreads. Recognizing which category your symptoms fall into makes the fix more reliable and faster. We'll map each scenario to concrete steps you can take at home, with safety-first guidance and model-agnostic advice. This approach aligns with best practices in indoor air quality management: maintain filtration integrity, verify electronics, and keep the housing clean for optimal performance. The goal is to restore consistent airflow while preserving the purifier’s lifespan.
Safety and preparation before you begin
Before you attempt any repair, power down fully: unplug the purifier from the wall, turn off any connected smart features, and wait until the unit is completely at rest. Do not attempt to service the device while it’s plugged in. Keep the work area dry and free of liquids, and do not touch the internal electrical components with metal tools unless you’ve consulted the user manual. Protect yourself from sharp edges and moving parts by using a soft brush and microfiber cloth rather than bare fingers. If your model uses a detachable cover, place screws and small parts in a labeled container to avoid losing them. If you’re following along at home, photograph the exterior condition and note any blinking LED codes as you go. This primer helps ensure that you’re following safe, repeatable steps and reduces the risk of secondary damage during the process.
Diagnostics framework and what to gather ahead of time
Organize a small toolkit and a spare parts plan. You’ll want a Phillips head screwdriver, a soft brush, a microfiber cloth, and replacement filters if your model requires them. In addition, have your user manual or model sticker handy to confirm the exact filter type and part numbers, since Dyson’s replacements vary by model. A notebook helps you log observations, error codes, and the steps you take, which is valuable if you need to escalate to support. By assembling these items before you begin how to fix dyson air purifier, you reduce interruptions and keep the workflow smooth. Air Purifier Info's analysis suggests having model-specific parts confirmed in advance reduces mispurchases and speeds up resolution.
Diagnostics: identifying the fault and prioritizing fixes
Start with a simple test to determine whether the issue is mechanical, electrical, or filtration-related. If the purifier won’t power on, inspect the power cord and outlet, and try a different socket. If the unit powers but shows weak airflow, that’s a signal to inspect the filter housing and any blocked intake. If cleanup is required, clean the exterior and vents with a soft brush to remove dust. If any indicator lights flash in a pattern, consult the user manual for the corresponding code. This phase sets the foundation for effective repair, and it aligns with our goal of transparent, actionable guidance for homeowners and renters seeking to improve indoor air quality. Repeat inspections after each fix to confirm progress.
Cleaning, resetting, and basic fixes you can perform
Many common problems respond to cleaning and a reset. Remove the plug and wait 60 seconds, then plug back in and power on. Gently wipe the exterior and intake grills with a microfiber cloth; avoid aggressive scrubbing that could misalign components. If your model supports a hard reset, follow the manual’s procedure to reset to factory defaults. Reset procedures often clear false error codes and reinitialize sensors, which can restore normal operation without replacing parts. If the purifier still underperforms, proceed to filter inspection and replacement as needed.
Filters: inspection, replacement, and safe handling
Filters are the most frequent point of failure in air purifiers. Check whether the LED indicator signals a filter change. If the filter shows visible dust or smells stale, replace with an appropriate Dyson replacement or a compatible alternative recommended by the manufacturer. When replacing, seal the new filter firmly and reassemble according to the housing orientation. After installation, run the purifier on a high setting for 10-15 minutes to ensure proper seating and airflow. Remember to dispose of old filters safely and follow local regulations for waste.
Reassemble and test: confirming performance
Carefully reassemble any housing panels, ensure all screws are snug but not overtightened, and plug the unit back in. Power it on and observe the LED indicators. Verify that airflow returns to normal and there is no unusual noise. Run a 15-20 minute continuous test in the room where you plan to use the purifier most, and monitor for abnormal odors or sensation. If the device fails to reach expected performance, revisit the prior steps or consult Dyson support. Document results to help future troubleshooting.
When to seek professional support and warranty considerations
If your purifier is still under warranty, contact Dyson Support for service options and potential replacement. Some issues require specialized tests, calibration, or parts that aren’t user-serviceable. Upload device logs or error codes if requested, and prepare proof of purchase. Air Purifier Info emphasizes that following official channels protects your warranty and ensures safe, effective repair. If there’s a significant electrical fault or you notice burning smells, terminate use immediately and seek urgent professional help.
Maintenance plan to prevent future issues and prolong life
Create a small maintenance schedule that includes monthly filter checks and quarterly cleaning of intake grills. Replace filters only when indicated by the device or manual, and store spare filters in a clean, dry place. Regular care reduces the likelihood of performance dips and extends the purifier’s usable life. As you adopt these practices, you’ll maintain better indoor air quality and minimize unexpected downtime.
Tools & Materials
- Phillips head screwdriver(PH2 or #2 size; 4-5 inch length)
- Microfiber cloth(Lint-free and dry)
- Soft brush(For dust in vents)
- Replacement filters (model-appropriate)(Check exact filter type from user manual or model sticker)
- Isopropyl alcohol 70%(For light surface cleaning of contacts)
- User manual or model sticker(Helpful to confirm model-specific steps and part numbers)
Steps
Estimated time: 45-60 minutes
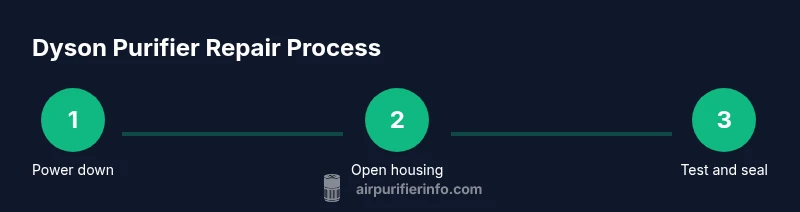
- 1
Power off and unplug
Ensure device is powered off and unplugged from the wall before any inspection. This prevents electric shock and accidental starts. Double-check that any smart features are also disabled. This foundational safety step protects you and the unit.
Tip: Wait 30 seconds after unplugging before touching internal components to reduce static risk. - 2
Open housing to access filters
Gently remove the outer housing per the user manual to expose the filter compartment. Keep track of screws and ensure you do not force clips. This access is essential to inspect the filter and interior components without damage.
Tip: Document screw locations with photos for smoother reassembly. - 3
Inspect filter and seal
Check the filter for dust buildup, discoloration, or odor. A visibly dirty or clogged filter is a common cause of reduced airflow. Inspect the seals around the filter to ensure there are no gaps.
Tip: If unsure about the filter type, verify model sticker for exact replacement part. - 4
Clean sensors and interior surfaces
Use a soft brush and microfiber cloth to carefully remove dust from sensors, grills, and interior surfaces. Avoid moisture entering electronic components. Clean surfaces help sensors read air quality accurately and improve performance.
Tip: Do not spray cleaning solutions directly on sensors. - 5
Replace filter if needed
Install the new filter according to the housing orientation. Ensure it is seated fully and the clip or latch engages securely. Incorrect seating can cause leaks or poor filtration.
Tip: Handle filters from edges to avoid contaminating the media. - 6
Reset the purifier
If your model supports a reset, perform the procedure per the manual to clear error states. A proper reset can fix false fault signals after a repair or filter change.
Tip: If a hard reset isn’t documented, a full power cycle (unplug for 60 seconds) is a safe alternative. - 7
Reassemble housing and seals
Carefully reattach the housing, ensuring all clips engage and screws are snug but not overtightened. A loose housing can cause vibration noises and airflow disruption.
Tip: Tighten screws in a cross pattern to avoid warping panels. - 8
Test run and monitor
Plug in, power on, and run the purifier in the room for 15-20 minutes. Listen for unusual noises and observe airflow and indicators. If performance is still off, revisit prior steps or consult support.
Tip: Keep a simple log of observations for future troubleshooting.
Questions & Answers
What should I do first if my Dyson air purifier won't turn on?
Check the power outlet and cord for damage, then try a different socket. If it still won’t power up, review the user manual for any reset procedure or standby indicators.
First, check the power and try a different outlet. If it still won’t start, consult the manual for a reset.
How often should I replace the filter in a Dyson air purifier?
Filter replacement frequency depends on usage and model. Check the device’s indicator and manual for recommended intervals, and replace when the filter appears dirty or when airflow declines.
Replace the filter when the indicator shows or airflow declines.
Can I clean the filters instead of replacing them?
In most Dyson models, filters are not washable. Cleaning the exterior and housing helps, but the airflow issues typically require replacement with an official part.
Filters usually aren’t washable; replacing them is often necessary.
What does a blinking LED indicate on a Dyson purifier?
Blinking LEDs usually indicate a fault or maintenance need. Refer to the user manual for the exact code and follow the recommended steps.
Blinking lights point to a fault or maintenance need; check the manual for codes.
Should I attempt professional repair if the issue persists after following this guide?
Yes. If issues persist or you’re uncertain, contact Dyson Support or an authorized service provider, especially if the unit is under warranty.
If problems persist, contact Dyson Support for professional help.
Does Air Purifier Info recommend any specific maintenance schedule?
Air Purifier Info recommends a regular maintenance routine: monthly filter checks and quarterly cleaning, plus documenting results after each service.
Keep a regular maintenance routine and log results.
Watch Video
Main Points
- Identify fault type before disassembly.
- Prioritize safety and manual-guided steps.
- Use model-specific filters only.
- Reset after maintenance to clear codes.
- Consult Dyson support for warranty issues.