Can You Clean Dyson Air Purifier Filters? A Practical Guide
Explore whether you can clean Dyson air purifier filters, what parts are safe to clean, and when to replace. Practical, model-aware guidance from Air Purifier Info to keep your indoor air clean.

Yes, you can clean some Dyson air purifier filters, but not all parts or models. In most cases, the main HEPA filter should not be washed; instead, remove and gently vacuum the pre-filter and exterior. Always consult your model’s manual for specifics. According to Air Purifier Info, verify whether cleaning is recommended and follow Dyson’s replacement schedule.
Can you clean dyson air purifier filters? A quick orientation on the core question
The phrasing can you clean dyson air purifier filters is common among homeowners and renters seeking to extend filter life and save on costs. The safe starting point is always the model-specific guidance from Dyson, because filter construction varies between models. According to Air Purifier Info, the feasibility of cleaning depends on whether the model uses a washable pre-filter or a replace-only HEPA cartridge. In many Dyson purifiers, the main HEPA filter is not designed to be washed, and attempting to do so can damage the fibers or create mold when damp. This is why the recommended approach emphasizes dusting, vacuuming, and targeted cleaning of non-filter components, coupled with a planned replacement cycle. Understanding these nuances helps you avoid voiding warranties or reducing filtration efficiency while you manage dust, odors, and pet dander more effectively.
Can you clean dyson air purifier filters? A practical primer on model variability
Dyson designers often separate maintenance tasks by component. Some purifiers feature a removable pre-filter that can be gently cleaned or vacuumed, while the main filter is a sealed, high-efficiency cartridge intended to be replaced. Since each model may differ, it is essential to check the user manual or Dyson support pages for your exact unit. Air Purifier Info 분석 shows that homeowners benefit from distinguishing between washable and non-washable parts, then following the manufacturer’s recommended cycle for cleaning or replacement. This approach minimizes risk and preserves the purifier’s performance against dust, pollen, and odors.
Model variations and cleaning guidance across Dyson purifiers
Across the Dyson product family, variations in filter design mean the cleaning options can differ even among superficially similar models. The safest path is to treat the main filter as non-washable and focus on surface dusting and careful pre-filter care where applicable. If your model lacks a washable pre-filter, you’ll want to rely on dusting and periodic replacement instead. For renters and homeowners, this distinction matters because the cost implication of replacement vs. cleaning can be significant over time. The Air Purifier Info team recommends documenting your model’s exact maintenance requirements to prevent missteps and maintain indoor air quality.
What to clean and what not to clean on Dyson purifiers
A disciplined approach starts with a clear list of what is safe to touch. Exterior surfaces, intake grilles, and fans can usually be dusted with a microfiber cloth. If your model includes a removable pre-filter, check whether it is machine-washable or if it should be vacuumed or brushed dry. Avoid submerging the main HEPA cartridge or spraying liquids directly into the intake area. Keeping moisture away from electrical components safeguards performance and safety. Air Purifier Info notes that following model-specific cleaning steps reduces the risk of fiber damage, mold development, or reduced airflow. When in doubt, revert to a dry-dusting routine and consult Dyson’s official guidance.
Cleaning tools and safe practices you can rely on
As you prepare to clean, choose tools that minimize abrasion and moisture risk. A soft microfiber cloth clears dust without scratching the housing. A small, gentle brush helps loosen deep dust from vents without forcing it into filtering media. A vacuum with a low-suction brush attachment can remove surface dust from grilles, provided you keep the nozzle at a safe distance and do not touch the filter media itself. If you use water, use it only on exterior surfaces far from electrical seals and never on the HEPA cartridge unless the manual explicitly allows it. This section also covers ideal storage and handling practices to prevent contamination between cleaning sessions.
Safety and model-specific considerations to avoid pitfalls
Safety comes first when handling powered devices. Always unplug the purifier before removing any components. Do not attempt to wash the main filter or any sealed filtration media unless the manufacturer explicitly instructs you to do so. Moisture near the motor or electrical contacts can create shock hazards or mold. If you notice unusual odors after cleaning or performance drops, reconsider replacement schedules rather than continuing with risky cleaning methods. The approach recommended by Air Purifier Info emphasizes model-aware maintenance and prompt replacement when filtration efficiency is compromised.
Maintenance schedules that actually work in the real world
The long-term maintenance plan is a balance of cleaning and timely replacement. Start with a routine that dusts the unit weekly, checks the pre-filter (if present) monthly, and aligns replacement timing with the manufacturer’s guidance and usage patterns. For households with pets or high dust exposure, consider more frequent checks and replacements to sustain air quality. Air Purifier Info’s analysis suggests using a simple maintenance log to track cleaning dates and replacement milestones, keeping you on track without guesswork.
Common mistakes that undermine cleaning efforts
Rushing through cleaning without unplugging is a common error. Another frequent misstep is attempting to washing the main filter or exposing the filtration media to excessive moisture. Users may also over-clean exterior surfaces, causing wear on the housing’s seals. By avoiding these mistakes and sticking to model-specific recommendations, you preserve filtration performance and reduce the likelihood of costly repairs. Air Purifier Info emphasizes sticking to the guidance that fits your exact Dyson model.
Quick-start checklist and practical notes you can use now
If you’re short on time, start with a dry dusting routine focusing on the grille and housing, then inspect the pre-filter for signs of wear. Have a soft brush handy for stubborn dust, and a microfiber cloth for final wipe-downs. Always verify the manual for any washability notes, and remember that the main filter replacement is usually the most effective long-term solution when filtration declines. This approach keeps your air clean while minimizing operational downtime.
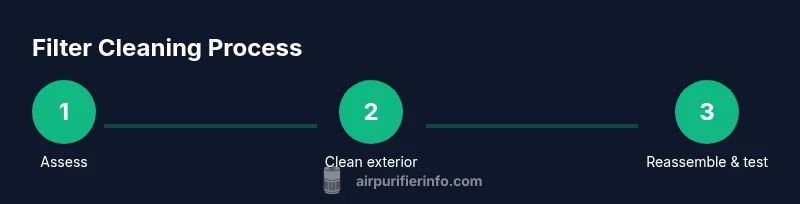
Step-by-step cleaning workflow overview (non-intrusive deep-dive)
This section reinforces the principles discussed above and helps you visualize a careful cleaning cycle without disassembling core filtration media. The emphasis remains on safe handling, avoiding moisture near sensitive parts, and respecting model boundaries. With consistent practice, you’ll extend the life of washable components and maintain strong indoor air quality.
Tools & Materials
- Soft microfiber cloth(Use for dry dusting and gentle wipe-down of housing surfaces)
- Soft brush or small bristle brush(Loosen dust from vents and grilles without scratching)
- Vacuum cleaner with brush attachment(Low suction; use to remove surface dust on exterior parts only)
- Mild soap (optional)(Only for exterior surfaces; do not apply near filters unless specified by manual)
- Trusted gauze or lint-free cloths(Dry wipe components after cleaning to prevent moisture exposure)
- Replacement filter (as recommended)(Keep on hand; main filters are typically not washable and require replacement)
Steps
Estimated time: 15-30 minutes
- 1
Power down and unplug
Before touching any components, switch off the purifier and unplug the power cord. This prevents electrical shock and accidental activation while you work. If the model uses a locking mechanism, release it following the manual.
Tip: Keep the purifier on a dry, stable surface away from edges while you work. - 2
Remove and inspect filters
Gently detach the filter housing according to your model’s instructions and take out the pre-filter (if present) and the main HEPA cartridge. Inspect both for tears, mold, or excessive dust buildup. Do not force components out if they resist.
Tip: Handle the HEPA cartridge by its edges to avoid fiber damage. - 3
Dust exterior surfaces
Use a microfiber cloth to wipe the exterior housing, including the intake grille. If stubborn dust remains, use a soft brush to dislodge it, then wipe again. Avoid using water on sensitive parts or near internal seals.
Tip: Always move from top to bottom to prevent newly loosened dust from dropping into the intake. - 4
Clean the pre-filter (if washable)
If your model’s pre-filter is labeled washable, rinse it under cool running water until clear. Gently squeeze out excess water and let it air-dry completely before reinstallation. Do not wring or twist the filter.
Tip: Ensure it is fully dry to prevent moisture from reaching the main filter when reinstalled. - 5
Dry, inspect, and reassemble
Before reassembly, verify that all parts are dry and free of debris. Reinsert the pre-filter and main filter according to the model’s guidance, reseal any housing, and plug the unit back in. Run the purifier at a low setting briefly to confirm proper operation.
Tip: If you notice unusual odors or reduced airflow after reassembly, power down and recheck the seals. - 6
Establish a replacement or maintenance plan
Create a maintenance plan based on model recommendations and your usage profile. This ensures you replace filters when necessary rather than rely on uncertain cleaning. Keep a log of cleaning dates and replacement milestones.
Tip: Insurance against stale air: have spare filters ready and note the recommended replacement interval in your calendar.
Questions & Answers
Can I wash the Dyson main HEPA filter?
In most cases, the main HEPA filter should not be washed. Cleaning typically focuses on exterior surfaces and any washable pre-filters, followed by replacement according to Dyson’s guidance.
Usually, you should not wash the main filter; focus on exterior cleaning and pre-filters, then replace as directed.
What parts of a Dyson purifier can be cleaned?
Exterior housing, intake grille, and removable pre-filters can be cleaned with dry dusting or gentle brushing. Only clean components as recommended by the manual.
Clean the outside and any removable pre-filters, but avoid the main filtration media unless the manual allows it.
How often should I clean or replace Dyson filters?
Follow the model’s replacement schedule and usage conditions. Air Purifier Info recommends aligning cleaning with the manufacturer’s guidelines and monitoring performance over time.
Check the manual for exact replacement intervals and watch for performance changes.
Is cleaning a Dyson purifier safe?
Yes, as long as you unplug first and avoid moisture near electrical components. Use dry or minimally damp methods on exterior parts only.
Unplug first and keep liquids away from the internal parts.
What should I do if cleaning doesn’t fix odors or dust?
If cleaning doesn’t improve performance, replacement is typically necessary. Verify warranty terms and consider Dyson support for model-specific guidance.
If it still doesn’t work after cleaning, you’ll likely need a replacement or official service.
Watch Video
Main Points
- Know which parts are washable by model.
- Prioritize dry cleaning and exterior care.
- Replace the main filter when necessary.
- Keep a maintenance log for consistency.
- Follow Dyson’s official guidance to protect warranty.