How to fix air purifier fallout 2: A complete, safe guide
Learn safe, practical steps to fix air purifier fallout 2, including cleaning, filter checks, motor inspection, sensor calibration, and ongoing maintenance—Air Purifier Info.

To fix air purifier fallout 2, unplug the unit, inspect the intake and exhaust for dust, replace clogged filters, clean internal components, and re-test performance. Start with fresh filters, then run a low-heat cleaning cycle if supported, and confirm no more fallout by checking air output. If unresolved, consult the manufacturer guidance or Air Purifier Info.
What fallout means for air purifiers
When people ask how to fix air purifier fallout 2, they are often describing a dusty plume or powdery residue leaving the unit. Fallout can indicate accumulated dust, a blocked airflow path, or degraded filtration media. This section explains how to identify fallout signatures, differentiate genuine purifying inefficiency from momentary agitation, and recognize when you should intervene with a cleaning and maintenance routine. In practical terms, fallout means you’re seeing dust coming from the outlet, a noticeably dusty intake grill, or reduced airflow that makes the purifier work harder than it should. Detecting these symptoms early helps you prevent motor strain, reduce allergen load, and keep indoor air quality high.
To keep this relevant for homeowners and renters, we’ll relate fallout to everyday scenarios—like pet dander in living rooms or kitchen smoke—that can challenge even well-maintained purifiers. The goal is to restore clean air quickly while avoiding over-cleaning or disassembly that could void warranties. Remember: consistent maintenance reduces fallout risk over time, and the right filtration media is essential for your specific space.
Diagnosing fallout: quick checks you can do
Before diving into disassembly, perform a few quick checks to confirm fallout is ongoing and not a transient event. First, unplug and power down the unit, then inspect the outside for visible dust on grills and housing. Next, look at the filter indicator (if your model has one); a lit or changing indicator often signals a clogged filter. Finally, lightly tap the filter housing and listen for changes in airflow. If the outlet still releases a dust plume after these checks, proceed with a more thorough cleaning and inspection routine. These steps are foundational and help you avoid unnecessary DIY actions that could void warranties or cause damage.
Safety first: unplug and prepare for inspection
Safety is non-negotiable when fixing an air purifier fallout. Always unplug the unit and, if applicable, switch off any power strip or wall outlet. Allow a minute for capacitors to discharge, especially in units with large motors or integrated fans. Wear protective gloves and a dust mask to avoid skin contact and inhalation of loose dust. Work in a well-ventilated area, ideally near an open window. If you’re uncomfortable with any step—such as removing the rear cover or accessing electrical components—pause and consult the user manual or a professional technician. Safety adherence protects you and preserves the purifier’s internal components.
Tools and materials you’ll need (from the toolbox of common sense and safety)
- Mild detergent or isopropyl alcohol and lint-free cloths for surfaces
- Replacement filters compatible with your purifier model
- Soft-bristle brush and compressed air can (or a low-power blower)
- Phillips head screwdriver for panel screws
- Vacuum with a brush attachment for upstream dust capture
- Protective gloves and a mask for safe handling
Always check the user manual before using tools that could void warranties. If you don’t have a certain tool, don’t improvise—seek alternatives suggested by the manufacturer or Air Purifier Info.
Cleaning and inspection: step-by-step care for components
Begin with the outer housing and grills. Use a damp cloth with mild detergent to wipe away surface dust. Avoid moisture intrusion into electrical components. Move to the filter compartment and remove aged filters; inspect the filter housing for signs of damage or warping. Clean the interior tracks, fan blades, and duct channels with a soft brush; for stubborn dust, use a low-pressure burst of compressed air from the clean side outward. Don’t touch, bend, or pry delicate fan blades. If you notice unusual noises after cleaning, re-check that everything is properly seated and reassembled.
Filter system assessment: when to replace vs. clean
Filters are the purifier’s first line of defense. Fallout often stems from filters that have reached the end of their life, become saturated with particulates, or break down in a high-dust environment. If you can’t reseat a clean filter easily, or if the filter’s protective frame is cracked or warped, replacement is usually the safer option. Compare the recommended MERV rating and replacement interval for your space; for heavy-duty use in kitchens or homes with pets, more frequent changes may be necessary. After replacing, verify the seals are tight to prevent bypass leakage.
Reassembly and initial test: confirm the fix works
After cleaning and replacing filters, reassemble the purifier in the reverse order of disassembly. Ensure the all fasteners are snug, all gaskets seated, and the intake and exhaust grills are correctly oriented. Plug the unit in and run it on a low power setting for 5–10 minutes in clean-room conditions where possible. Observe the outlet for any residual fallout and listen for unusual noises or vibrations. If you still notice dust plumes, you may need to re-check seals or consider a more thorough internal inspection by a professional.
Performance testing: verifying improved air quality
A practical test is to compare air quality readings before and after the fix, if your purifier includes a built-in sensor. Alternatively, use a simple visual cue: airflow should be smooth with no visible dust escape. Use a clean white tissue near the outlet to detect faint dust movement; absence of residue indicates improved operation. For best results, run the purifier for 30–60 minutes in your main living area and monitor whether the air feels fresher and less dusty. If improvement is marginal, re-check installation and consider a filter upgrade for your space.
Maintenance cadence: setting you up for long-term success
To prevent fallout recurrence, establish a maintenance cadence tailored to your space. In high-dust environments (kitchens, pet homes, basements with humidity) you may need to inspect weekly and replace filters every 3–6 months. In normal living spaces, quarterly checks and semi-annual filter changes are often sufficient. Keep a simple maintenance log, noting dates of cleaning, filter changes, and any issues observed. This habit helps you track performance over time and ensures your purifier remains effective.
When to seek professional help or consider replacement
If fallout persists after all cleaning, inspections, and filter changes, it may indicate deeper problems such as motor windings, fan imbalance, or electronic control issues. In such cases, consult the manufacturer’s support line or a certified technician. If your purifier is older or frequently fails despite proper care, evaluating replacement with a model designed for your room size and air quality needs could be the most cost-effective path.
Tools & Materials
- Phillips head screwdriver(for removing panel screws)
- Soft-bristle brush(to loosen dust without scratching)
- Lint-free cloths(for surfaces and filters)
- Replacement filters(compatible with purifier model)
- Vacuum with brush attachment(upstream dust capture)
- Isopropyl alcohol (70%)(for stubborn grime)
- Protective gloves and mask(safety while handling dust)
- Compressed air can (low pressure)(gentle dust removal)
Steps
Estimated time: 45-60 minutes
- 1
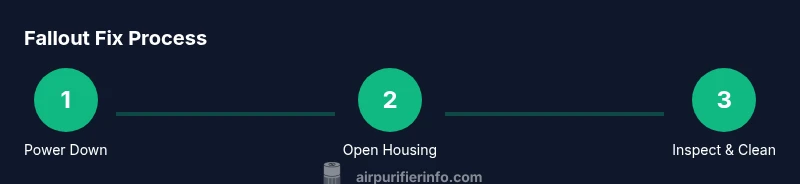
Power down and unplug
Shut off the purifier and unplug from the wall. Wait 60 seconds to discharge capacitors before touching internal components. This reduces shock risk and protects electronics.
Tip: If the unit is hot, let it cool for 10 minutes before handling. - 2
Open the housing
Use the screwdriver to remove access screws and carefully lift the cover. Take note of how cables are routed to avoid incorrect reassembly.
Tip: Take a photo of wiring if you’re unsure of placement. - 3
Inspect filters and seals
Remove filters and check for swelling, tears, or discoloration. Inspect gaskets and seals for warping that could cause bypass leakage.
Tip: If the frame is damaged, replace the affected filter assembly. - 4
Clean interior components
Wipe down interior walls and fan housing with a lint-free cloth. Use a soft brush to remove stubborn dust from blades and vents. Avoid wetting electrical parts.
Tip: Do not spray liquids directly into the motor. - 5
Replace filters
Install new filters, ensuring the airflow arrows align with the housing. Re-seat firmly to prevent gaps where unfiltered air could bypass.
Tip: Do not reuse old filters; disposal follows local guidelines. - 6
Reassemble the unit
Reattach the cover, fasten screws snugly, and re-check that nothing is loose. Confirm that all cables are clear of the fan blades.
Tip: Double-check that the intake and exhaust grills are correctly oriented. - 7
Initial test run
Plug in and power on the purifier on a low setting. Listen for unusual noises and observe airflow from the outlet for 5–10 minutes.
Tip: If you hear grinding or rubbing, stop and recheck blade alignment. - 8
Evaluate performance
Assess whether fallout has ceased by monitoring the air output and checking for any visible dust release. Continue normal operation and log results.
Tip: Keep windows closed during the initial test for consistent results.
Questions & Answers
What does fallout look like in an air purifier?
Fallout appears as visible dust escaping from the outlet, a dusty intake grill, or noticeably reduced airflow. It often signals dirty filters or clogged internal pathways. Regular inspection helps catch this early.
Fallout looks like dust coming from the outlet or a dusty grill, usually caused by dirty filters or blocked airflow.
Can fallout be fixed without replacing filters?
Some fallout can be managed by thorough cleaning and reseating filters, but persistent fallout after cleaning typically requires new filters. Filters wear out and lose efficiency over time, especially in dusty environments.
You can try cleaning and reseating the filters, but if fallout continues, you’ll likely need new filters.
Is it safe to disassemble the purifier at home?
Yes, with the unit unplugged and following the user manual. Use protective gear and avoid touching live circuitry. If you’re unsure, contact a professional or the manufacturer’s support.
It’s generally safe if unplugged and following the manual, but don’t hesitate to seek professional help if unsure.
How often should I clean or replace filters to prevent fallout?
Maintenance frequency depends on usage and environment. In high-dust homes, check weekly and replace filters every 3–6 months; in normal environments, quarterly checks and semi-annual changes are typical.
In dusty homes, check weekly and replace every few months; otherwise, do it every 3–6 months.
What should I do if fallout persists after maintenance?
If fallout persists after cleaning and filter changes, consult the manufacturer’s support line. It could indicate motor or control issues that require professional assessment.
If it keeps happening after maintenance, contact support; there may be motor or control problems.
Do warranties cover fallout-related issues?
Warranties vary by model and region. Check the terms for filter-related issues and if disassembly affects warranty. When in doubt, contact the manufacturer.
Warranty terms vary—check coverage for filters and disassembly before proceeding.
Watch Video
Main Points
- Inspect for fallout signs and identify root causes
- Replace filters when contaminated or worn
- Clean internal paths without moisture on electronics
- Test performance and maintain a regular schedule